Set In The Street.

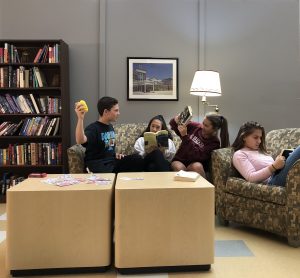
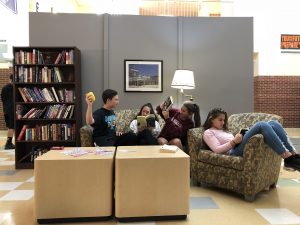
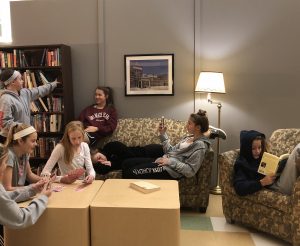
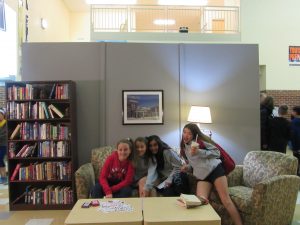
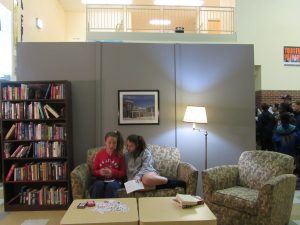
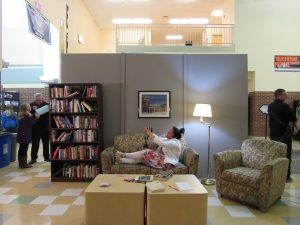
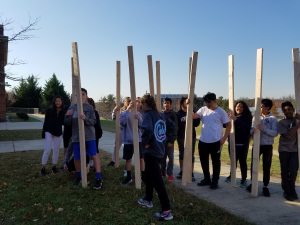
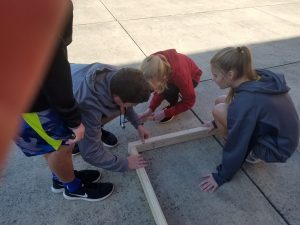
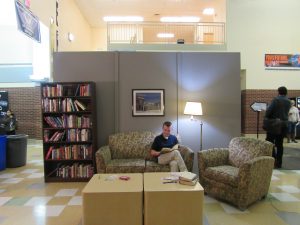
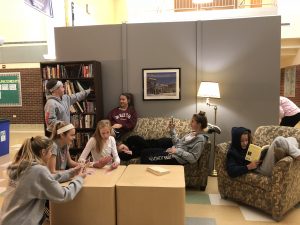
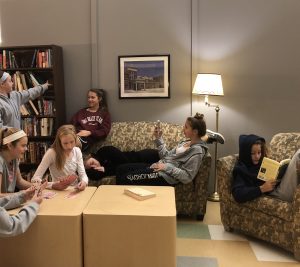
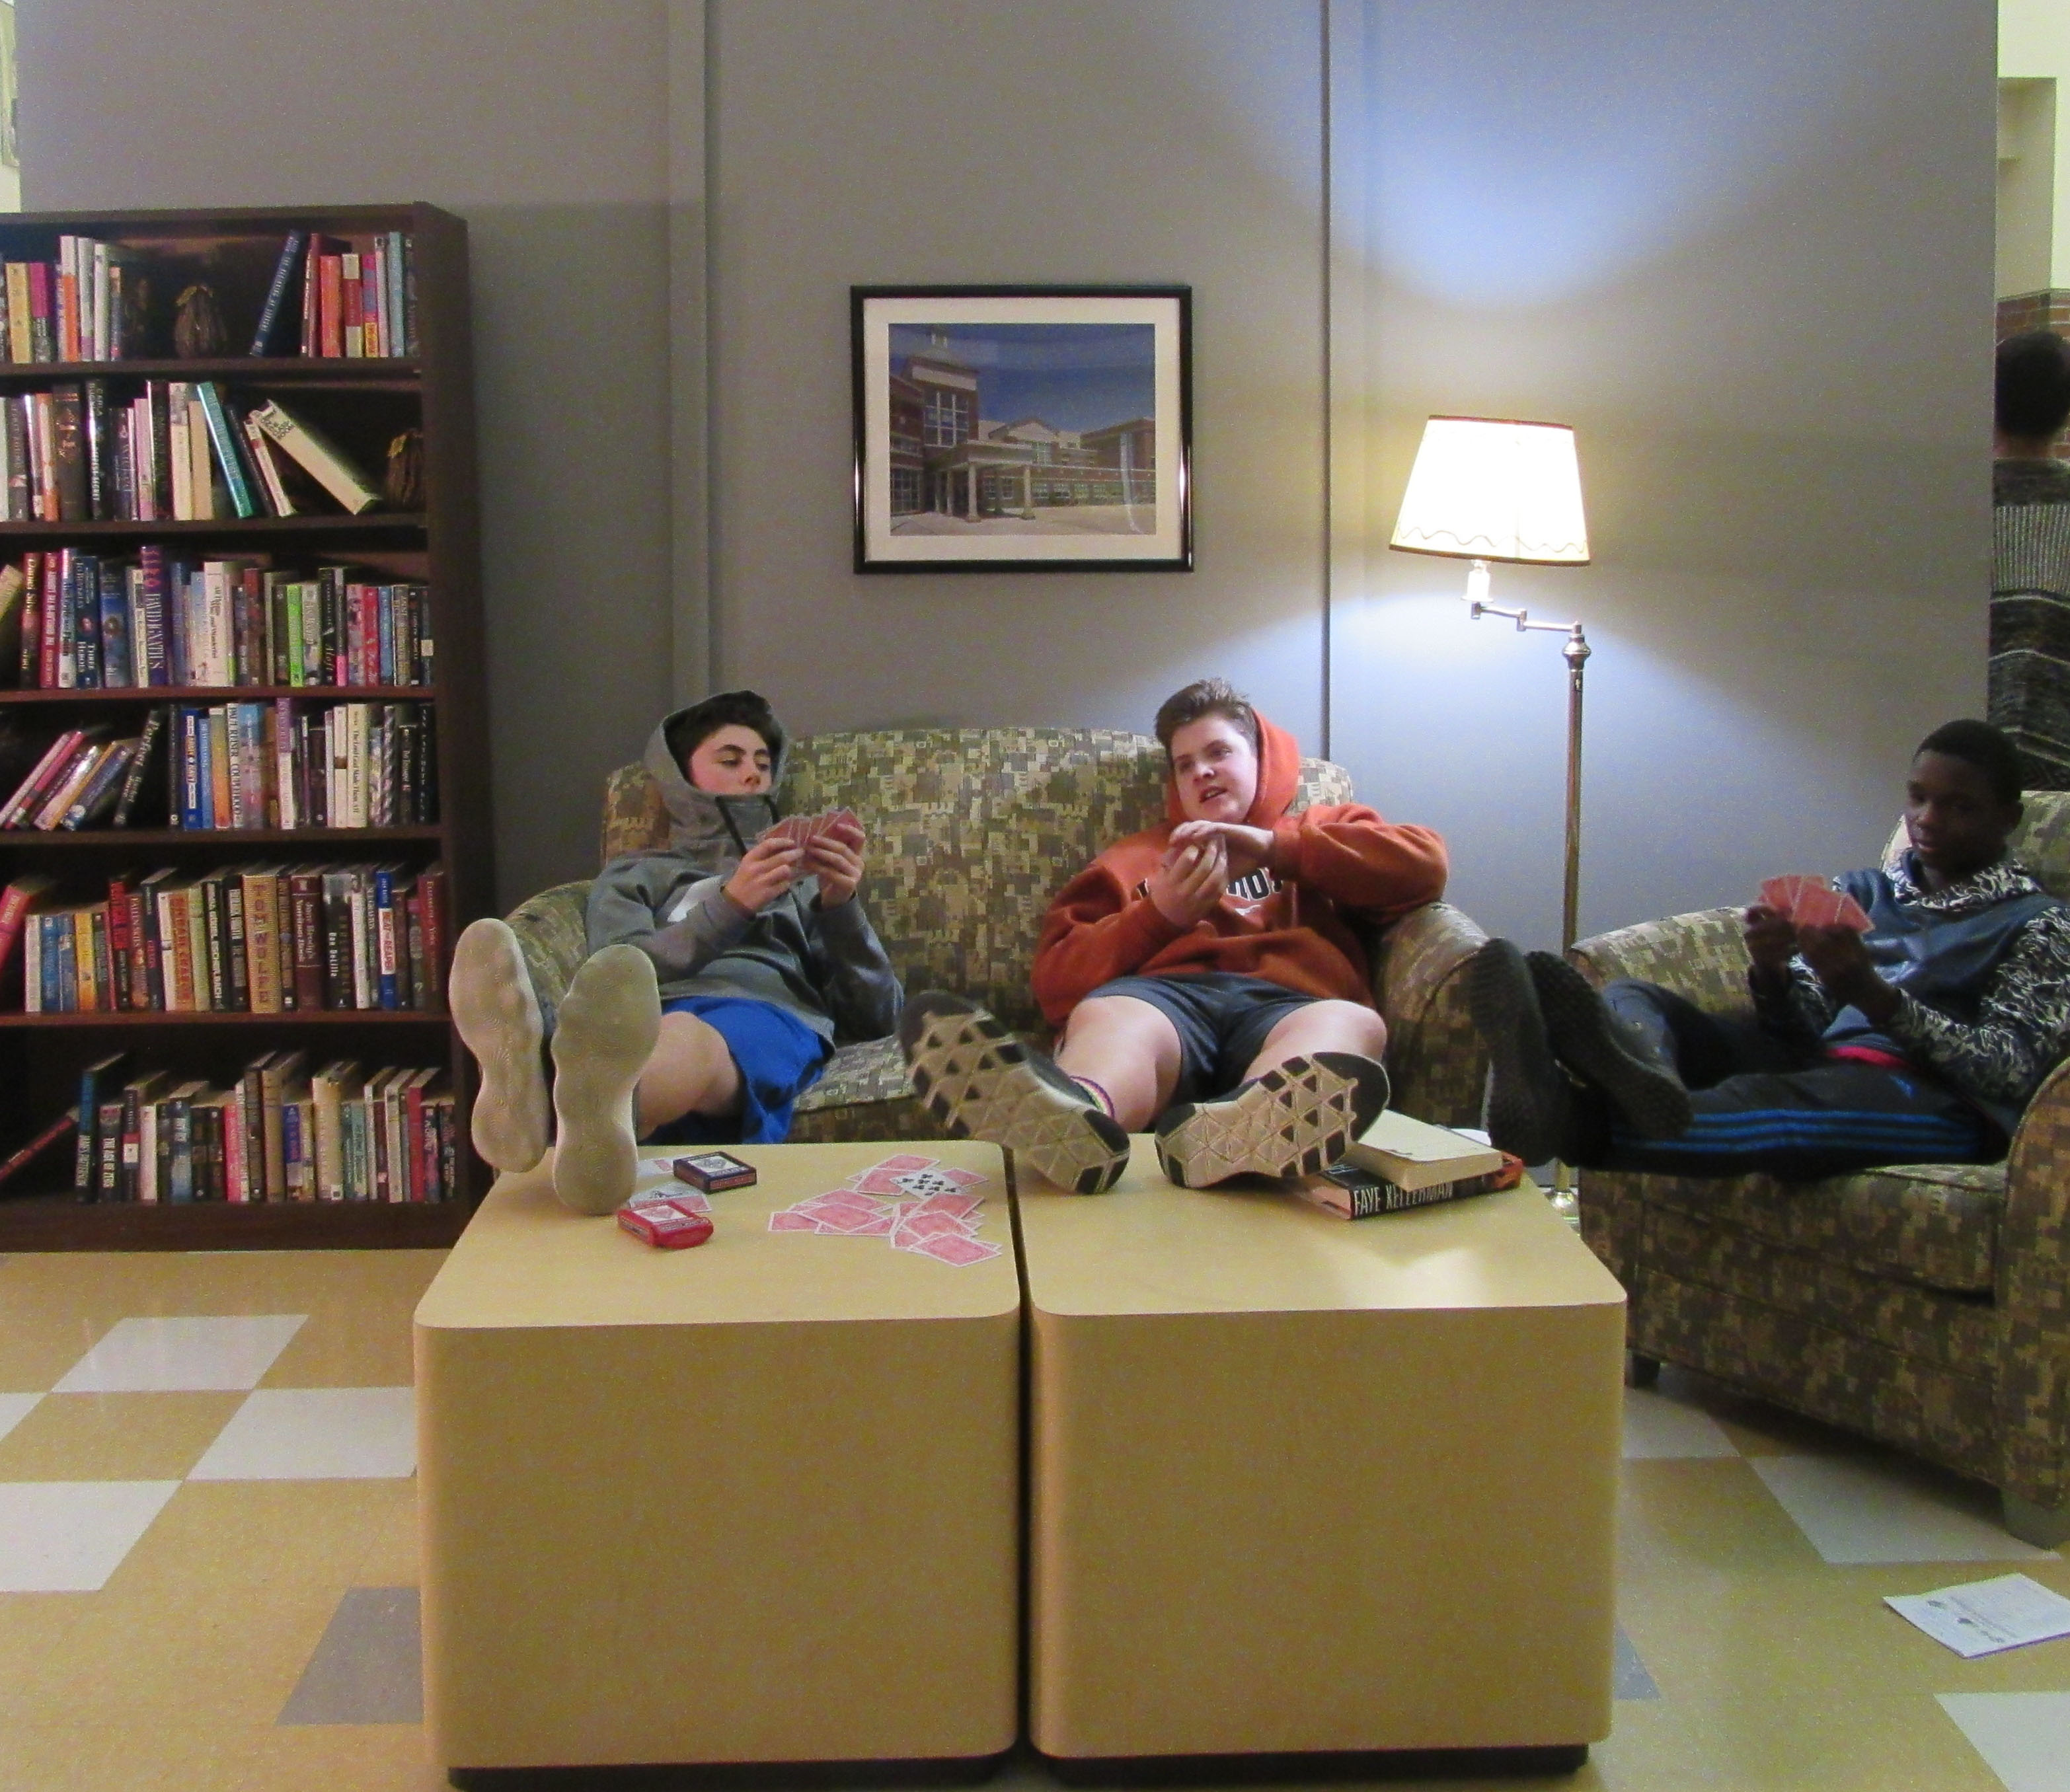
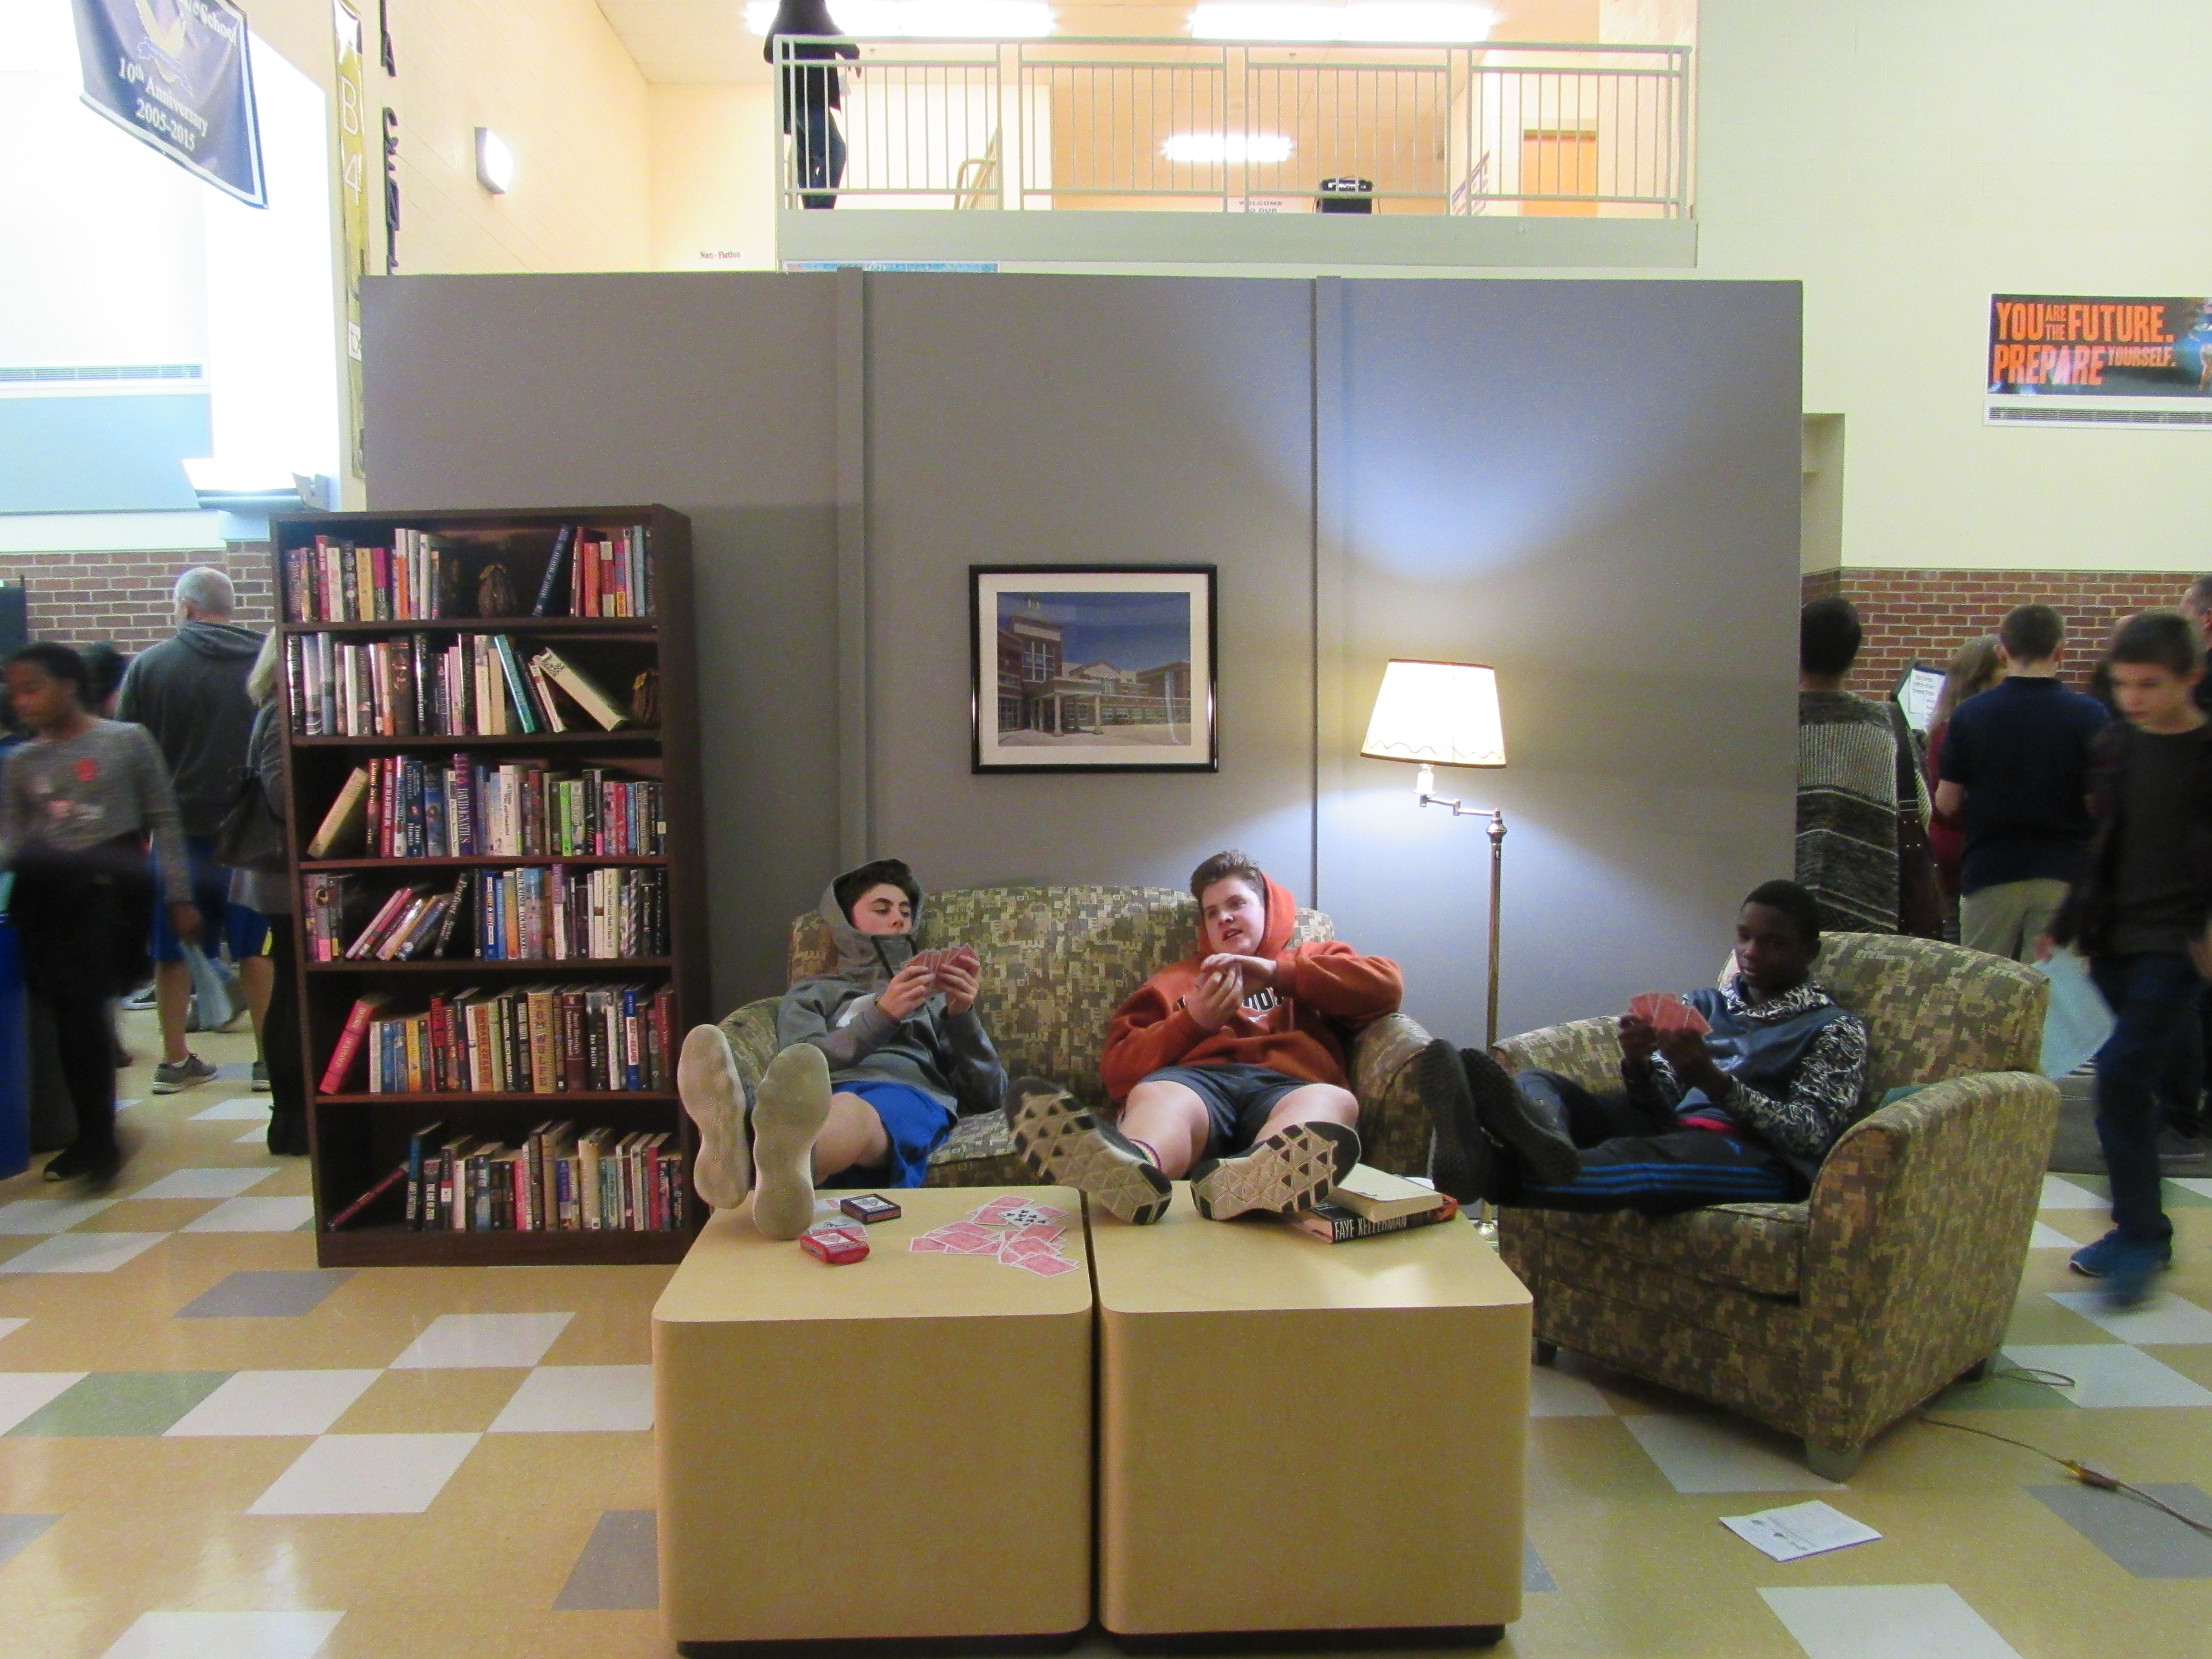
In the past few weeks we did a project called set in the street. Where we had to build a living room. First we had to build the walls, we used pieces of wood and made the base was 4 foot by 8 foot there were 3 bases. We had to nail all of the pieces together. Then we took drywall and we screwed it into it, while making many holes in the drywall. Then, we patched those holes up with some drywall paint. After that we sanded all of the drywall paint so it would be smooth. Then, we painted the wall so it would look like a wall in a living room. Then we had to put the whole thing together. So, we screwed the things together and then tightened it with a bolt and screw that we wrenched in. Finally we added a bookcase full of books, a couch, a couch chair and some little square tables with a deck of cards on top of it. Then, you put a camera in front and let the magic happen.

Here are some construction pictures  :

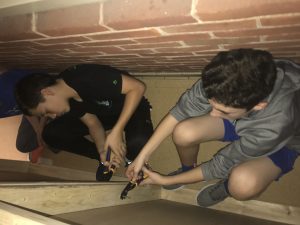
Here are some set pictures: 


Set In The Street

In the project “Set in the Street” we copied a professional photographer in New York City who made a set to look like a realistic settings in public areas. We built an old living room with an couch, a chair, and coffee table, and lamps. Included in the set there was cards, books, and picture frames for detail. We got all these materials from different teachers. The set also had a wall that we painted. In order to make this wall, we trimmed and cut the wood to fit the set length. The wall itself took several days to build.The class used materials such as drills, hammers, nails, and screws to make the wall. After the set was complete we asked students and adults at our Art Night to join the set while we took their picture. The final product was cool to see and many people enjoyed it. The picture below shows my friends and I posing in the set (I was the one asleep). One is cropped while the other is not.


Set in the Street

In our project “set in the street” we created a set using wood, tools and drywall. Nothing new for me, we built 3 4 by 8 panels that once we built the next day we painted with gray paint after it dried for a few days we conjoined the walls in the in the main area of our school once it was done was 12 by 8 wall then we decorated it to look like a living room, we decorated with 2 couches a bookshelf and a lamp      .https://vimeo.com/246275094

Set in the Street

“Set In The Street” took a lot of effort.  Before we put together the set we all gathered in the classroom and talked about what we needed.  Some of us brought in the materials others help get the things.  We made the walls by using wood, drywall and grey paint, I was fun because we got to put in the screws ourselfs.  Next we got The furniture from the teacher’s lounge including a couch, a chair and tables.  We also got the bookshelf and books from the lounge, and the lamp was ginin tous by Mr Leech.  The picture above the couch is taken from outside the school and out in a picture frame that was bought.  In one of the images below me and my friend Sammi are acting natural in the living space, as we would if if was real.

Set In The Street

In Photography class this week we made a set in the street which is a miniature replica of a house used for pictures although the house is split in half so my class and I made a living room. In order to have everything we needed we had to take couches and bookshelves from the teachers lounge. Also, we needed to have some wood for the walls and the wood was exactly “4’8”. Than we had to paint the walls [wood] with gray paint my teacher provided us with. Lastly,once we finished it was time to decorate!!!!!!!! Although, decorating was quite challenging we were able to communicate and the house ended up looking awesome.


Set in The Street

While building the project there was a lot of work that went into this process. In the very beginning we all built sides of the set with 2 by 4 pieces of wood to make the frame of wood. We all then took 4 by 8 pieces of dry wall to lake the walls actually walls. After completing the three sides of the wall were completely built we painted and made sure everything on the walls looked good. We than transferred the three pieces of the walls to the atrium to put them together. After putting them together we moved them the the position they would stay in then set up all the furniture that would be in the picture. Some difficulties along the way were working together sanding it down properly and building them together. Some of the easy things were painting it and setting up the furniture. The time laps below is us setting up the furniture and putting the finishing touches to the set. 

https://photos.app.goo.gl/zCNOfmSTpzTJRTMH3

Set in the Street


For this project, We construct a set in the street.It took us 1 week and ½ . here is what we used and did. First we used wood we sanded the wood and cut the wood 4 ft by 8 ft.second we used nails to hold the wood together.I finally used a drill for my very first time.After we drilled in the nails we covered it with drywall mud. Then we had to sand the exes. We used the couches from the teacher lounge.And used books from the media center . We  also got the bookshelf from the media center as well.The camera that I have in my hand is the school’s camera.  At the end I figured that working together is easier than working by yourself.it was my first time building a wall and doing cool things like this. I Have 1 picture of me but I cropped it.the 2 one is not cropped 


Set In The Street

Our Set in the street photography project was very fun to create.  Over the past two weeks my photography class has been assigned to build a set.  Everyone was working hard to make our set look great.  It was a long and difficult process, but along the way we had fun and in the end had a excellent result.  


First we had to build the background.  A makeshift wall would have to do for our background.  Our class was split up into three groups each being responsible for  a section of the wall.  After cutting wood into planks using an electric saw we assembled the outline of the wall. Then added a board going through the middle.  The next day we screwed pieces of drywall onto the boards.  We then painted the drywall grey. To set up for arts night, we connected the walls together.  After school students built a stand for the wall. They then decorated with couches, a picture, coffee tables and a bookshelf.  


Overall, this process was very efficient.  As a class we were able to complete the scene in a very short amount of time.  Students got to show their skill at carpentry and using building tools.  I learned a lot about building and got to use a drill correctly.  I was able to collaborate with my peers to create something we could all enjoy.  In order to make the process even more efficient we could have created roles for each member of the group.


Our final product was very satisfactory.  The scene we created looked like it belong in an actual living room.  Many people who attended arts night were able to lounge in the couches and have their pictures taken.  I truly enjoyed creating our Set In The Street project and learned a lot.

Set in the Street

This past week in class we were doing a project called Set in the Street. This project was very fun to do but required tons of work. Set in the Street is basically a project where you build a wall and decorate in front of the wall to make it look like the inside of a house. You are supposed to do this in a random area and take a picture with a normal background still in it. Then, you are supposed to crop out the background so it looks like the picture was taken in an actual house. The first step was to build a wall. This required a lot of work because we had to get pieces of wood and hammer then together to create a 4×8 base. We then took drywall and placed it onto the base. We drilled it into the base so that it would stay in place and then we were done. We then painted the wall so it looked like an actual house. Finally, the last step was to drill and hammer nails and screws into all three wall that we made in order to make one big 12×8 wall.After we built the wall, we had to get furniture to put inside our “house.” So, we went up to the teacher’s lounge and got couches, chairs, tables, and bookcases. They were very heavy but, we brought them downstairs and put them in place. We then put the wall up by making wooden supports to hold up the wall. The last step was to put a few pictures up on the wall which me made by getting a picture frame and putting a picture of our school inside it and add a deck of cards and we were done! During this project I struggled with drilling the screws into the wood because I’ve never done it before. But, I found painting it very easy because that is something that I have done before.                  


Set in the Street


For this project we did something called “Set in the Street”. This was started by a photographer in New York that built sets in different populated places. Except these sets were out of place. Our set was of a living room that we built in the atrium of our school. The purpose of this was to take pictures of subjects and have them act like they were in there own living room. This presented some challenges. Challenges like creating three walls from scratch and fitting an 8 foot tall wall through a 7 foot tall door. This project however was a lot less stressful and a lot more fun than the typical projects we do.