Light Graffiti

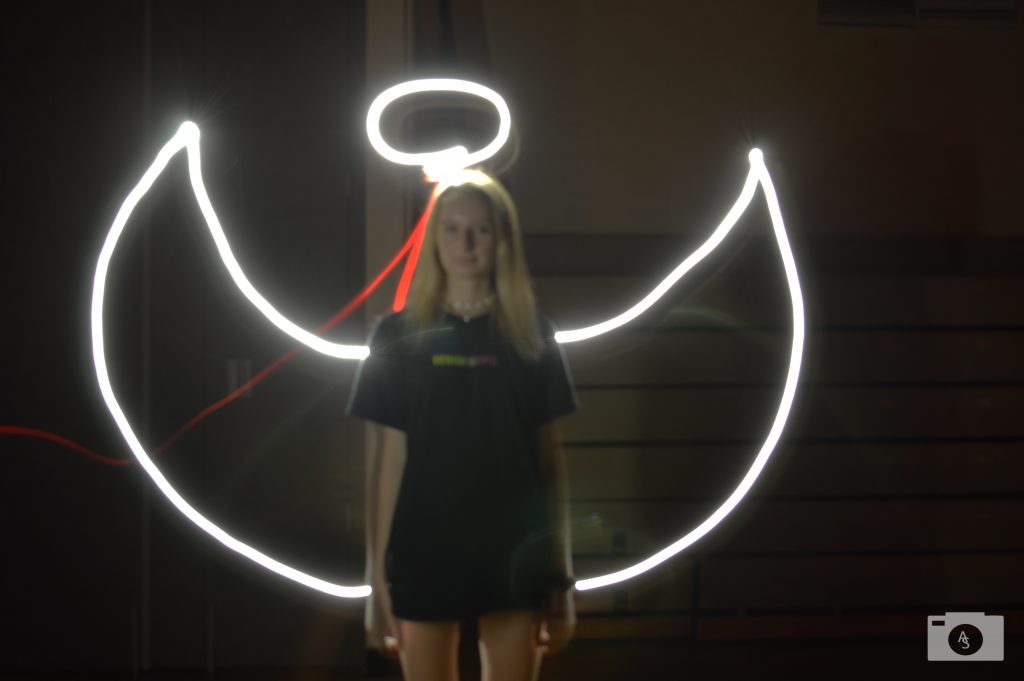
For this assignment, we went into the school gym and turned all the lights off. We used our phones flashlights to draw the designs. The easiest part of this assignment was planning ahead our drawings and giving each person a specific part ahead of time. The most challenging part was timing the drawing with the camera, because if you held the button down too long then the picture wouldn’t work. The most frustrating part of this assignment was when the photo didn’t come out the way I wanted and we had to redo it. An idea for taking this project to the next level is to use props to be able to fill them in and make cooler designs!

my other photos

macro legos

For this project we had to take a picture of a lego doing an activity, and we had to take the picture at lego level. The skills I used for this project were getting the camera to focus on the legos. The most challenging part of this assignment was making it look like they were in a lego size world. If i had to take 5 more photos I would take the lego surfing, swimming, ice skating, climbing a tree, and at school.

balance beam
boat ride
movie night

Getting close

For this project we had to get as close to the object as we could with our cameras to be able to depict all the details of the object in the photos. for this project one of the biggest challenges were getting super close to the object without making the photo come out blurry. The easiest part of this assignment was choosing the objects to take a picture of. There are many objects that have details you can only see up close so it was very easy. If I could go anywhere to take a close up picture I would take a picture of a waterfall or a wave because the details of the water flowing down would be very cool.

Link to my other photos.

Catch the Action

For this project, we had to take photos of an object, or person, in motion. This does not mean blurry photos, but it is photos that cannot be staged. To set up for this project, I had to change the shutter speed on my camera to be able to take multiple photos at a time, or a “burst” of photos. A tip for someone trying to take action photos is to keep your camera as still as possible, to get the cleanest image you can.

Link to all my other photos.

Frame Your Subject

For this project we had to take pictures of people, or our subject in a “frame”. This frame consisted of objects such as a doorway, window, in between tree branches and more! This project compares to the rule of thirds because they both use lines to force you to focus on the subject. These projects differ because the rule of thirds use imaginary lines while this project uses visible lines to focus on your subject. The biggest challenge of this project was the lighting, sometimes we had really good spots to take pictures but the lighting made the picture invalid.

link to my other photos

Rule of Thirds

For this assignment, we had to use the grid on our phones, or camera to create the rule of thirds properly. The grid is created by 4 lines, 2 horizontal and 2 vertical. The 2 horizontal lines create thirds going sideways while the 2 vertical lines create thirds going vertically. These lines created 4 intersecting points, which are also the points that people focus on first. You wanted your focus objects of the photo to either take up 1/3, 2/3 or be on the intersecting points to create this project properly. The biggest challenge of this assignment was making sure I did it properly, because I couldn’t know if i did it properly since I am bias because I took the photo. To overcome this challenge, I asked other people what was the first thing they looked at in the photo, and if it matched up to what I was expecting, then I did it correctly. This project changed the way I take pictures because I realized, that the object that you want to focus on doesn’t need to be in the middle.

Link to all my other photos

Black Portraits

For this assignment, we had to take pictures with a camera using manual mode, so we could learn how to be in control of the camera. For editing our pictures, we used photoshop, but we were only allowed to use a limited amount of editing tools, so we couldn’t rely on editing. The biggest challenge of this assignment was making sure the lighting was good. The room was dark, since we turned off all the lights to be able to get the best pictures we could, we used lights and we had to position them perfectly so the camera could pick up the light, and so there was no glare on the background. The easiest part of this assignment was editing the pictures because we weren’t allowed to do much editing.

link to all my other photos

White Portraits

For this assignment, we had to take pictures with a camera using manual mode, so we could learn how to be in control of the camera. For editing our pictures, we used photoshop, but we were only allowed to use a limited amount of editing tools, so we couldn’t rely on editing. The challenges of this assignment were making sure that there were no shadows in the background. The easiest part of this assignment was editing the pictures because we weren’t allowed to do much editing.

link to my other photos

1 object, 5 shots

For this project we had to choose 1 object and take 5 different pictures, all from different angles. We had to do this for 3 different objects, and one of them had to be a person. The biggest challenge of this project was the lighting. Many of the places where I tried to take pictures had yellow lighting, so I had to use my resources to overcome this challenge. The easiest part of this project was figuring out the angles to take the pictures at. The hardest object to photograph was my water bottle because since it is small I had to get on the floor to take some of the shots from a lower angle.

link to all my other photos

24 Colors

For this project, we had to go around the school, or our house to take 24 photos, one for each crayon color. The background had to match the crayon color as much as possible when doing this. There were some challenging parts of this assignment such as making sure the lighting was good enough so the crayon matched the background in the photo. A lot of times for me the background matched the crayon in real life, but in the photo it didn’t because of poor lighting. When this happened I had to use my resources to find what could help me make the lighting better and overcome these challenges. The easiest part of this project was finding objects to use for the background. Most of these crayon colors are very average so I found many objects to match the crayon.

Link to my other photos