Light Graffiti

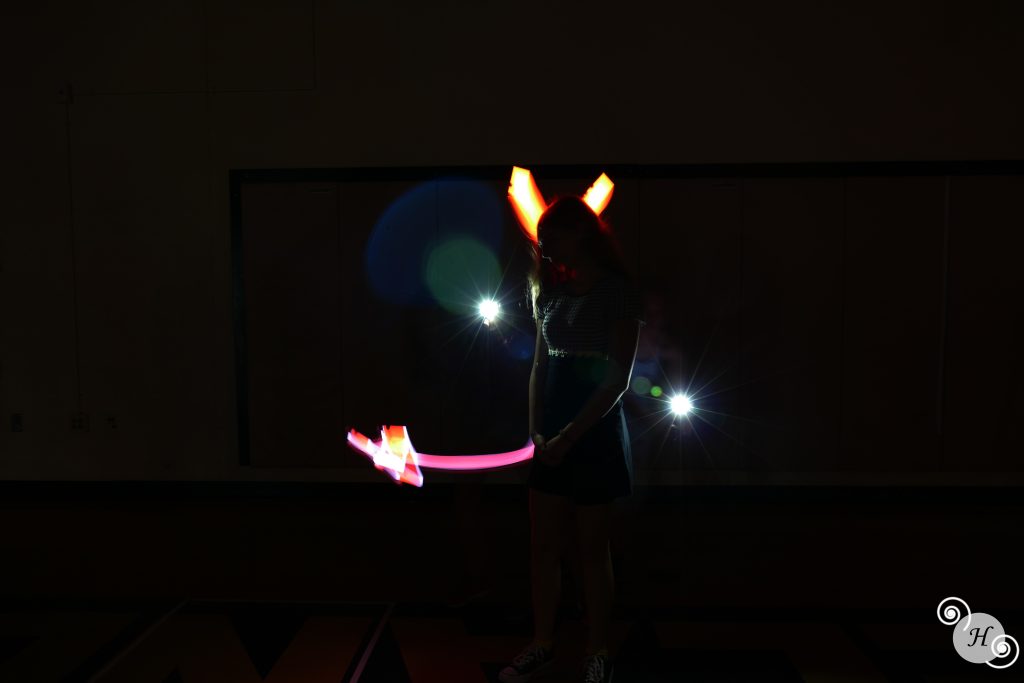
In this project, we had to take our photos in a dark place with little light pollution and change the ISO to the lowest setting possible, then change the shutter speed to bulb mode. Time wasn’t a problem for us so we didn’t have to rush. However, since we were using our phone, the light source was really thick, making it hard to draw. If I could take this project to the next level, I would take a picture underwater in a pool at night.

Click here to see the rest of my photos

Playing with Lego’s

In this project we had to use Lego’s to create real life scenarios as if these toys were human. Some skills I used from projects in the past are rule of thirds and using different angles. I think the hardest part of this project was the wind because our Lego’s would easily get blown away. If I had to take 5 more photos I would want to take some under water ones and more superhero ones. 🙂

Click here to see the rest of my photos

Avengers Assemble

galactic rock climber
Save the kitty

Getting Close

In this project I had to take 10 photos of living and non-living things up close. Some things that worked out well were choosing my objects and the look of the overall photo. Some challenges were making sure the object didn’t move and not letting the photo turn out to be blurry. If I had everything I needed, I would take an up close photo of bio luminescent coral. 🙂

Click here to see the rest of my photos.

Catch The Action

In this project we had to take photos of objects and people in motion/ doing an action. In order to make the photos seem less blurry I held the button down to make my phone take a burst. Some tips I learned while doing this project was keeping the camera still and changing the camera angle to create a better structure. I would want to photograph figure skaters if I could. 🙂

Click here to see the rest of my photos.

Framing your Subject

During this project we went outside and inside the school in search of five images that create framing. In photography, framing is when there is a natural grid provided in the area to create a visual point in your photo without using rule of thirds. This is different from using rule of thirds because while framing uses actual frames/grids rule of thirds uses a grid from your camera to create invisible frame points. Some challenges were finding actual frames and focusing the photo on one object. The photo below is my favorite because since the watch is the only thing in the bench it’s easy to focus on it especially since there isn’t much else in the photo. 🙂

Click here to see the rest of my photos

Rule of Thirds

During this project I officially learned how to take photos properly by using the Rule of Thirds. Then, we were asked to take 8 photos using these rules. We used these rules to help create a clear visual point in all our future photos. Although I think it was a bit hard to get our photos directly on the grid lines because it’s hard for a person to keep their hand perfectly still. Below are the photos using the Rule of Thirds that I took for this project. 🙂

click here to the rest of my photos

Infinite Backgrounds

During this project we had to take photos in front of white and black backgrounds while trying to make the overall photos look infinite. Some challenges that we faced were getting photos without shadows. However, we solved this problem by learning that if we step further away from the paper, the shadows will go away. Also, even though it took a bit of time, finding the right setting on the camera was a bit of a struggle. 🙂

Click here to see all my white backgrounds

Click here to see my black backgrounds

5 Shots

For the 5 shots project we had to pick 3 different objects and take 5 photos, each with different angles. My 3 object were a fake plant, Bella Hanson, and my horse. I think the challenge of the project was getting 5 actual angles without repeating one. In my opinion, I think my horse was the hardest to photograph because he would move and shake his head a lot. Overall, I think this project helped me understand what an angle actual is in photography. Also, how it can improve my photo taking in general. 🙂

Click here to see the rest of my photos

24 crayons

During this assignment we had to buy a box of 24 crayons then match each crayon to something in our daily surroundings. Some challenges of the project was finding the exact shade of the color to the object. Also, there might’ve been similar crayon colors so it would hard to find which crayon made the best fit. Some thing I found easy was just taking the pictures in general. Overall, I think this project was really fun and I can’t wait to do more! 🙂

Click here to see my photos.