Light Graffiti

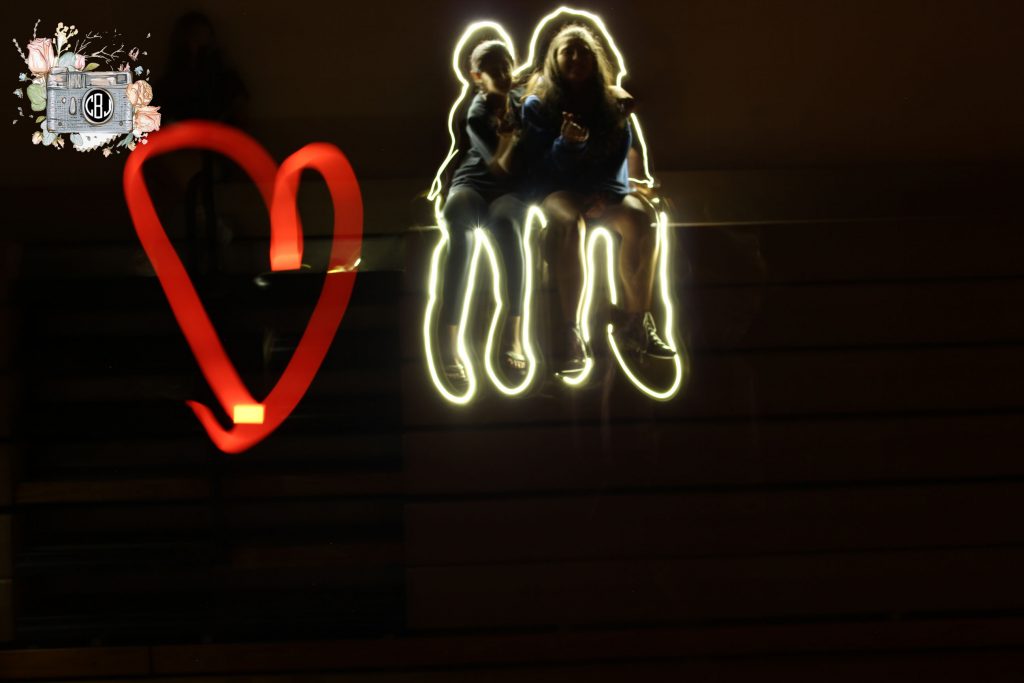
To do this project, we had to lower the ISO and keep the bulb open for the time it takes us to take the photos. Sometimes the camera wouldn’t work and we’d draw the picture and take the photo and then we’d find out the camera wasn’t taking the picture. It was easier to draw the graffiti. It was frustrating when we had to trace around people because it was hard to know where we started. To take the project to the next level we could do something with action and do light graffiti for that. Click here to see the rest of my photos.

This is one of the photos my group took.

Playing with Legos

In this project, I had to take photos of Legos in a scene so it tells a story. We had to make the Legos look like people. I used skills from the taking up close photos project because sometimes we had to get close to the Legos because they’re so small. Something that was hard about this project was that we had to try and make everything look like an actual scene which was sometimes hard. If I could take more pictures, would want to take pictures of a Lego taking a photo because it would be cool. Click here to see the rest of my photos.

This is one of my favorite photos.

Getting Close

In this project, I had to take photos of objects up close. I used VSCO to be able to take photos up closer to focus on the object. The easiest part of the project was finding things to take photos o f. The hardest part of this project is trying to focus the camera so that the photo isn’t blurry which is what VSCO helps with. I would like to photograph water droplets on something like a plant or a flower because I think that it would look cool. Click here to see the rest of my photos.

Action Shot

For this project, we had to take a photos of a person that’s in action. We had to make sure that the image wasn’t blurry and was something that was in action and not acting like your in action when you aren’t. I took my photos in burst so that I could get the action and it wouldn’t be blurry. If someone else did this project, I would say that they should take photos in burst so they can get the action. I would want to take a photo of soccer, basketball, or cheer because they’re really cool to see in action. Click here to see the rest of my photos.

This is the stacked action photo.

Framing your Subject

In this project we had to find a natural frame around the school and outside. We could use windows, doors, pillars, trees, etc. We had to take a picture of a subject in these frames. This project was similar to the Rule of Thirds project because both make your photos more interesting. They’re different because in the photos in Rule of Thirds, the subject isn’t in the middle of the shot. The hardest part was finding something interesting to frame my subject. Click here to see the rest of my photos.

This photo is my favorite because I liked taking photos with the railing as the frame.

Rule of Thirds

In this project, I had to take photos with the rule of thirds where you have a 3 by 3 grid and you put your subject on one of those thirds. The easiest part of this project was taking the photos in rule of thirds. The hardest part was trying to find good photos because our school is plain. I think that the rule of thirds makes your photos more interesting because the subject isn’t right in front of you. I looked at where the third lines were on my phone and I took photos from the side thirds and from the bottom thirds. Click here to see the rest of my photos.

Black Background

To take the photos, we changed the ISO and we used a light to make the lighting good. To edit the photos, sometimes I changed the curves to make the colors brighter. The easiest part of the project was to edit the photos. The hardest part of the project was to make the lighting looks good with no shadows and use the light so we could see the photos. Click here to see the rest of my photos.

White Background

I had to change the ISO of the camera to make it so that the white paper background looks infinite. I used Photoshop to make the photo black and white and I changed the color’s curves to make them lighter or darker. The easiest part was when we edited the photos. The hardest part of this project was trying to get a lighting that doesn’t show any shadows. Click here to see the rest of my photos.

My Logo

My logo is a clip art of a camera with flowers and I put my initials in the lens. For my logo project, I got my photo off of google and I got my initials on a monogram maker. I didn’t contact the owner of the photo. When I use a photo or something from another photographer, I give them credit for it. If someone used one of my photos, I think they should give credit for it. The easiest part of this project was definitely making the monogram. The hardest part was finding a photo because it was hard to decide.

This is my logo