Macro(Lego)photos

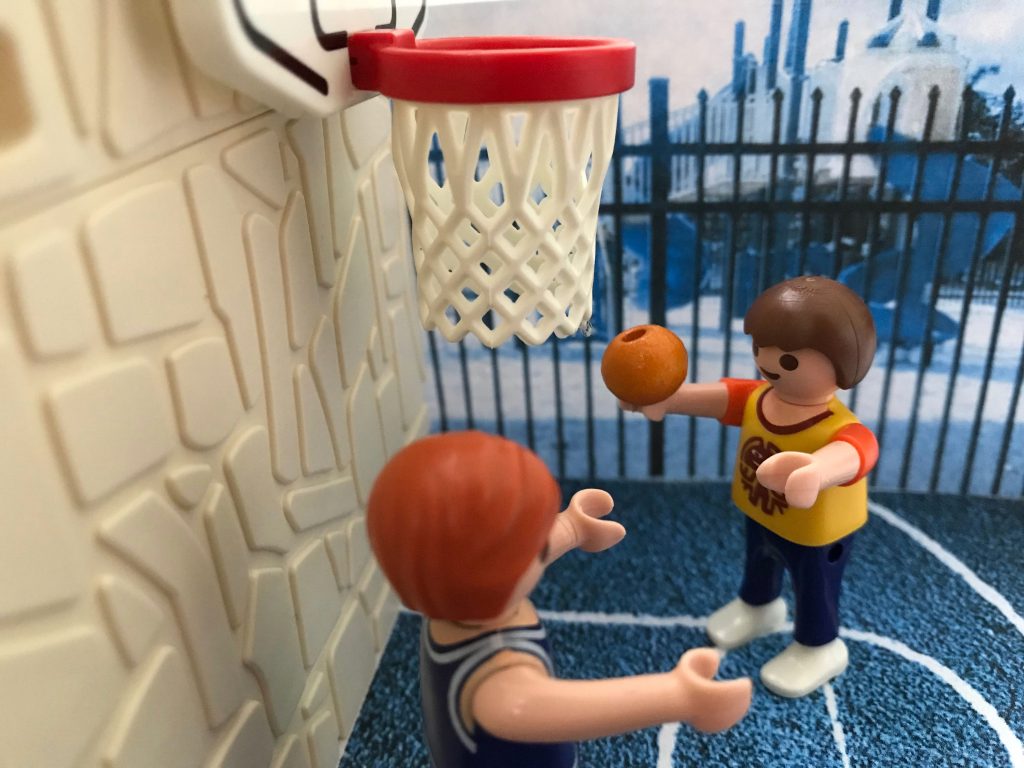
In this project, we had to take pictures of legos close up where you can see what actions they’re portraying. It has to look like the picture has been taken in “their world”. The Macro photos we took last time where we took pictures of objects close up really helped me with this one since the position and angles of the camera are similar. What challenged me was getting good angles of the legos where the lego is well seen. If I could take more pictures, than I would take in more of a nature full area since there is more creativity there.

Light Graffiti

In this project, we we surrounded by darkness and had to make the camera capture streaks of light. First we had to set the camera to a low ISO. We held down the camera button and waited for the person to draw with light. After, we let go when they were done. The end result was a photo which had light streaks where they drew from the illumination from the light from their phones. Where we drew to create light streaks didn’t always come up on camera because it was so dark so we couldn’t see where it was positioned. Which was really frustrating. However, when we used multiple light sources, it made the photo look better because there was a variety of colors and details. Next time, maybe we could do it in a different setting so we could get a glimpse of the background. Like a forest, or the woods.

click here to see the rest of my photos

Macro Photos

In this project, we had to take pictures of objects almost at the point where you didn’t know what the object really was. What worked well for me was finding different objects to take pictures of, especially outside where there is a lot of natures. Trees, flowers, bugs, etc. However, getting the camera to focus on the object at such a close rate was challenging. I had to kind of crop the images so it looked closer than it appeared since the camera would not clearly focus. If I had the best equipment to take macro pictures, I would want to take pictures of different peoples eyes. The different variety of colors and everybody’s unique iris’s would make it very interesting to take pictures of.

click here to see the rest of my photos

Action shots

In this project, we had to capture people and objects in movement. I found if you take a picture in different angles it helps capture the movement better in the photo. If you’re trying to take action photos make sure that your picture doesn’t come out blurry and make sure you can actually see the movement of the person or object. In the future I would like to capture photos of BMX bikers. I think it’d be very fun to do that in the future.

click here to see more of my photos

Framing

In this project, we had to have an object around something that would frame it. Mirrors, cups, doorways etc. This was similar to the rule of thirds because the frame makes the photo interesting. Its different from the rule of the thirds because since in framing your object is your main focal point. Some challenges I had were finding what frames to put my subject in.

Click here more to see more of my photos

Rule of Thirds

Instead of the main focal point being in the center. In Rule of Thirds, the focal point is off to the side. What worked for me is what the main focal point of the picture should be, but what was kind of difficult is where I should place it in the photo. When I first started this project I didn’t really understand the point of Rule of Thirds, but now I understand how it gives you different types of pictures without the object being your whole picture. In the pictures that I took, I made sure that everything wasn’t on the same line and the picture captured the background as well.

Click here to see more of my photos

Infinite Backgrounds

In this project, I took pictures of people with black and white backgrounds. Using a shutter speed of 1/13 which is how long the film was exposed to light. We had to use different ISO for both our black and white background pictures. In order to capture more light in the picture which we used for the black backgrounds, we had to use a higher ISO and to disregard the light we had to use a lower ISO which we used for the white backgrounds. At first, it took a while to get the right lighting for the photos and for there to be no shadows in the background. But after some trial and error, we ended up getting it. I also think we had a different variety of poses in the photos which really made the photo stand out more.

Click here to see more of the white background photos.

Click here to see more of the black background photos.

1 object, 5 shots

In this assignment we had to take pictures of objects, but get 5 different camera angles of the object. I think a challenge for me was thinking of 5 different angles to use for the photo. I think the hardest picture to take a photo of in 5 different angles was somebody wearing a pair of shoes because it harder to get good angles. This project showed me how to take pictures without using the same angle over and over again.

Click here if you want to see more