Light Graffiti

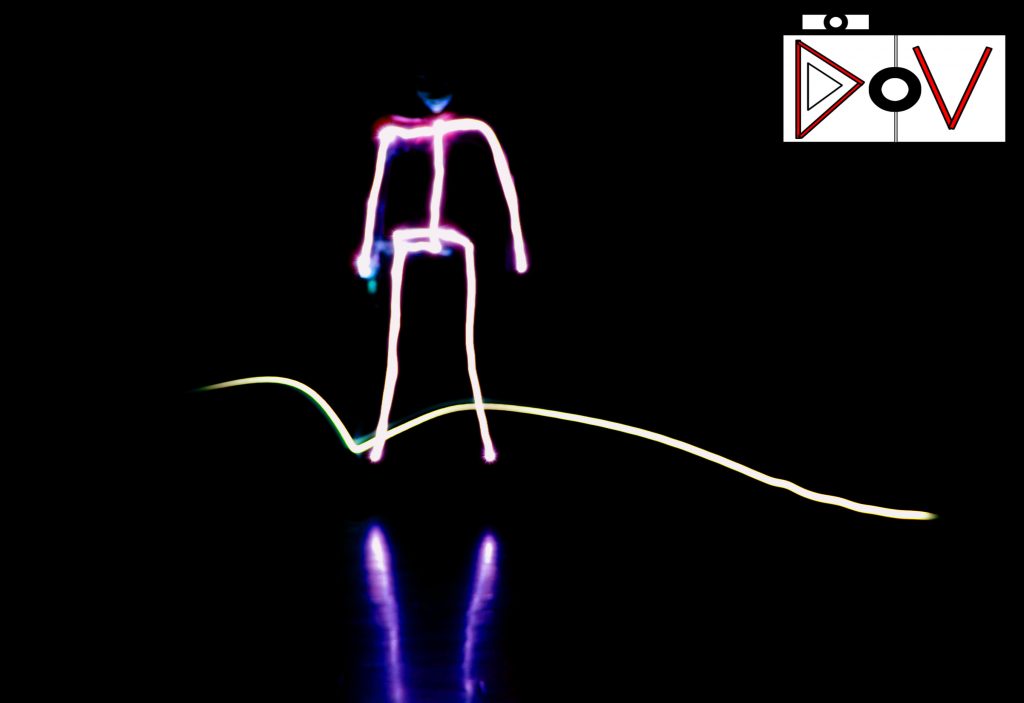
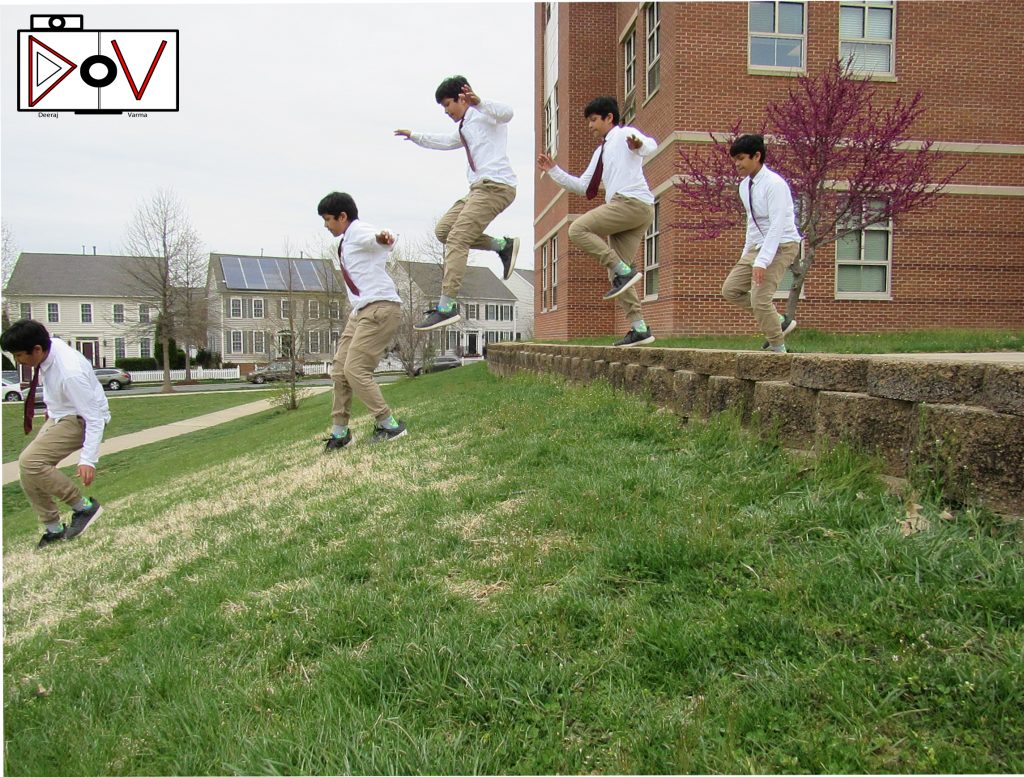
I took my pictures by first adjusting settings, I then get positions of people ready so my other members could either color in or outline the other person. What worked was to get a at least 1 or 2 people to outline the other person because if there were a lot you can see the people moving in the picture and that was pretty hard to edit out. What was really hard was that was to make the picture that we drew with the lights good or to at least look a little organized. As well as to make sure the camera isn’t exposed to light that long as well as to the dark. Some ideas to take this to the next level is to have really cool drawn backgrounds or good drawings with the lights in front of a natural background.

Click here for more photos

Lego Macro Photos

This project included using Lego figures and other small objects to make it like the Lego figures are doing stuff that humans can. We had to take pictures to make it look like like the Lego figures are human size. I used my editing skills as well as the rule of thirds for some other pictures that I took that aren’t going to be shown. It challenged me sometimes to get to the perfect angle for the Lego character and to get to the same level of height as the Lego figure. i would like to photograph something with like a landscape in the background or during a sunset to get a good background.

Captain America about to save more people as always
just taking a stroll through the Jungle. Hoping to see some cool animals.
Just got some serious air time.

Closeup Pictures.

This task included students to take pictures of things but getting really close to the object to get the detail of the object. What worked well was to take pictures in the shade because you could get better light. If you take pictures in lights then it would be hard to capture the detail because of the light in the picture. it was difficult to take good pictures because sometimes it would only focus for a little time and so you needed a good time so you can actually get a good picture. If I had the time,equipment,and ability than I would take a picture of maybe an alligators head or eye because they have different shades of color in their eye and so it would look cool.

Click here to see more photos

Action Photos

This project was a project that included students to take picture of something that is in action or being done and something that isn’t stationary. I would use a countdown and also I would use shutters because it would picture would be taken faster, and I could just use the photos with action in them. A tip for starters is having patience because it takes a while to get really good pictures as well as use the shutter option in the camera. i would want to photograph Swimming because it would look really cool when someone is swimming and water is splashing everywhere to where you can see the drips of water in mid air.

click here to see my Action photos

Framing Subject

This project included students to use natural frames to frame their subject they are going to take a picture of. This project used a little of the Rule Of Thirds because you need a good picture so for that you need to adjust your subject to a side to fit the frame.

Click here to see more Framing pictures

This picture was my favorite because of the overall look at it. It look so good because of how the background is blurry and Abraham is just so popped out in the picture. The hardest part of this whole project was fitting the subject in the frame to a good position so the picture could then be good.

Rule of Thirds

This project included students to take pictures of objects or other students using different sides of the camera so the object isn’t centered every picture. What really worked was using the cameras with the grid because it really helped separate the camera screen for the picture. What didn’t work was using the camera without the grid. The lines that were used for the camera really helped because it divided the camera so we can put the object on each side of the camera.

Click here to see my photos for Rule of Thirds

Black Portrait

Click Here to See black portraits

This project included students taking a picture of other students with a black backdrop. Stuff that worked was using the lamp because it would add light to the face so it wouldn’t just be dark the whole picture. Using the lamp with color instead of the led light would make the picture look weird.

A picture of a person in my group is below

Name is Juan Correa

5 Angle Photos

In this project students had to pick an object and get five different pictures with 5 different angles of the same object being stationary. The challenge was finding different angles that were actually good to make the picture itself look good. The hardest object to photograph was probably the person because you had to find a good lighting place for the picture. This project was really helpful to help find how pictures can be better with different angles.

Click here to see my photos

24 Crayons

c

This project was a project where students had to take pictures of crayon with a matching color inside and outside of the school. The challenges of this project was finding a good match for the crayon. I found it easy for taking the picture itself and making sure it was okay. My favorite picture that I took is probably the one below.

click here to see my photos