Light Graffiti

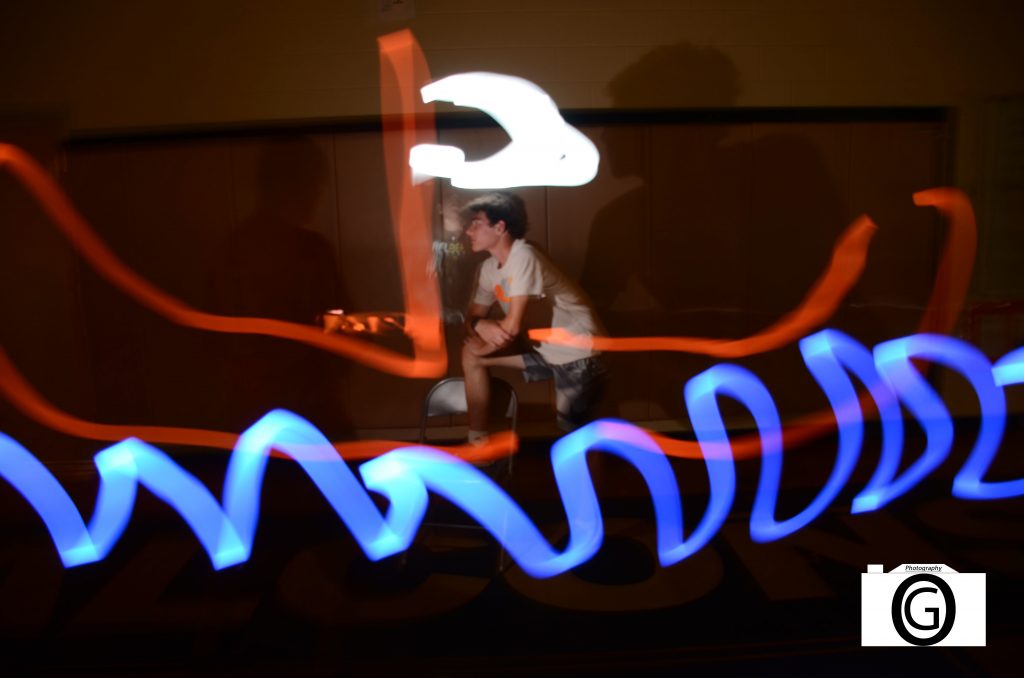
In this project, we had to take pictures in the dark while having people color in the image with different colored lights. To take these pictures, we first had to put the camera in manual mode and color in our main subject. we did so by shining a light on the person in the image. Next you would have to keep the shutter open on the camera while the other group members colored in the picture. Once you were finished drawing in all the colors, you could close the shutter. It was tough to get the pictures perfect. When coloring in the image, you had to be very careful about when you shine your light. Many times we accidentally showed our light and it messed up the entire image. This was the most frustrating part of this project. Eventually we realized that we had to plan our images before hand and switch colors outside of the camera view. To take this project to the next level, we could position our camera farther away from our subject so it has a wider view. This way, we could make much larger and detailed scenes in our photos Here is all my images. Below is my favorite photo.

Macro Portraits (Playing With Legos)

For this project, we had to make scenes with Lego figures and photograph them. Like our last project, we had to take our pictures at a very close angle while keeping our object in focus. It was challenging to position the Legos correctly. For example in my boat photo, the wind kept blowing the boat and sharks around. If I could take 5 more photos, I would take one of a construction sight, playing on a playground, fishing, climbing a tree, and a pool alley. Here are my photos:

A day at the beach.
Crusin’ at Lakelands Lake.
Computer maintenance.

Up Close

In this project, we had to take pictures of objects from a very close angle. It was challenging to get objects to focus, especially on my phone. Because my phone had no manual focus, you had to stay a certain distance away from the object for it to focus. It was easy to position our objects in a rule of thirds style. If I had more professional photography equipment I would take close up photos of tiny rain drops on objects Here is all of my photos.

Processed with VSCO with preset

Action Photos

For this project, we had to take pictures of people or objects in motion. In order to capture good images, we used the burst mode on our cameras. This gave us many photos of the object so we could choose the best ones. If you are trying to take good action photos, Use the burst setting on your camera. This will make capturing a picture at the right time so much easier. This will give you a variety of photos so you can keep the ones you like. A sport I would enjoy photographing would be mountain biking. You can catch photos of people getting lots of air on their bikes, and even the occasional crash! Here is a link to all my photos. Below is my favorite picture.

Framing Your Subject

In this project, we had to use random objects as the frame of our photo such as columns or a railing. In this project it was difficult to align the frame of our photo and our subject perfectly. For example you had to move around a lot to line up your frame perfectly. After you did this you had to position your main subject in the proper place. This was relatively similar to the rule of thirds project because you had to perfectly align different things in the photo. In rule of thirds, you had to align your subject with the rule of thirds lines. In this you had to properly align your frame and subject. Here is a link to all my photos. Below is my favorite photo. I liked this one because The playground had many unique objects to use as frames. This was probably the best from the playground.

Rule of Thirds

For this project, we took photos of random objects/people. when taking the picture, we had to line up our main object with one of the 4 lines or line intersections on the camera screen. none of the main focuses of our photos could be in the center. Overall this project was very straightforward, so there were not very many challenges. The easiest part of this assignment was aligning objects with the rule of thirds lines on the camera. Here is a link to all my photos:

https://drive.google.com/open?id=156BbbHvB5_4vbkWjF8KrERmyfhPSzTUt

Below are my favorite photos of a street sign and a person:

Black Background

For this project, we had to take portraits of everyone with an all black background. It was challenging to find the right shutter speed for each picture. If it was too slow, the picture would be too bright. If it was too fast. you wouldn’t see anyone in the picture. It was easy to edit the photos,so the person is visible, but they were still in the dark.

Here is all of my pictures- https://drive.google.com/open?id=1O5mvzTKDpalawX3V3yrqoTQMYFPVNYC-

Below is my favorite picture.

5 shots

For this project, we had to take five pictures of an object, all at different angles. One challenge for this project was finding five angles. After taking two or three photos, you had to really get creative to find two more new angles. The hardest item to photograph was the fire alarm because it was seven or eight feet high on the wall. This project helped me find more unique angles to take pictures to make them look better. Here is link to all my photos:

https://drive.google.com/open?id=1zi4lrh2wM53hwaX3w9i8mPSep4qKDOc-

Below is my favorite photo:

24 Crayons

For this project, we had to take a picture of something with a similar color to each crayon. Because each box has random amounts of each color, I had about six blue crayons. This made it very difficult to find six objects with the same color. once we found a matching object to a crayon, taking a picture of it was very simple, since no fancy angles were required. My favorite photo was the one shown above. I managed to get the crayon perfectly aligned with the painting on the first try. Here is a link to my other photos:

https://drive.google.com/open?id=1wyt8AiqQaJ9wIuQ297UsltzZeqsCdscV