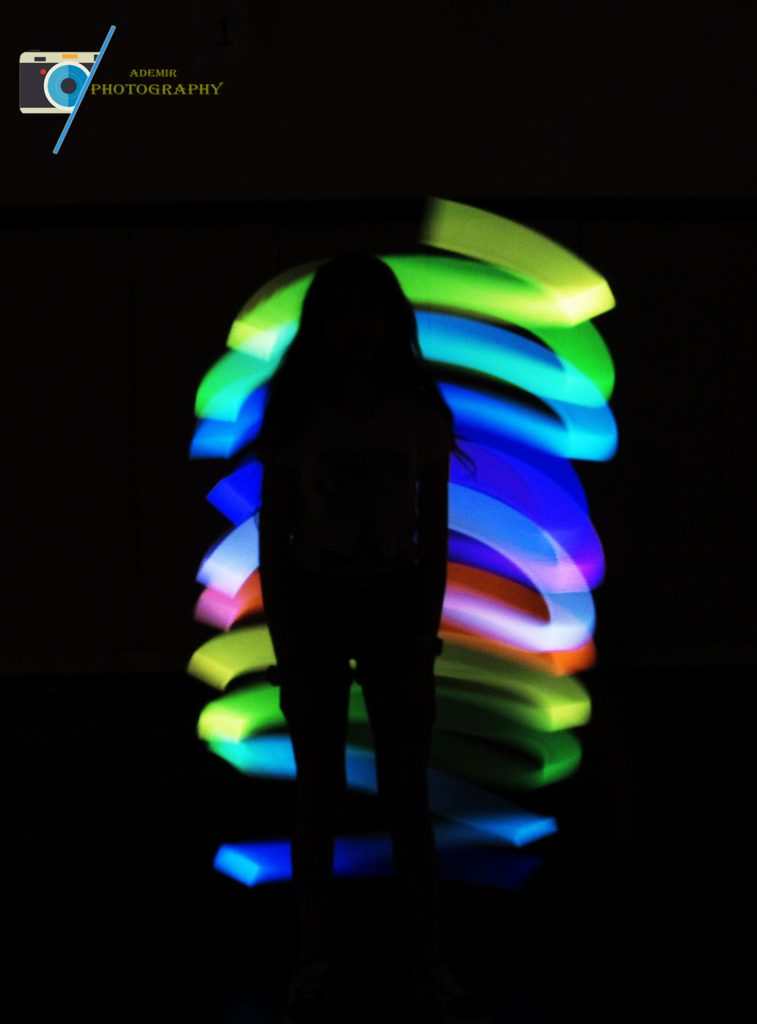
Light Graffiti

Light Graffiti

To take the light graffiti photos. Our group had to lower the ISO to 100. We also had to change the shutter speed to 8 – 15 seconds. We also had to get a light source like a phone or a flashlight etc. and when the camera began it´s fifteen seconds, we drew. Something that worked was having the shutter speed on 8 seconds and making a simpler design. What didn´t work was drawing or writing anything because it took too long to do. We didn´t have many frustrations but one of them was probably when one of the other groups had a very bright light and it sometimes became part of the picture. To make this project better, maybe we could have more time to do this project because I felt like maybe if we had more time, we would have more ideas. Click here to see more photos.

Getting Close (with legos)

Getting Close (with legos)

:ego Driving
Lego climbing
Lego Falling
Lego sleeping

For this project, we had to create a story with legos. We had to make it look like they were living in their own lego world. I used the rule of thirds to make the lego in focus. I also used photoshop to edit the string on the lego. The hardest part of the project was probably making the legos seem like they were in their own world. Which meant that some of the objects had to be somewhat their size. If I could take more pictures, I would probably take some of the pictures at a pool. Or maybe take a picture of legos at nighttime.

Action

Action

For this project, we had to take pictures of objects in motion. I used the camera app and I had to take the photo at the right moment, so this project took some time. If you’re using a phone, I recommend you to use burst, its when you spam the camera button. It will take a lot of photos and you can choose from there which one you think is best. I would like to take a closeup of a bird from close. Click here to see more photos.

Up Close

Up Close

For this project, we had to take pictures of things from very close. For this project, I used VSCO for the first time because a normal phone camera won’t be able to zoom into the object from very close. Something that worked well for this project was finding the objects around the school. Even though you could get closer to the subject with VSCO, there were still some issues with the camera and getting too close to the subject. If I could go anywhere to take a photograph of a close-up, I would probably go to a rainforest and take close-ups of animals and plants that can be found there. Click here to see more close-ups.

Processed with VSCO with f2 preset
Framing Your Subject

Framing Your Subject

For this project, we had to find things around us that could create a frame. It could have been people, shadows, etc. This project was different from the rule of thirds because in the rule of thirds, we had to use the grid to have an object the focus of the photo. However, for this project, we had to use the environment so the object in the picture is the focus. The only challenge of this project was probably the lighting. My favorite frame is the one of the dog because the people because I like how the people in the background helped frame the dog.

Click here to see more

Rule of Thirds

Rule of Thirds

The rule of thirds is a graph on a camera that helps you focus on an object which helps you create interesting pictures. What worked was putting the object/person where two lines crossed and what didn’t work was putting the object/person in the middle. I think that the rule of thirds is going to improve the way I take pictures of things.

Click here to see more photos!

White Background

White Background

To create an Infinite white background, we had to have a high ISO. It’s about taking pictures in a white background. Something that was difficult finding the correct ISO, and finding a correct angle so the shadow disappears. What was easy was posing posing and using the ISO when we found the correct one.

Click here to view the white background 🙂

Black Background

Black Background

For this project, we had to use the camera on manual mode and mess around with the ISO. The ISO had to be low to create an infinite black background. What didn´t work was having a light in a certain position because some of us wore glasses and it created a glare, but what did work were the angles the lights were placed.

Click here to view the Black Portraits

5 Shots

5 Shots

In this assignment, we had to take pictures of three objects and take 5 pictures of them at different angles. One of the challenges I faced during this project was the camera. The pictures taken of the camera were blurry and I had no idea why. The easiest object to take was the calculator because it was something I owned so it was easy to find. Click here to see all my 15 photos.

Crayon Project Color Hunt

Crayon Project Color Hunt

In the 24 crayon assignment, I had to get a 24 crayon box and match it to one of the colors around the school. One of the biggest challenges for me was to find the perfect match for the color. The easiest part of the project was using the camera. My best and my favorite picture I took was the one above. If you want to see more of my photos, click here to view more.