Light Graffiti

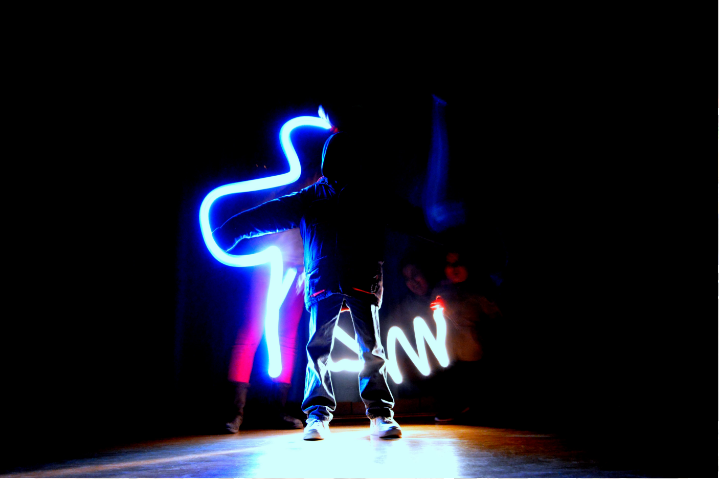
We are going to continue to use the manual settings on our cameras to paint with light or do light graffiti.  We’ve 
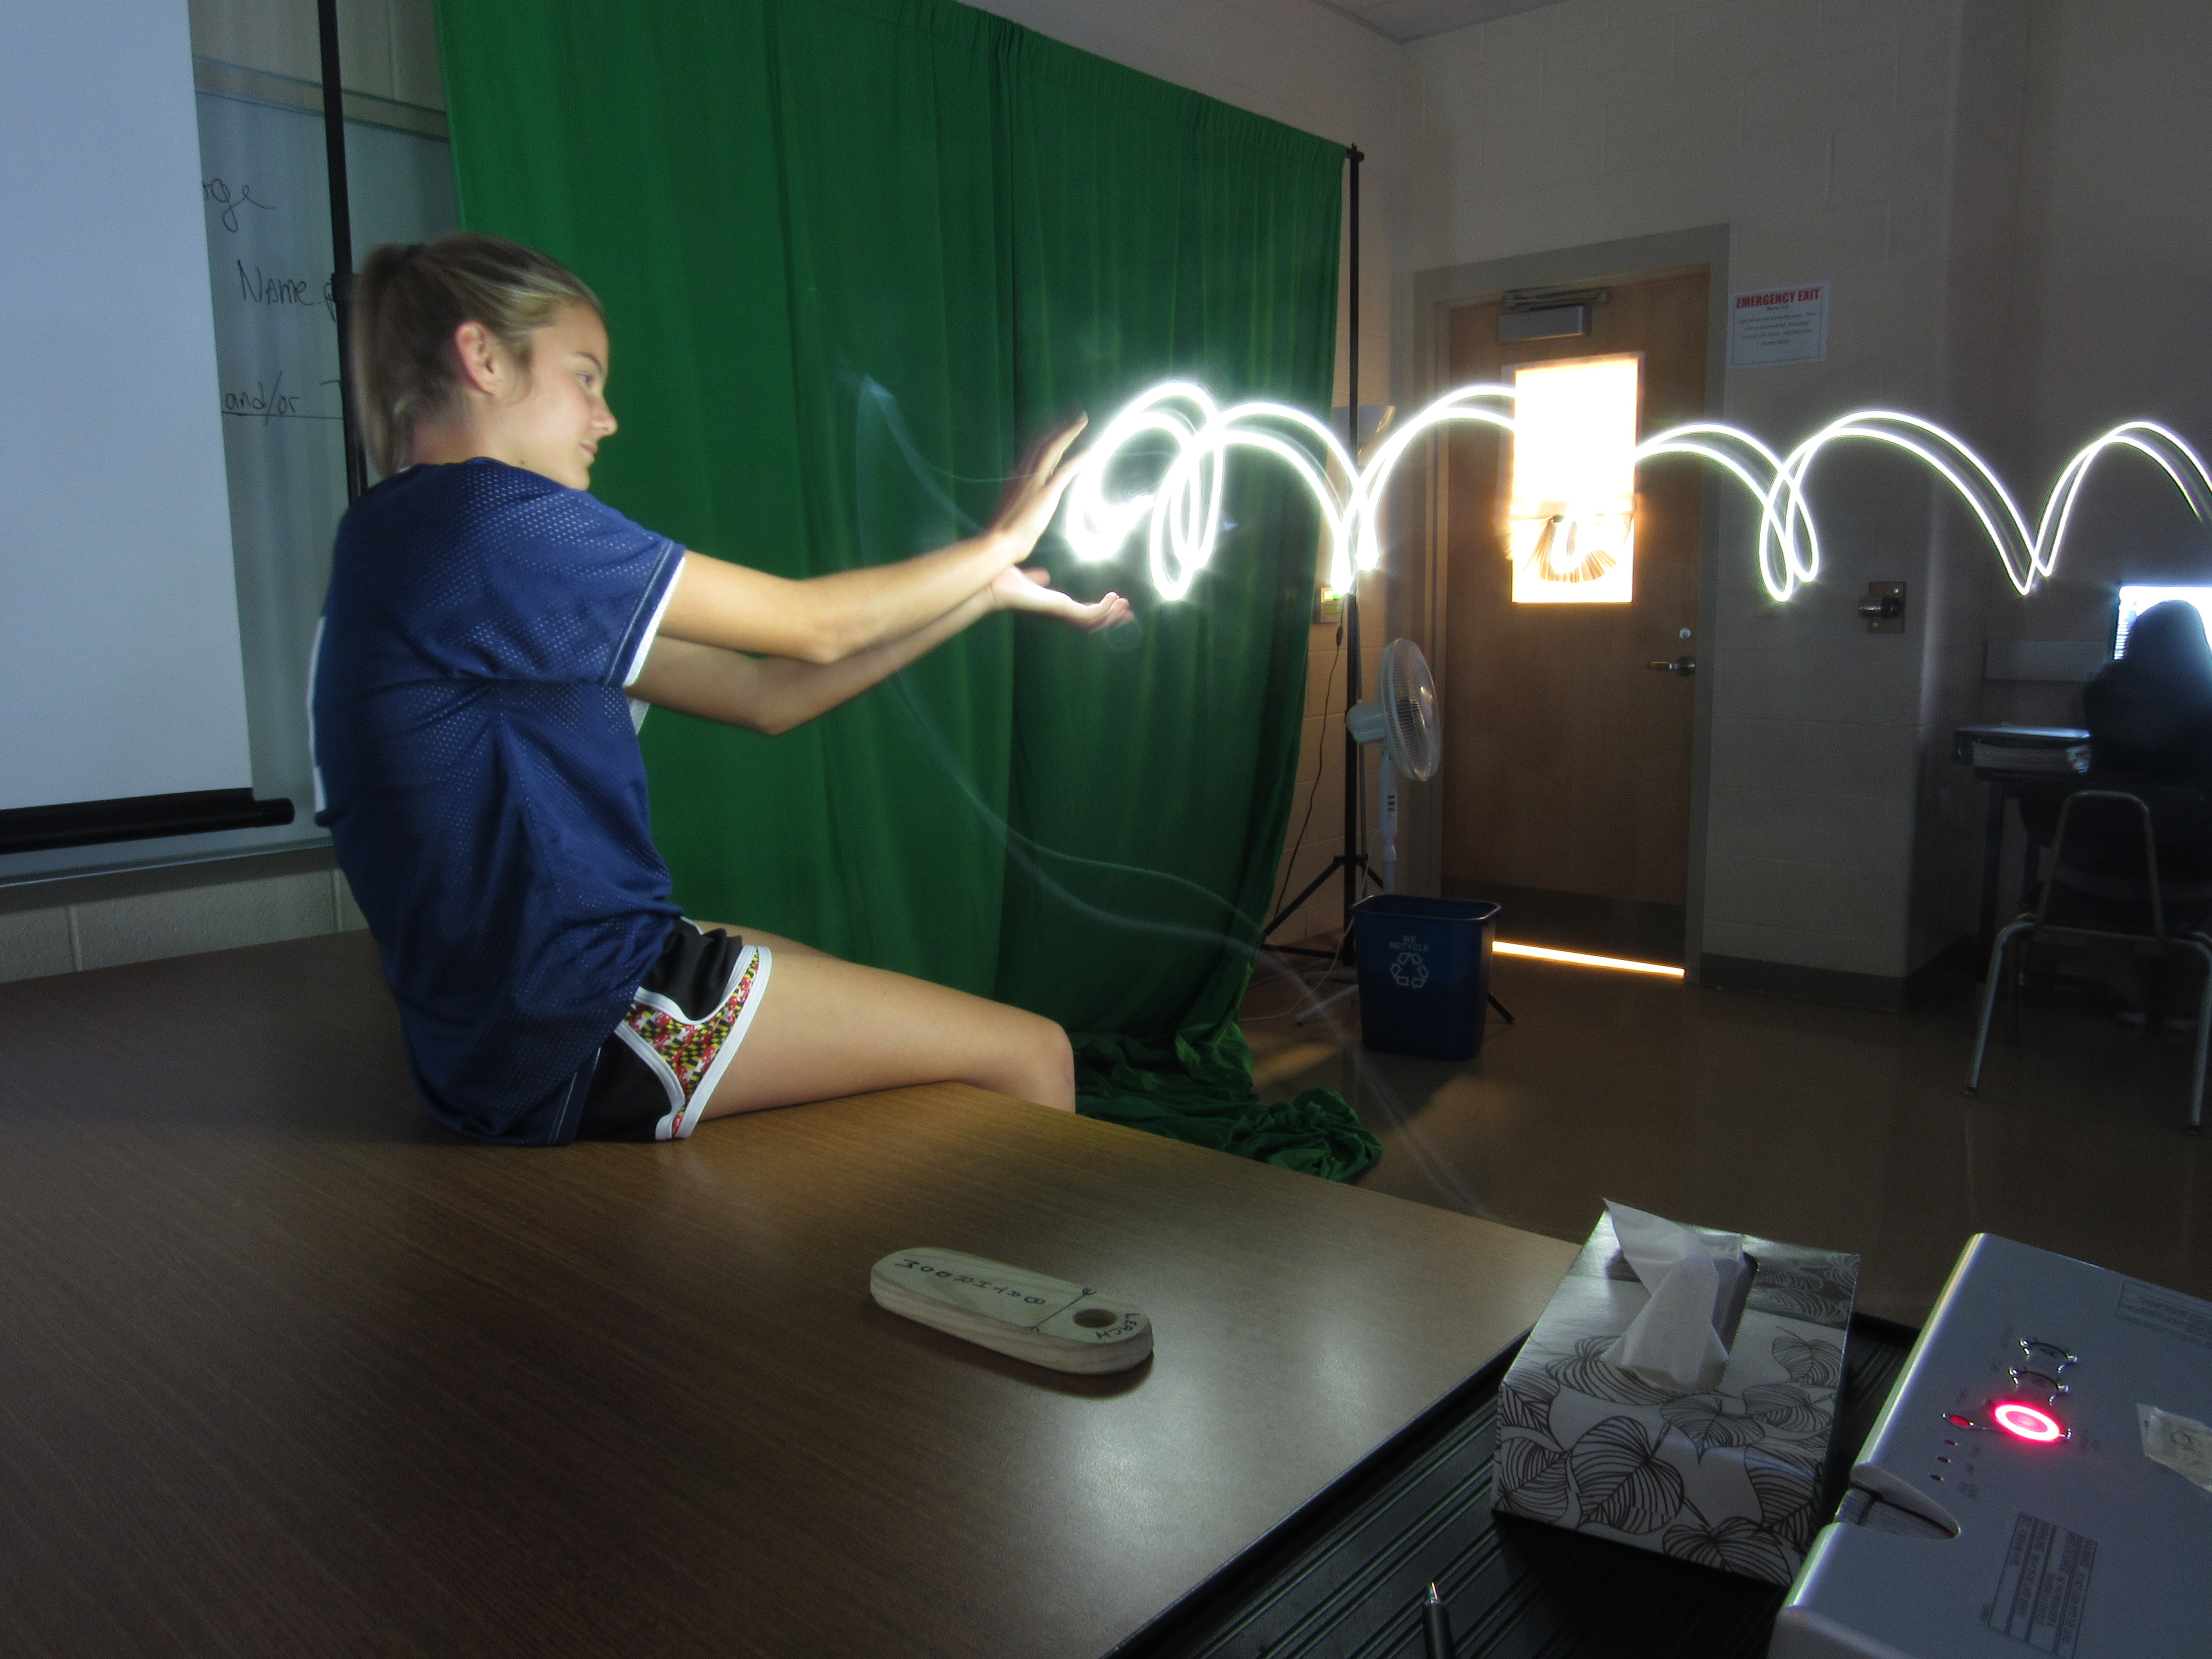
used the ISO and F-Stops (aperture) setting when we took out portraits with the black backgrounds.  For this project, shutter speed will be really important.  In order for you to “paint”, you will need to leave the shutter open as long as possible.  This will allow light to hit the sensor, but it will also give you and your teammates the chance to work.

I have left examples and tutorials at the bottom of this post to give you a place to start with settings and give you some ideas.

It’s going to be frustrating.  You’re going to run out of time to paint, your painting will take practice, the settings won’t be right, the camera will move…..  But, have fun and keep trying.

Here’s what you will need at the end:

+ 5-10 final graffiti images (per group)

+ How did you take your pictures? Settings? Steps?

+ What worked? What didn’t?

+ Frustrations

+ Ideas for taking this project to the next level

+ 1 photo in your post, must have logo

+ An active link to your Google Photo Album

+ Post must be in the “Light Graffiti” category


Portraits

When I stated planning this class over the summer, I really wanted to have you take portraits with an infinite background.  We have a couple of challenges…. The first being that we are at a middle school and not a professional studio.  The second, we have cameras that have manual settings, but we don’t have professional lighting.  After a lot of playing around and doing some (some = a lot) of youtube watching, I think I have it figured out.

There a few terms that you will need to become familiar with before you can start this project. The terms are ISO, Shutter Speed, and F-Stop.  These are the 3 settings that we can control on the cameras we have available to us.

Use the link HERE to define the terms I listed above.

I will give you a quick tutorial on how I took my photos based on my research, but I want most of this to be trial and error by you.  This will be a “team” effort for sure.

Your post needs to include:

  • Explain the process you used to take your photos and edit your photos.  Camera settings, lighting direction, distance from background.
  • What worked? 
  • What didn’t? 
  • A photo of you (with logo)
  • A photo you took (with logo)
  • An active link to a Google Photos Album that includes a photo of each person in your group.
  • The post category will be “Portraits“.

Below are some of the pictures I messed around with while working through this.  I am still learning and want to continue to learn during this project. Be serious, be artsy, goof around, and just keep trying.


Examples of poses for men: https://www.thephoblographer.com/2014/12/26/portrait-posing-basics-18-failproof-portrait-poses-men/

Examples of poses for women: https://www.thephoblographer.com/2014/12/22/portrait-photo-basics-25-failproof-portrait-poses-women/

Photo App Review

What’s your go to photo app on your phone.  Is it InstaSnap or Chatagram?  Well, I (we) want to know.

App reviews are a huge part of how people decide

what to put on their phones, especially if storage space is an issue.  A review usually includes a brief description of what the app does.  This is also an advertisement for the app.  App developers need downloads to stay in business.  There are also screenshots from the actual app.  Let’s be honest, you don’t actually read the description, you just look at the pictures.  🙂

Your task is to review 2 photo “apps”.  If you have a phone or similar device, review your favorite app.  If you don’t have a phone, don’t worry, there are plenty of online apps to use with a computer as well.  Everyone’s second review will be using an online website that can be used on a computer.  This would exclude programs like Fireworks and Photoshop.

Use Google Drive and an album in Google Photos like we did for our 24 Colors Project.

Each review should include:

  • Name of the app or website
  • if it’s a site, include the web address
  • a description of the app and what’s it is used for
  • why it’s your favorite
  • images used in the app
  • add the category of “App Review” to your post

24 Colors

Welcome to your first photography project.  I am really looking forward to seeing the photos you take.  You are going to be choose 15  crayons  and finding those colors in the world around you.  This will be a challenge, but it should make you start to notice the colors that we see everyday.  I would like this to be more than just taking pictures of crayons with a color that matches them.  I would like to see you be creative with how you place and photograph the crayons.  I have left some examples below for you to look at below.

When writing your post you must include:

  • An overview of the assignment
  • The challenges of the project
  • What you found to be easy
  • Favorite (displayed like mine below)
  • A link to your Google Drive folder.

When you are ready to post, you will be making a new page on your website.

I know you are creative, now is a great time to show it.

Yellow

gray.fw

white