White Background

Album Link: https://photos.app.goo.gl/4TsTOlDKp1ws2vo83

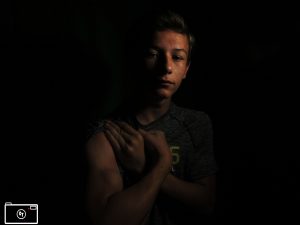
This project challenged us to make a picture with practically no background involved in the picture.  I had to take lights and attach them to seats and put them at a background so that the background was so white it was clear. What didn’t work id that when you had to little light the background wouldn’t turn out white.  Also with the curves you had to make lots of changes to him to make it look like that. It was challenging but fun at the same time.

Here is a picture of me by Carter Taggert

White Background

I used Manuel setting and ISO to make the background white.What worked was that I a scroll bar of something like that to make the white background whiter. What didn’t work was that if you were to close to the background you could see the shadow.

This picture was taken by Liza

this is a picture that I took of my Friends.

https://photos.app.goo.gl/cUE5duVPFiPKN81O2

White Backgrounds

This week in class I had to take pictures, and edit them to create an infinite white background. I edited my pictures on Adobe Photoshop. While taking my pictures, I had to adjust the ISO and shutter speed to take a picture that I was satisfied with. I also had to make sure the camera was on manual settings. A challenge during this project was making sure there were no shadows in the photograph. Everything else about the project was easy to learn, and understand. Here are three of my favorite pictures, that I took and edited…

Click the link below to see more pictures I took and edited…

https://photos.app.goo.gl/zZs7rB3YCzqg9fJ02

This is my favorite picture of myself. I edited the picture on Adobe Photoshop. My friend, Samantha Records, took this picture of me.

White Backgrounds

https://photos.app.goo.gl/a8KKsgt0z0uGrJRH2

The link above is to see all other photos I took and edited during this project.

This is my favorite photo that I took and edited during our White Background Photos Project. We had to take photos on a white background, make it infinite background, and then edit them. I preferably, made my photos black and white, so it made a dramatic affect of the background and person. It was challenging to make the photos not have a shadow and make the lighting right. We messed with the F-stop, ISO, and shutter speed to make the photo have no background. I learned a lot about the camera and thought this was a very cool project to do.

Portraits 2

This is my favorite photo that I took and edited. Some difficulty’s with this part of the project was trying to light up their face and the back round so there was no shadow’s. Also a difficulty was to make the right angle that let the light hit their skin just right. But the people that I took the photographs of made it easy because they knew just the right pose to make to make the picture look good.

https://photos.app.goo.gl/pQzcyf0L89XvYwBm2

Portraits-Black Background

For this project the goal was to create a professional grade portrait with a traditional camera.  I isolated the subject of my photo and edited the shutter speed to prevent the picture from being flooded with light. It was difficult to not include a shadow in my picture. However, once taken, removing the light was easy.

https://photos.app.goo.gl/OtbpKvNl41pu3il52

Portraits

Our goal for this project was to take pictures with an infinite background, using three camera settings. This ensured that the background would be black, yet enough light would be captured by the camera lens to see the person. These manual camera modes we adjusted were ISO, Shutter Speed, and F-Stop. I edited these photos on Adobe Photoshop, applying curves to brighten, darken, or emphasize certain tones within the picture. Using these editing tools worked very well. However, uploading the images to Google Photos was difficult because it wouldn’t work unless it was saved under a JPEG file. In addition, it was challenging to find just the right angle and lighting in order to create this darkened effect.

This is a picture of me taken by Connie.

https://photos.app.goo.gl/cBw2ipumBlCDvnz72

Portraits

In order to get the pictures to look like the ones I put below I had to mess with the ISO and Shutter Speed. As I was editing the photos I was having a lot of trouble with Shutter Speed because I had no idea how fast it could take a picture. Lastly, I believe that the ISO worked perfectly with my pictures because I knew what I was supposed to do with the picture. Go to:https://photos.google.com/album/AF1QipOabstgL37I90BhaUFDI2el_bLX4JKrM-XT2AHw

portrait

When taking the photos messing with the shutter speed was very easy and interesting to use because the lighting change was cool. When changing the lamp lighting putting to the side made the photos turn out bright but putting directly strait worked well.

My favorite picture:


favorite picture someone took of me:


https://photos.app.goo.gl/bgrVDZ6E3FbN8p2p2

Black and white backgrounds

I took the picture but I had to put light in  it so the person would show up.When You took the picture in the dark that did not work .And the clothes you are wearing like if I wore dark close you could not see me and if I was wearing light colors you could see me better.

This is a picture that I took

This is a picture that someone took of me.

https://photos.app.goo.gl/AYKFwNtpROZAkOKB3