Light Graffiti

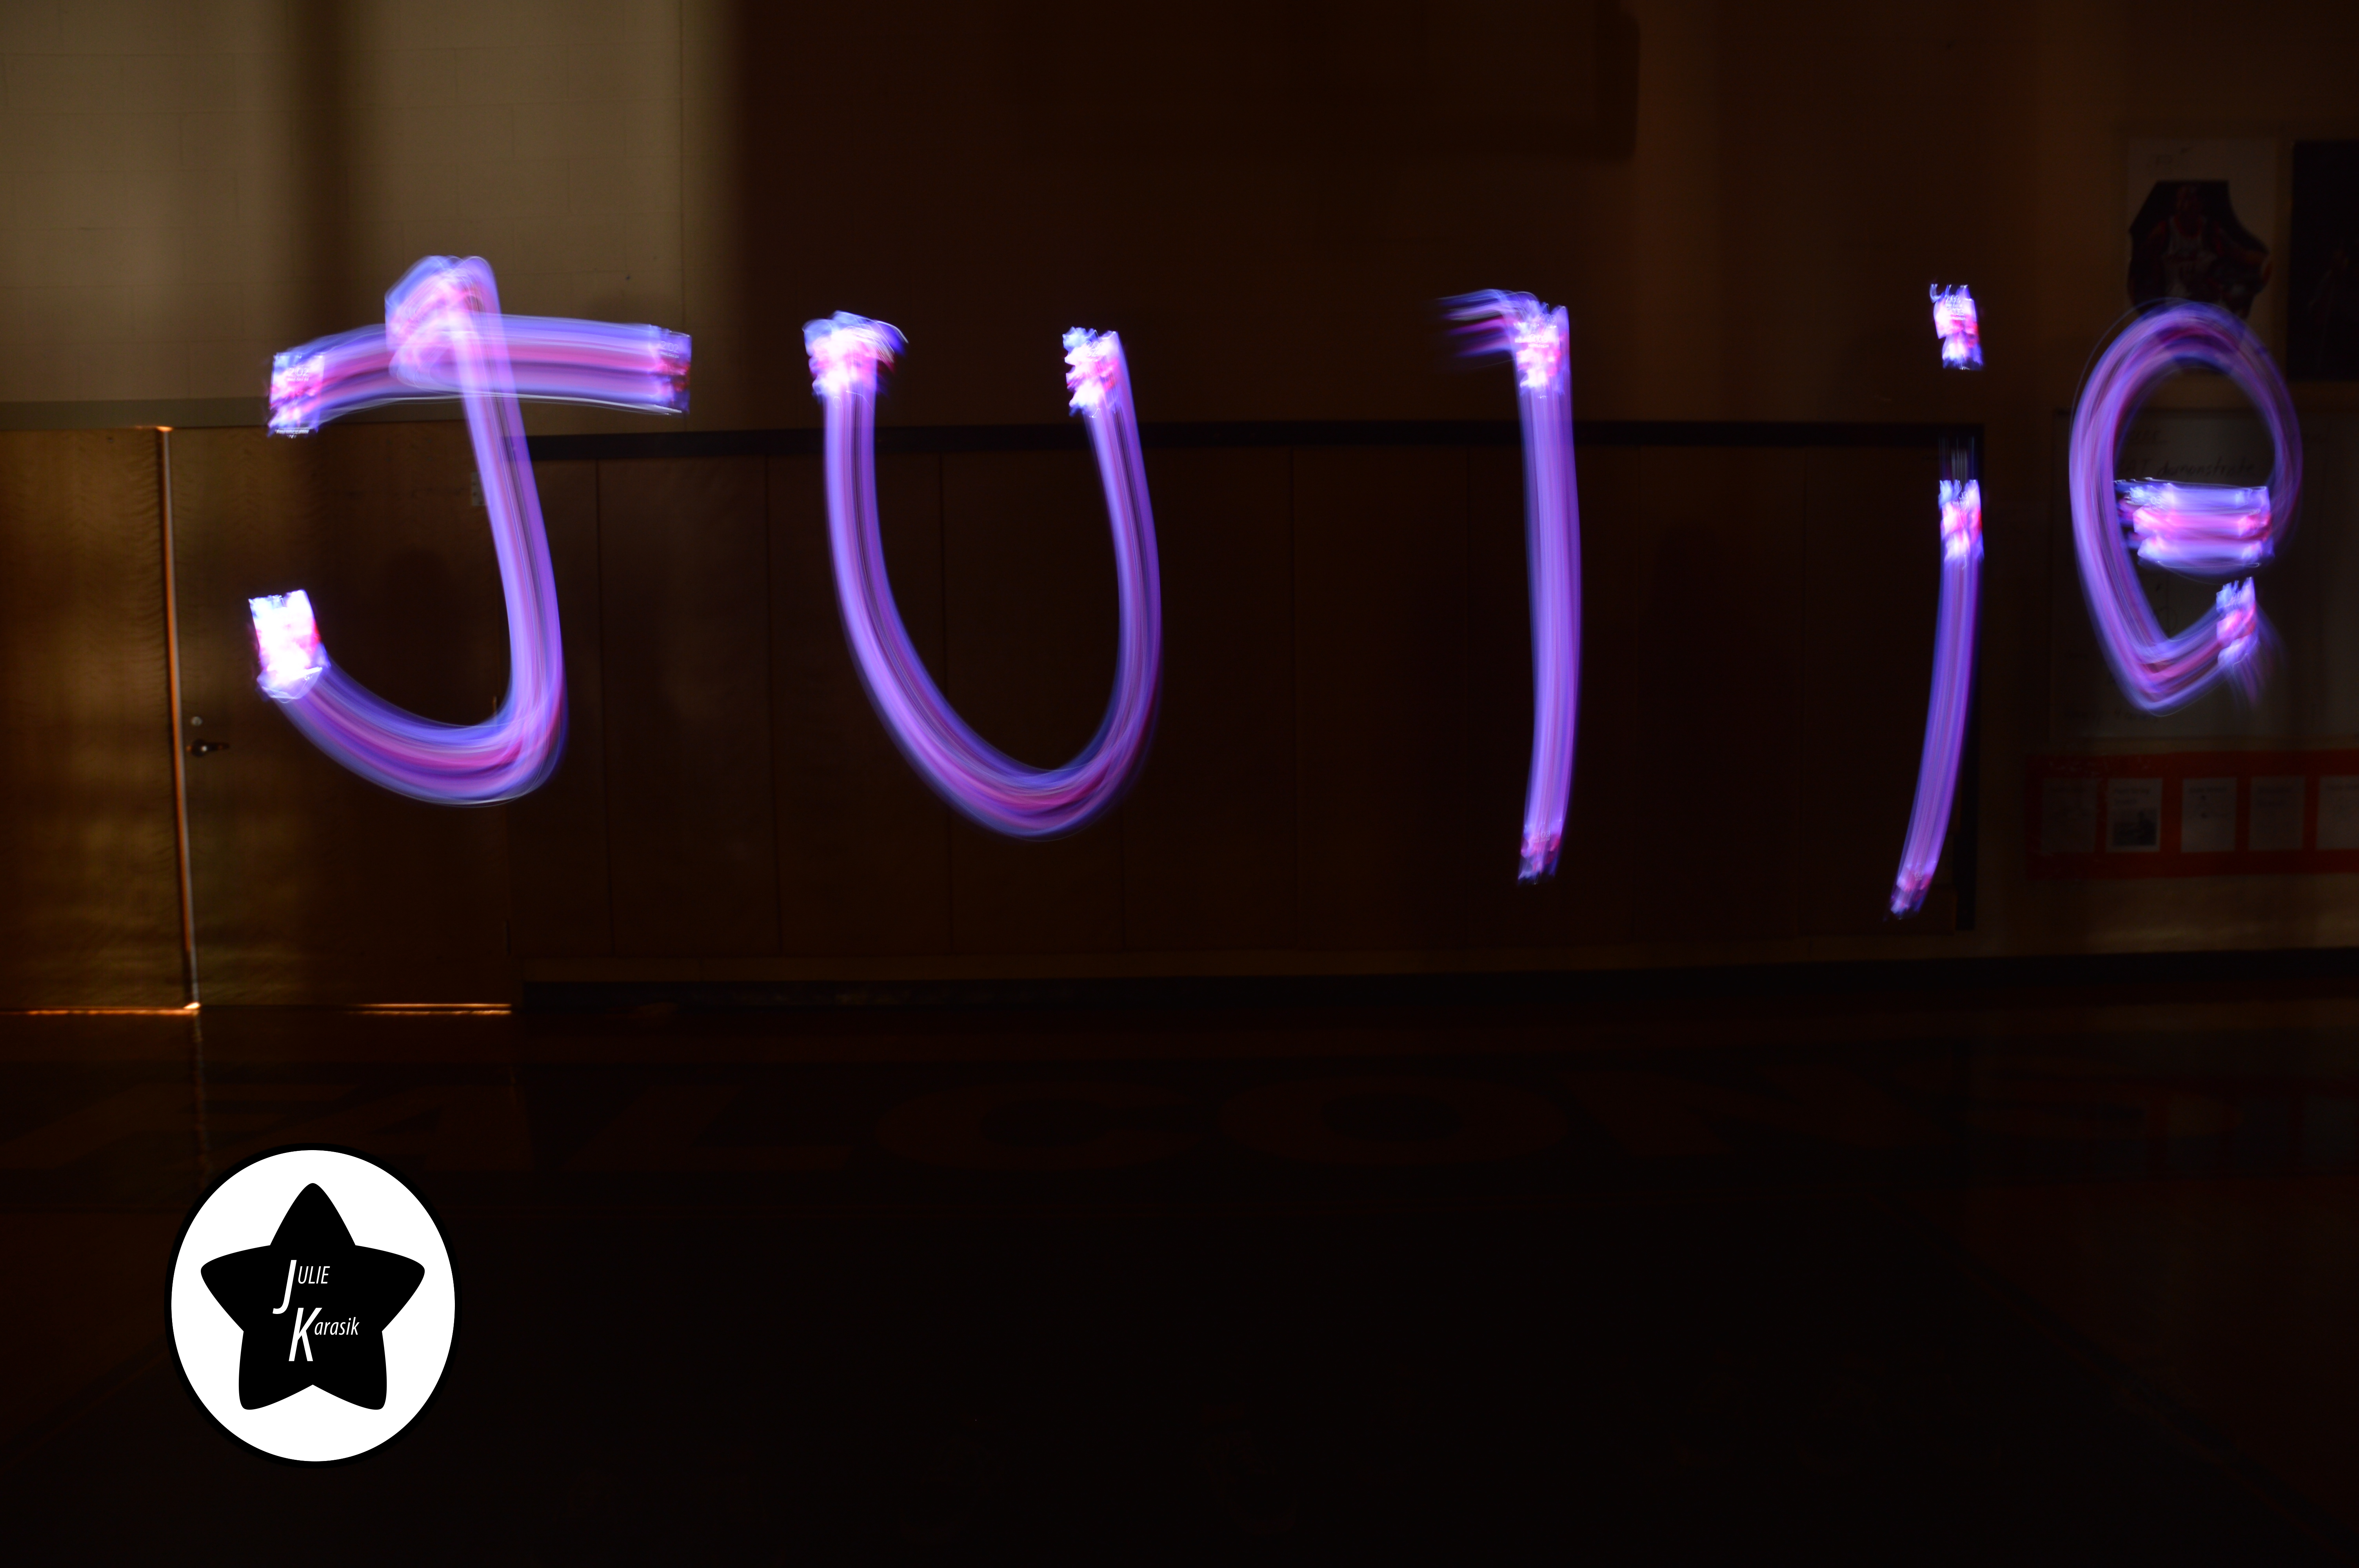
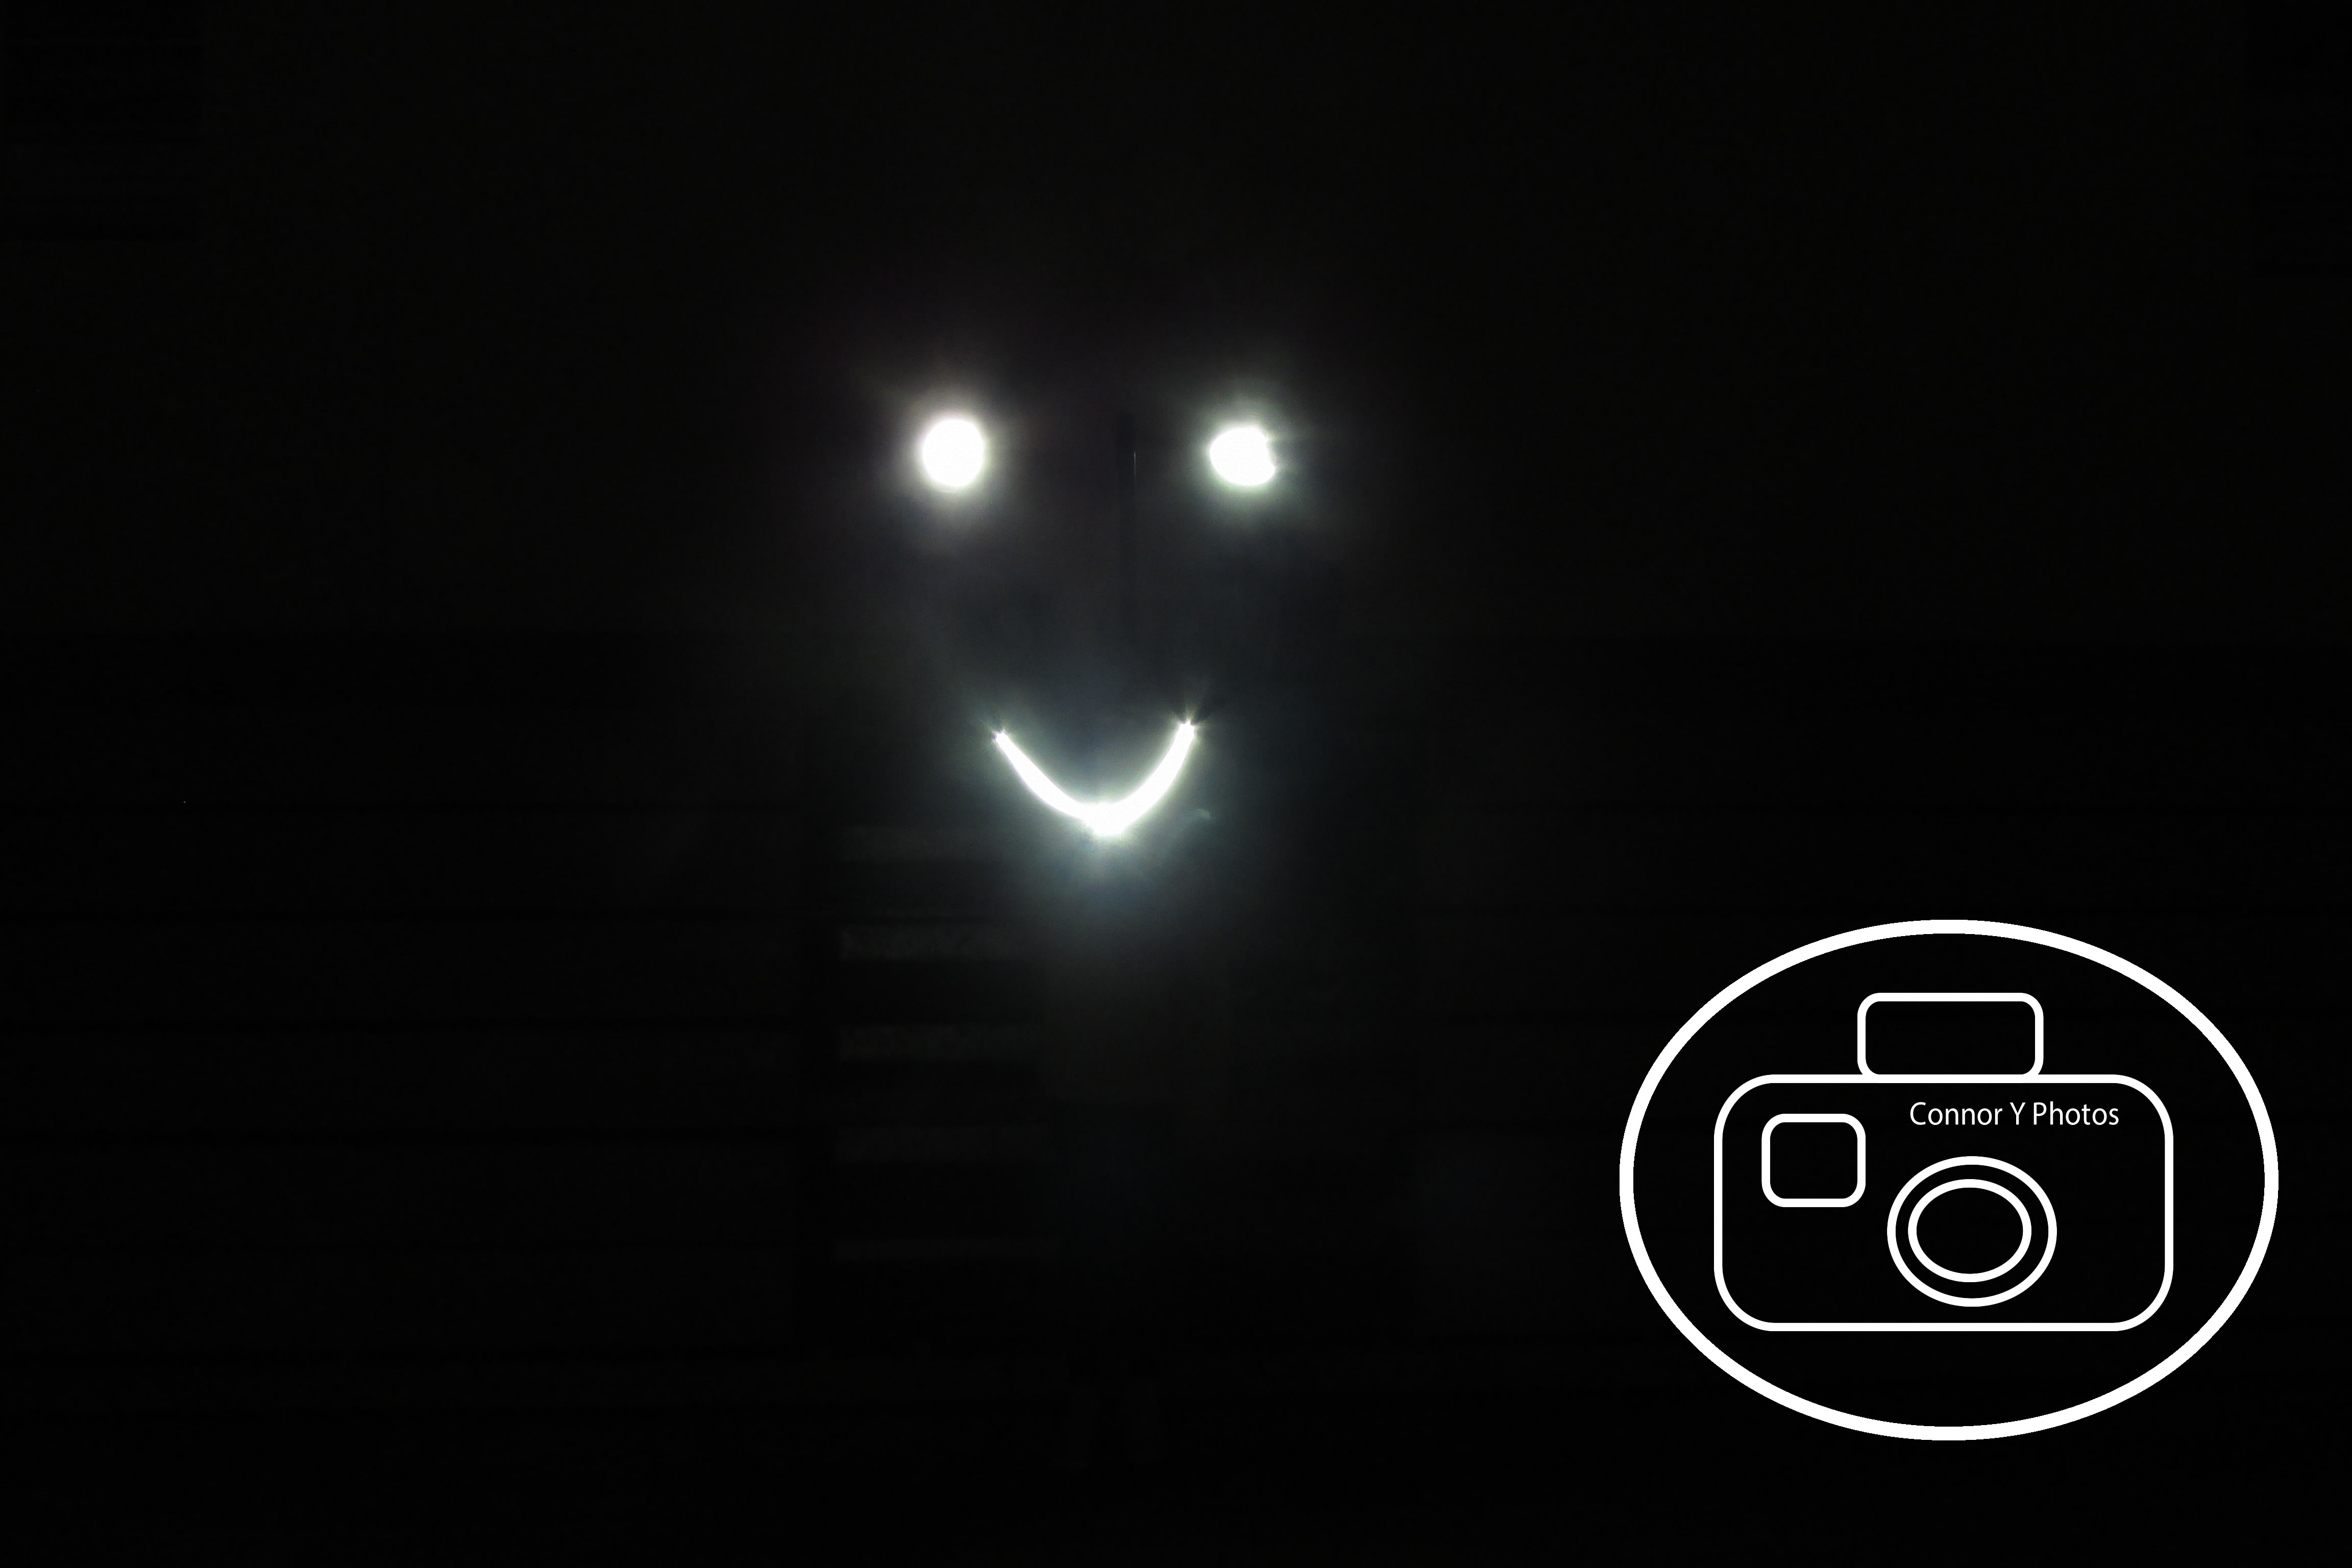
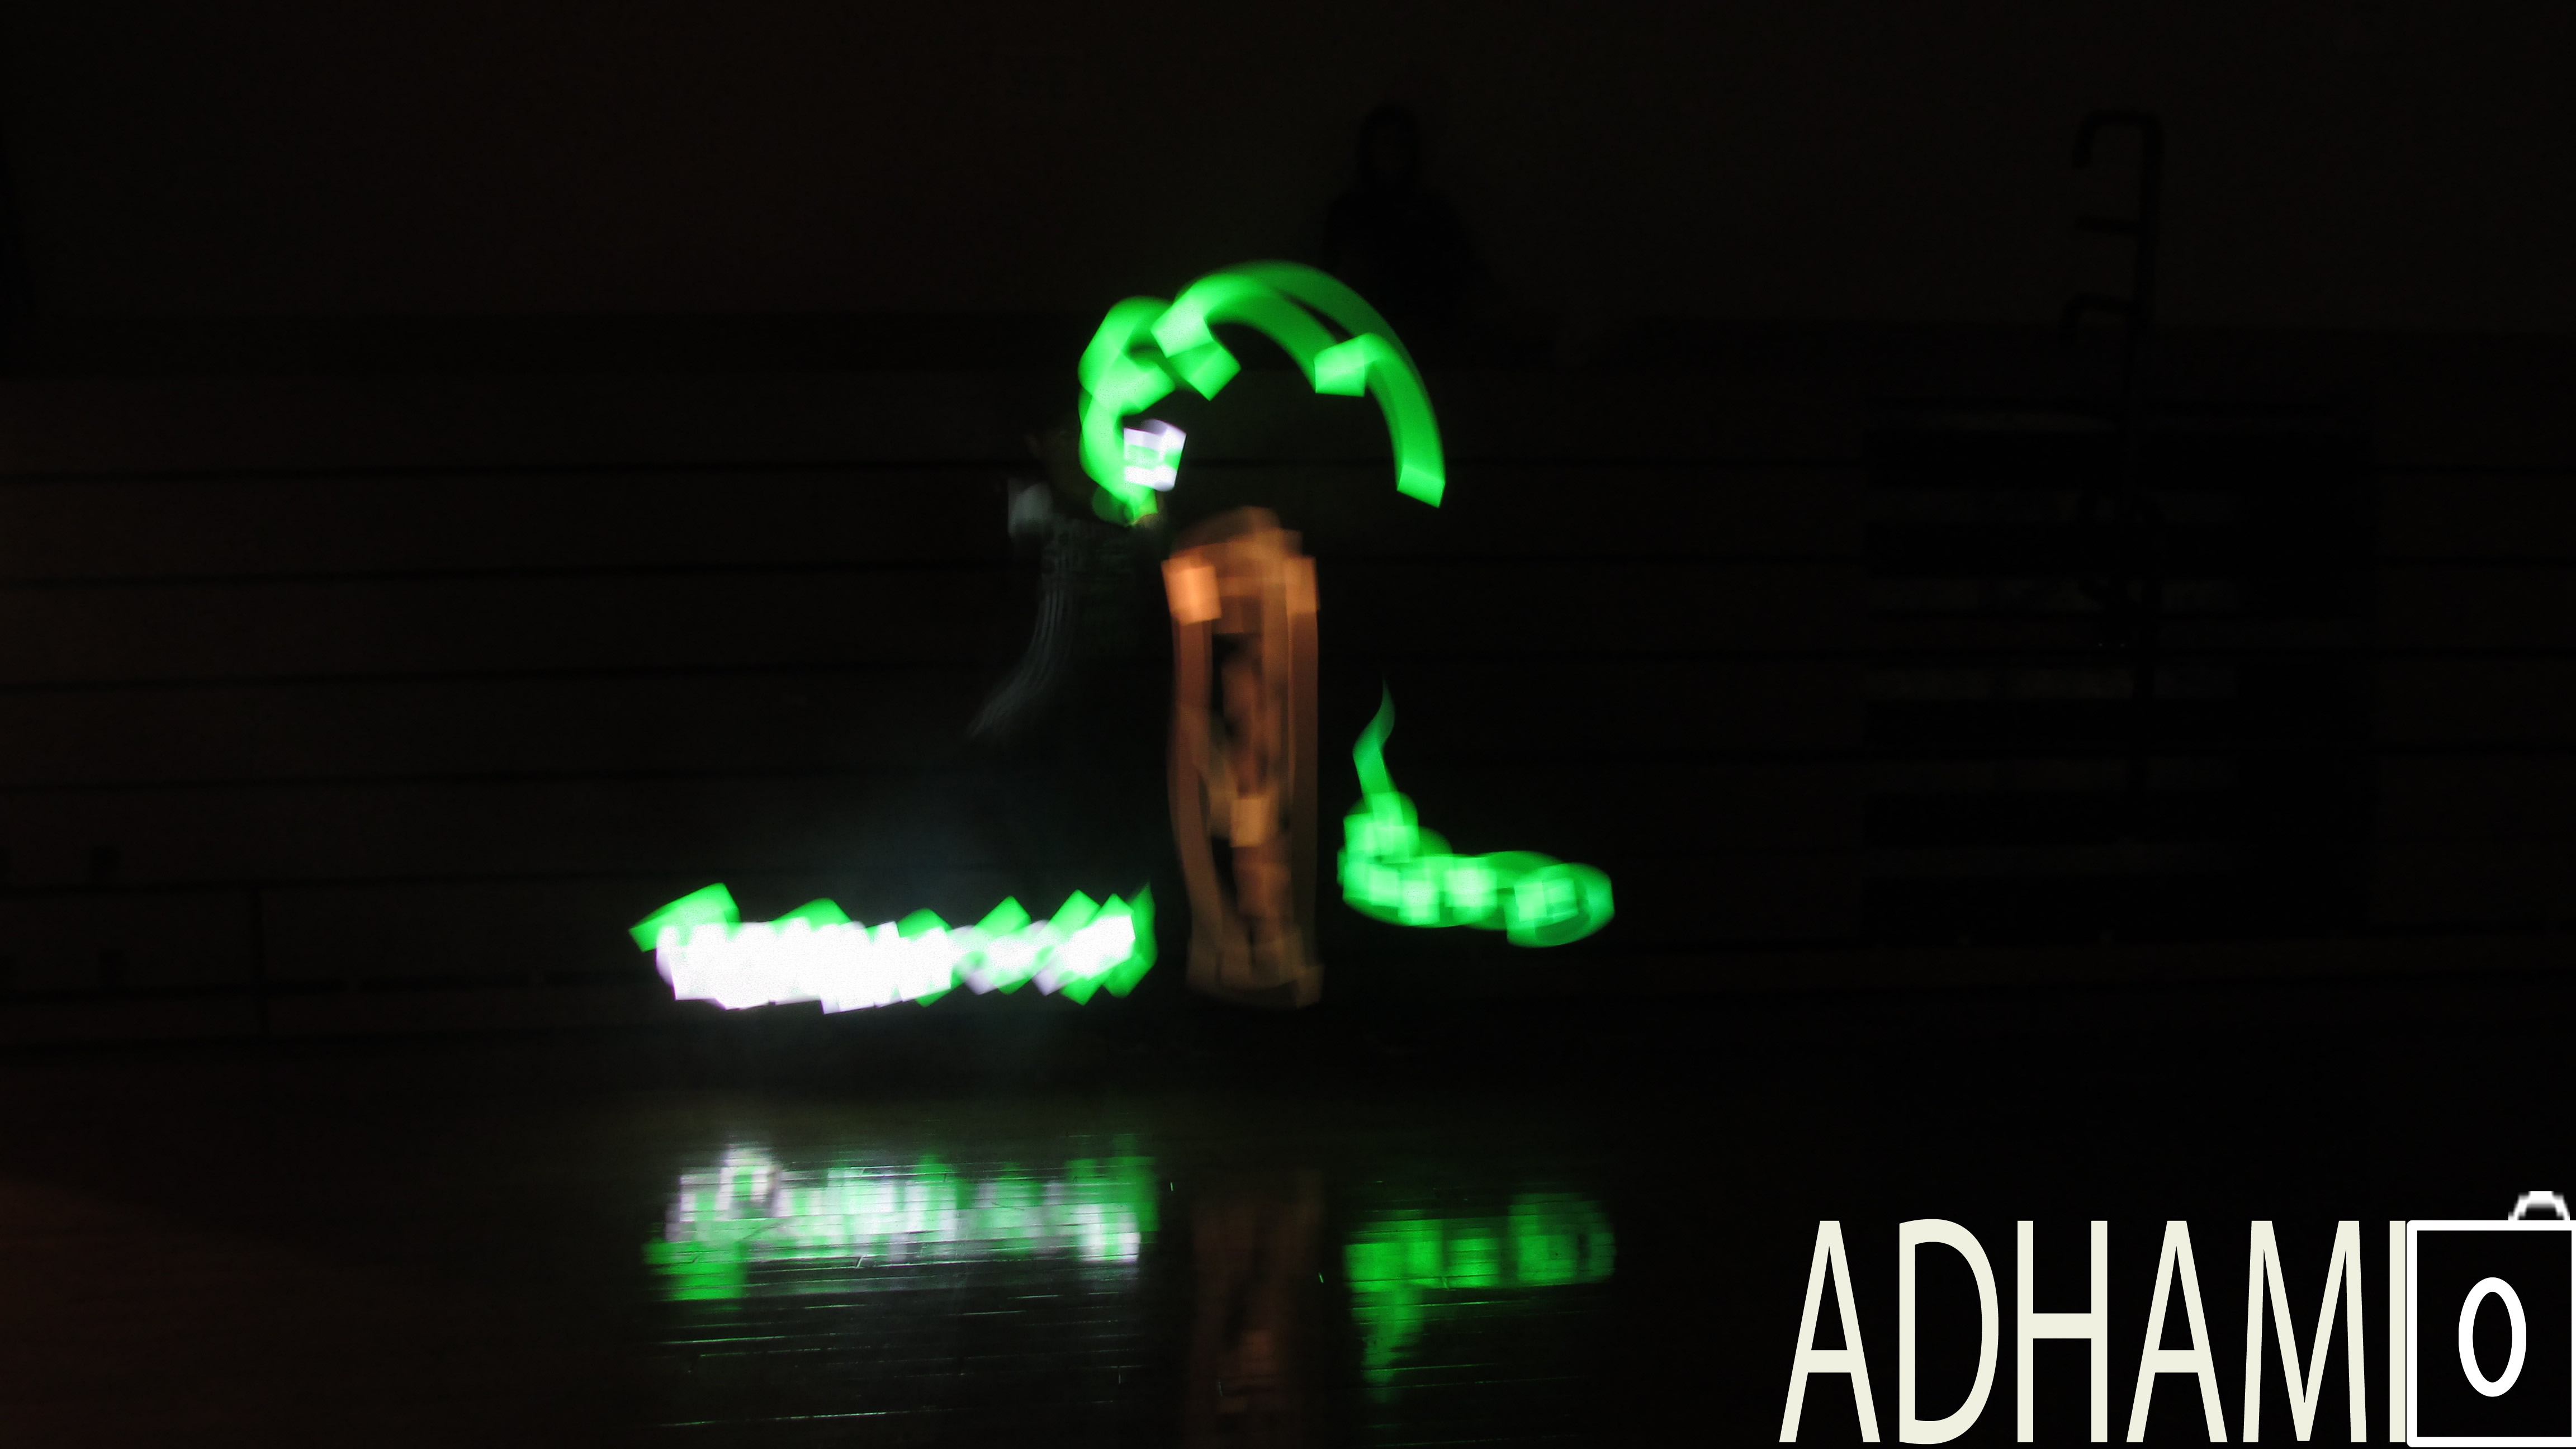
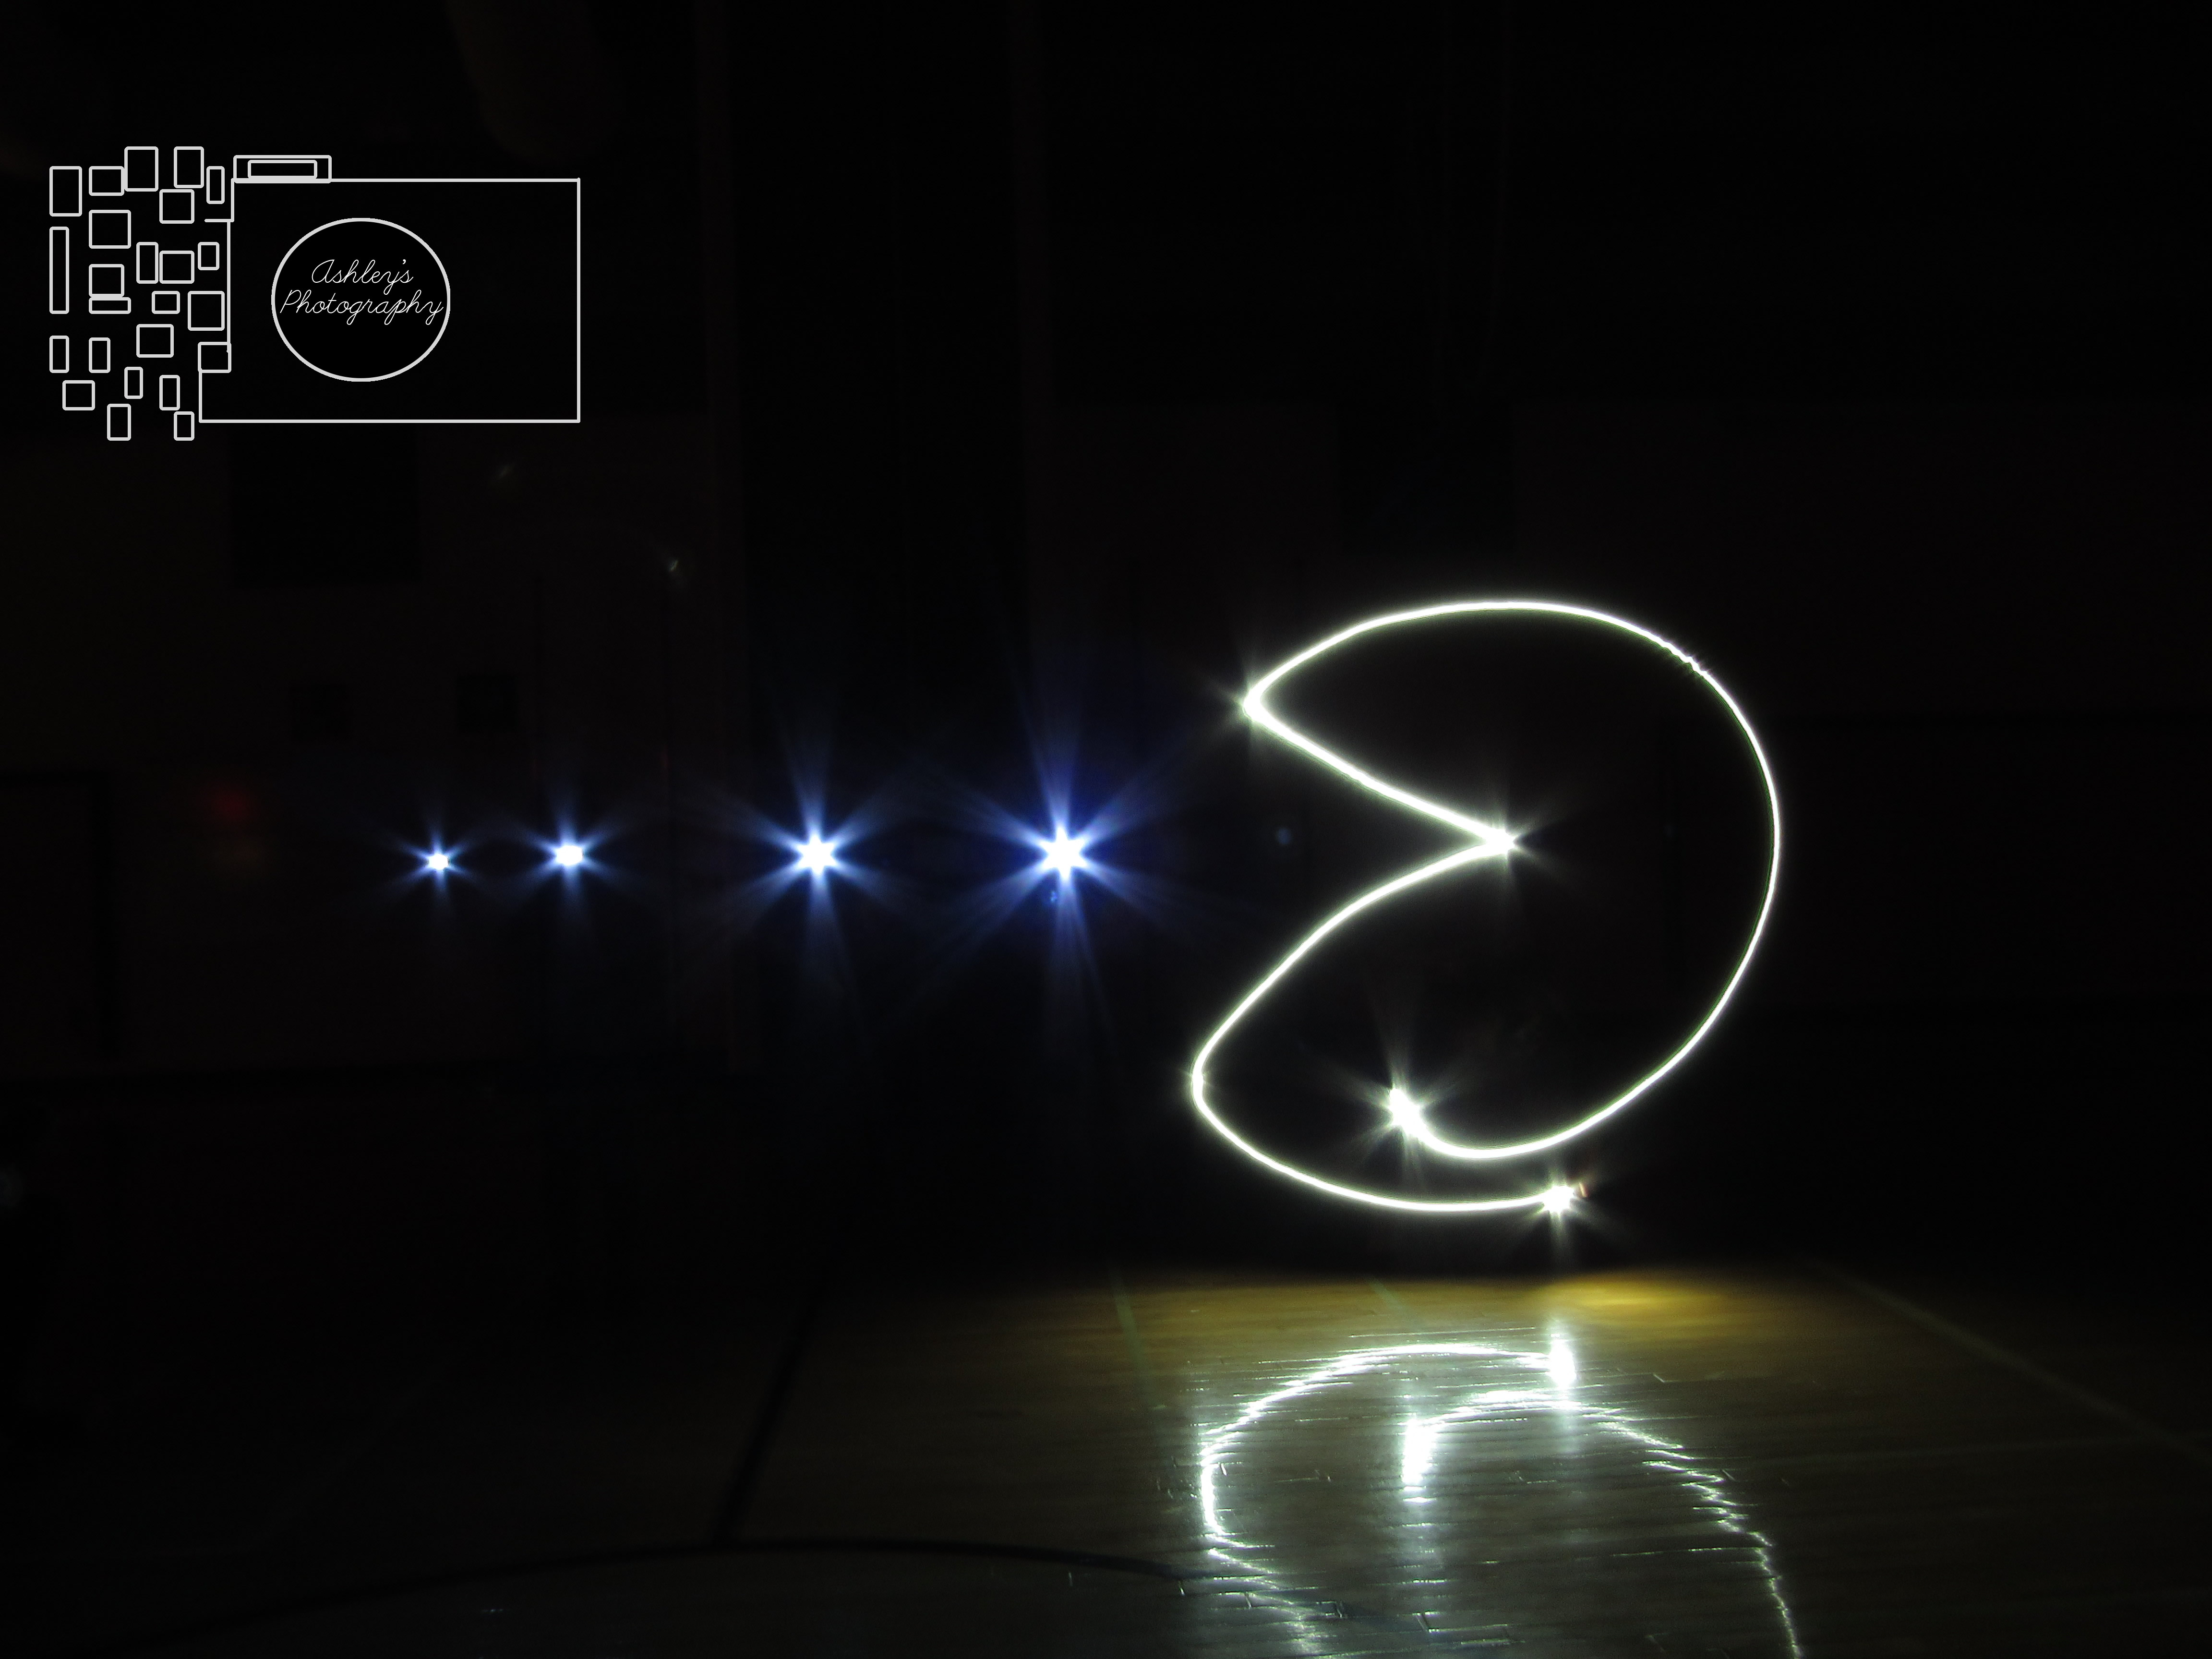
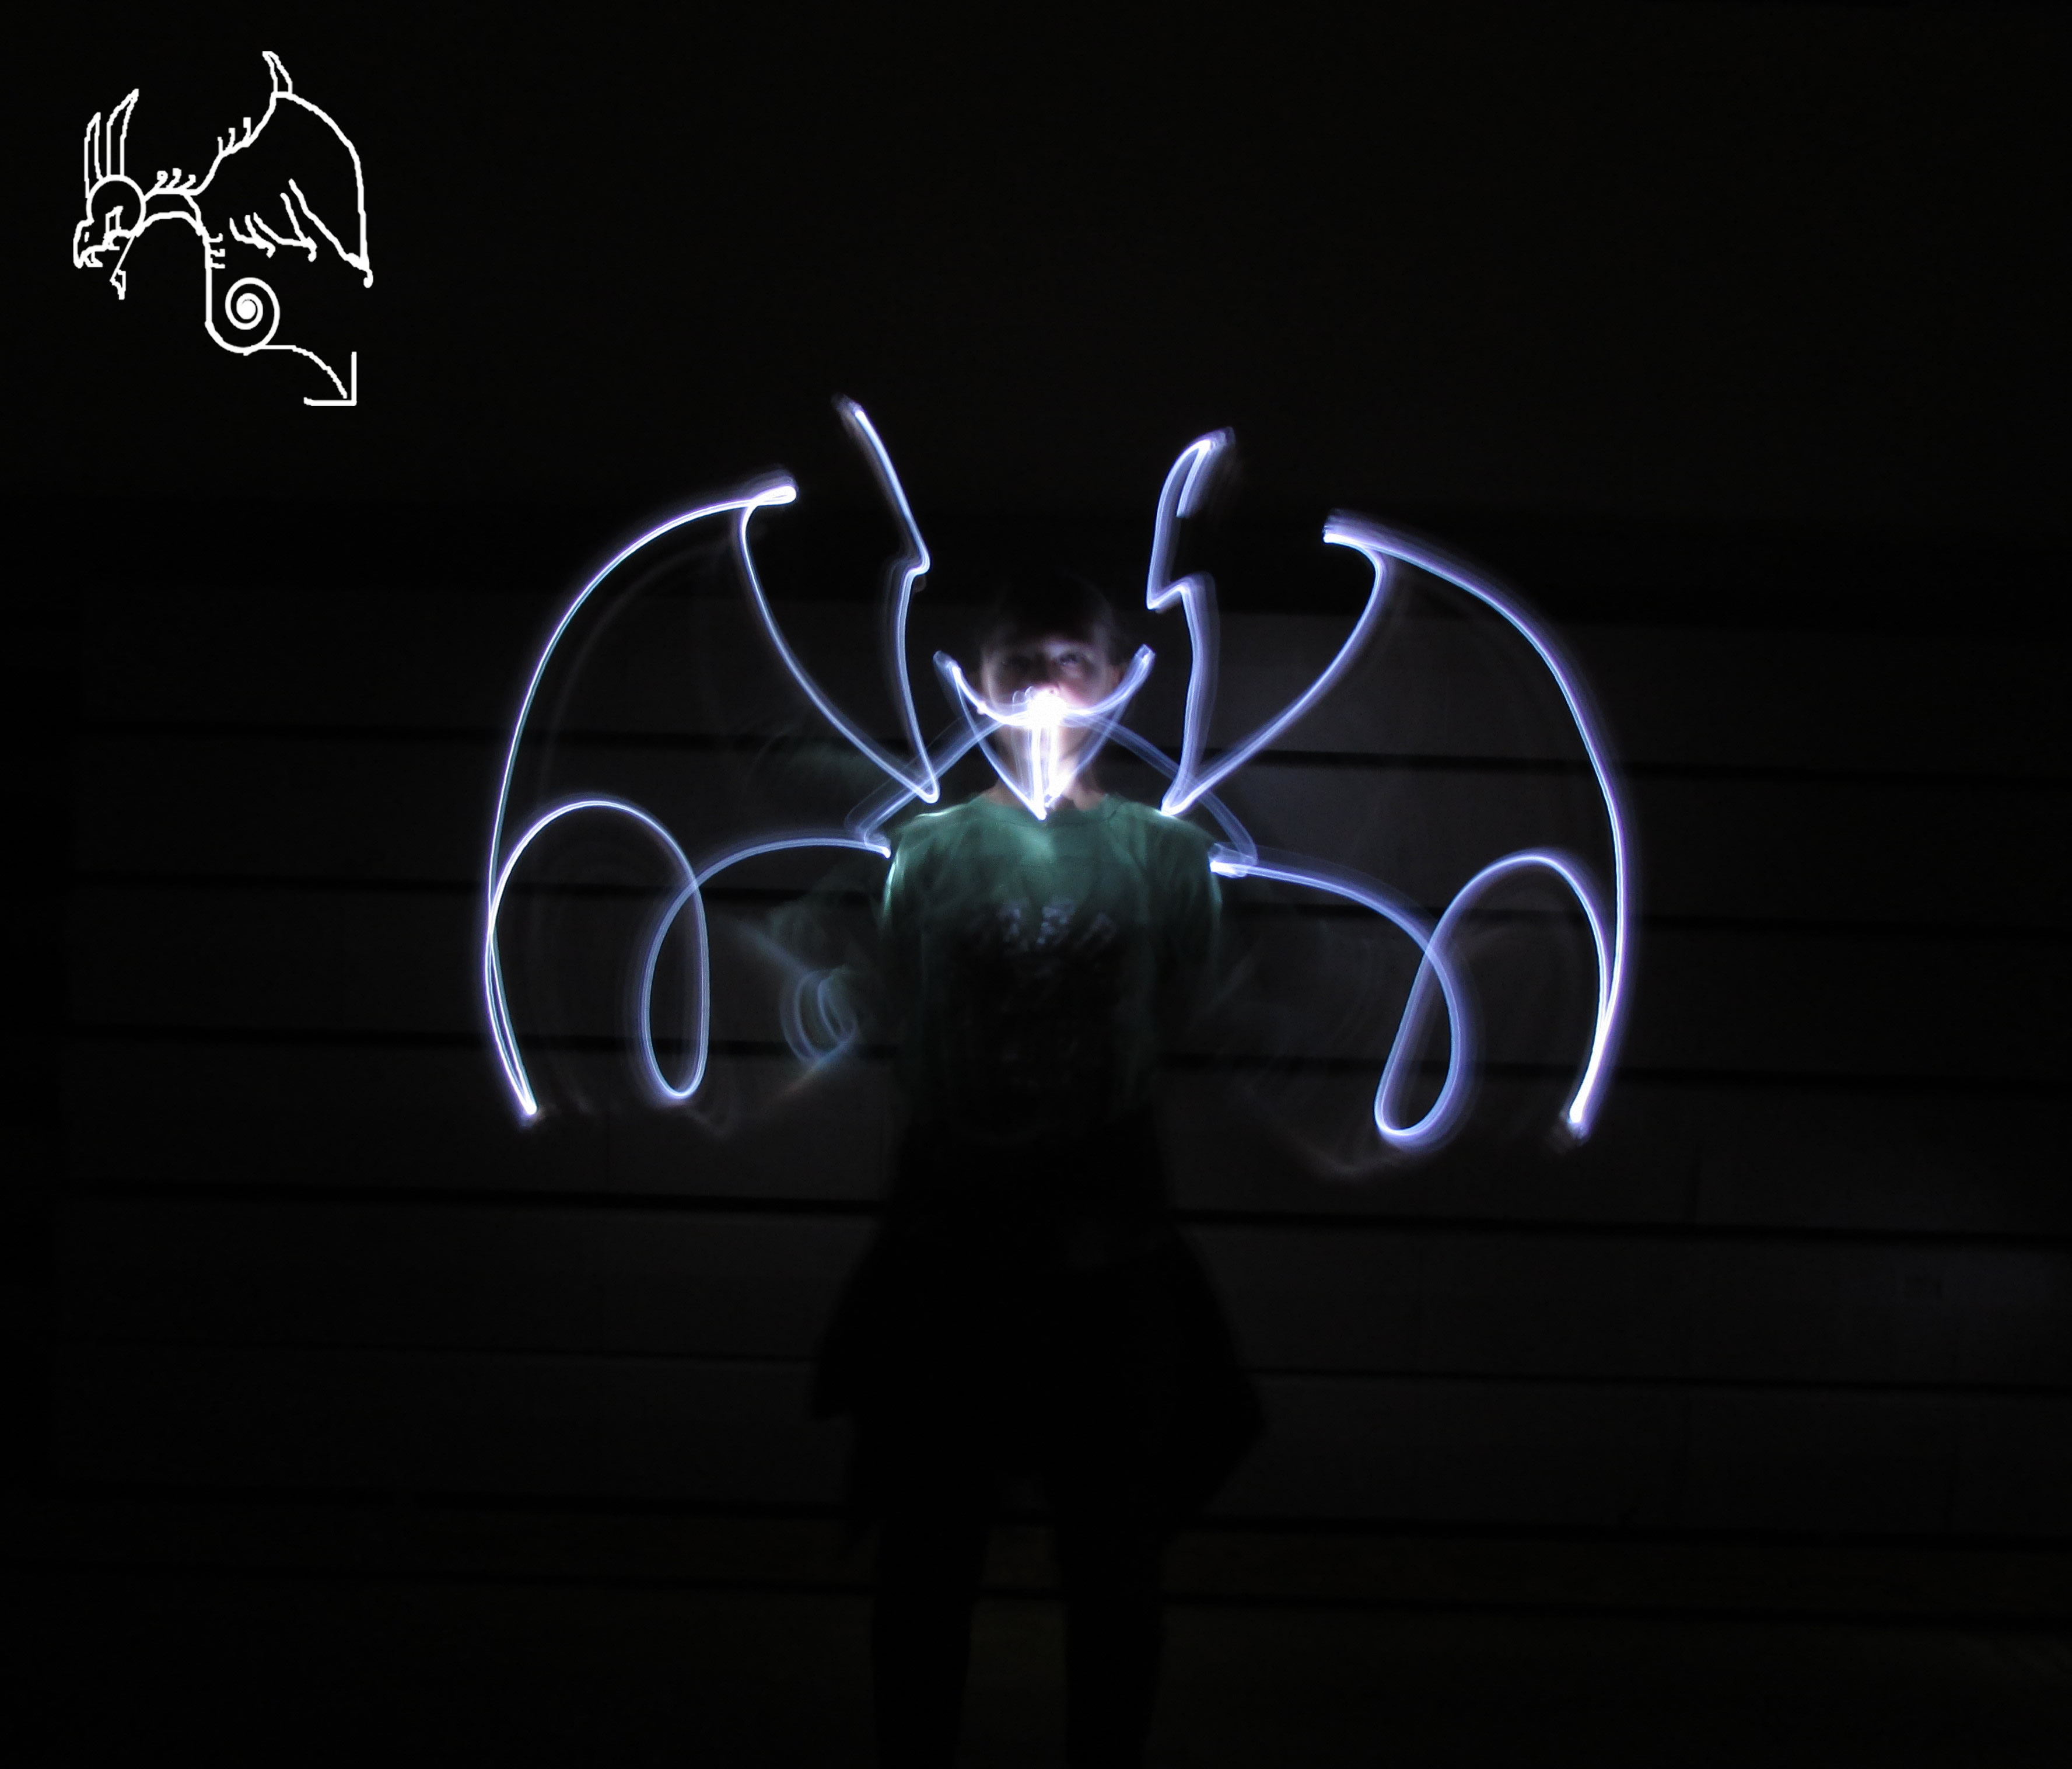
This assignment was one of the funnest and coolest things I’ve ever done in my life. I was amazed the moment I realized drawing with light was possible with my trusty camera. To take pictures of light graffiti, you’ll need to setup some settings on your camera first. To start off, you’ll need to put the settings of your camera on manual. Then, set your ISO to its lowest value, which in my case is 100. This will make it very sensitive to any light, so make sure your atmosphere is as dark as possible. Next, set up how long you want your camera to be exposed for before taking a picture by choosing the quantity of seconds. After that, draw your way with flashlights, your phone, glow sticks, and more! I got control of the settings very quickly, but there were things that were not so easy. It was difficult to understand for me and my group to know when to start drawing (at the end we concluded that we needed to wait for 2 seconds after we press the camera button to start drawing). Also, since we didn’t know how the light would show itself at the end, most of our photos turned out to be sloppy and sometimes blurry. The next time I try something like this, I’ll probably go outside at night and set up the camera’s shudder speed for as long as possible to create an epic photo with more than one light!                                                                                                                                     -Marie Valouiski

Link over here for the rest of the photos.

Light Graffiti

We took the pictures by keeping the shutter open then using light to make stuff then turning the shutter off. It worked when you used color on our phones by making the brightness all the way up. It didn’t work using flash lights for my group. It was really annoying when i had to write the letters back words to spell out stuff. To take it to the next level use more lights and people for help.      JK

Rule of Thirds

One of the things that didn’t work was trying to take pictures of moving objects, because the object would always turn up blurry. This meant that I had to take pictures of inanimate objects, a light pole, or a soccer ball, or a bench, etc. I thought that this project was going to be boring, but it turned out to be really fun. I used the grid on my phone to make sure that the whole object was in one third of the picture. Then I made sure that my phone was still while the picture was taken. 

Find the rest of the pictures here.

Rule of Thirds

In this project, it was very easy to crop the picture because my phone had a grid. However, finding different things to take pictures of was challenging because there were a lot of options but you had to choose wisely because it’s much easier if it has a center. My thoughts before the project were that it would be one of the hardest project but it turned out to not be that hard. I used the grid in my camera settings on my phone and lined up the object/person to the line. If you want to see the rest of the photos, click here

Rule of Thirds

When taking my photos for the rule of thirds, it was easy to set up the shot. On settings on my phone I turned on the grid for my camera. Using the grid on my camera, I lined up my person and/or my objects on one third of the grid on my phone. Your eye automatically focuses on the rule of thirds. In this project, it was hard to edit the photos so that the object or person is exactly on the rule of thirds. Before this project, I had no clue what the rule of thirds was, but now, I can use it with any pictures I take. Click here to see all of my photos, here.


Light Graffiti

We took our pictures by having the shutter open for as long as possible. We turned on the flashlights while the shutter was open and started painting with the light. Having many attempts for one photo really worked because you could choose your best photo. Moving around while painting didn’t work because it made the picture blurry. It was really frustrating to figure out how you could paint your desired picture without messing it up. For taking this project to the next level, we could do a short stop motion video using light graffiti.

You can see the rest of the photos here.

Rule Of Thirds

In this project we used the rule of thirds to make people or objects in a specific place, either on the right or left. I took pictures with my phone for this project. The project was hard to complete because my phone isn’t the best camera to use, but it still was able to get the right photos. An easy part to accomplish the project was finding the right objects to take pictures of around my house.

Link is here.

Kenia’s Rule Of Thirds

in this project we had to take pictures of any person or objects, and the camera had the 3 lines and there we took the photos between the lines without making any movement, and the difficult thing was to see that object to take a picture and that could be seen very well We spent a few days taking pictures outside the school and in the main gym. If you want to see my photos go by clicking Here

Light Graffiti

The settings we used to take the pictures were ISO 100, F stop 5.6, and 15 second long shutter speed (maximum). The steps we took were to have someone supervise the creation of the photos while the other two would draw the scene with their lights. This worked sometimes, but there was a fourth group member that was not very helpful during the process, ruining the pictures and kicking everyone else to mess up the pictures. Also, the shutter only stayed open for 15 seconds, so our pictures were rushed. My idea for taking this to the next level would be to draw picture for minutes at a time, adding a ton of detail. 

See the rest of the photos here

Light Graffiti

We took our pictures by putting the camera to manual, used F-Stops ISO setting.  We had to put the shutter speed to 10 seconds and during those 10 seconds we used our light to make a design.  What worked was using a flashlight.  What didn’t work was using the light from your phone.  What frustrated me during the project was getting everybody to do their design on time and finding backgrounds to do.   To look at the rest of my photos click here.