Light Graffiti

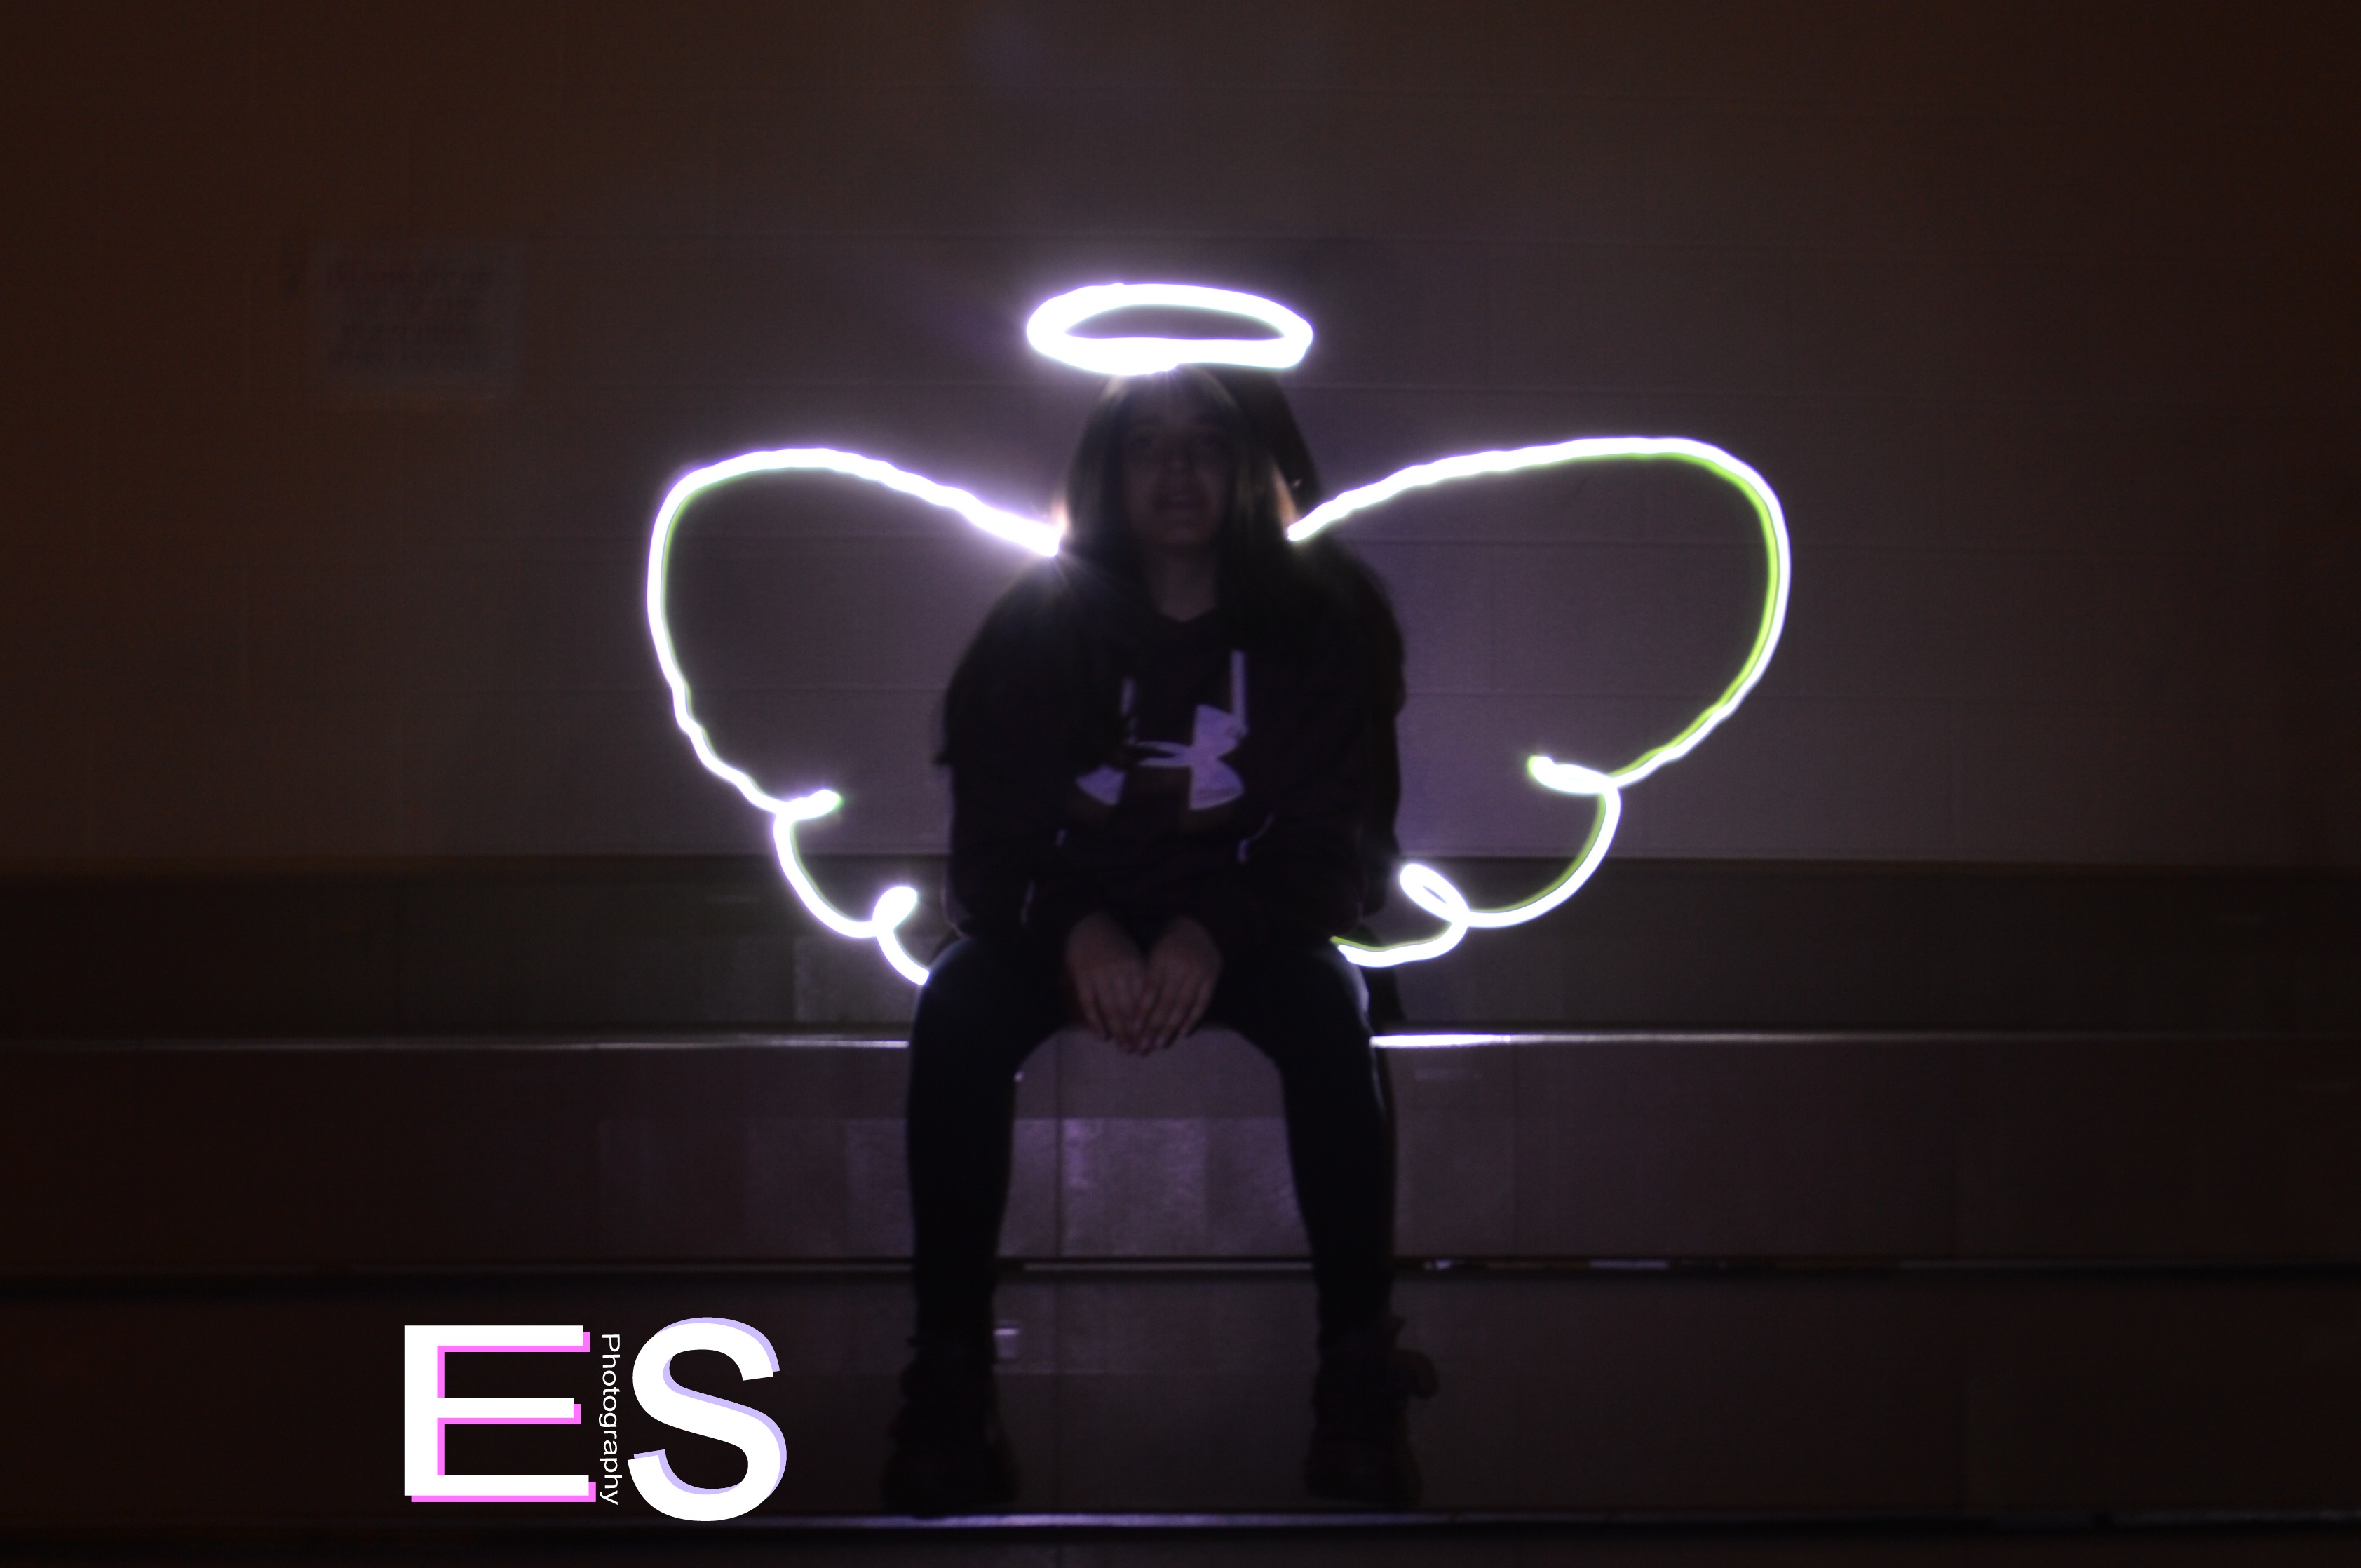
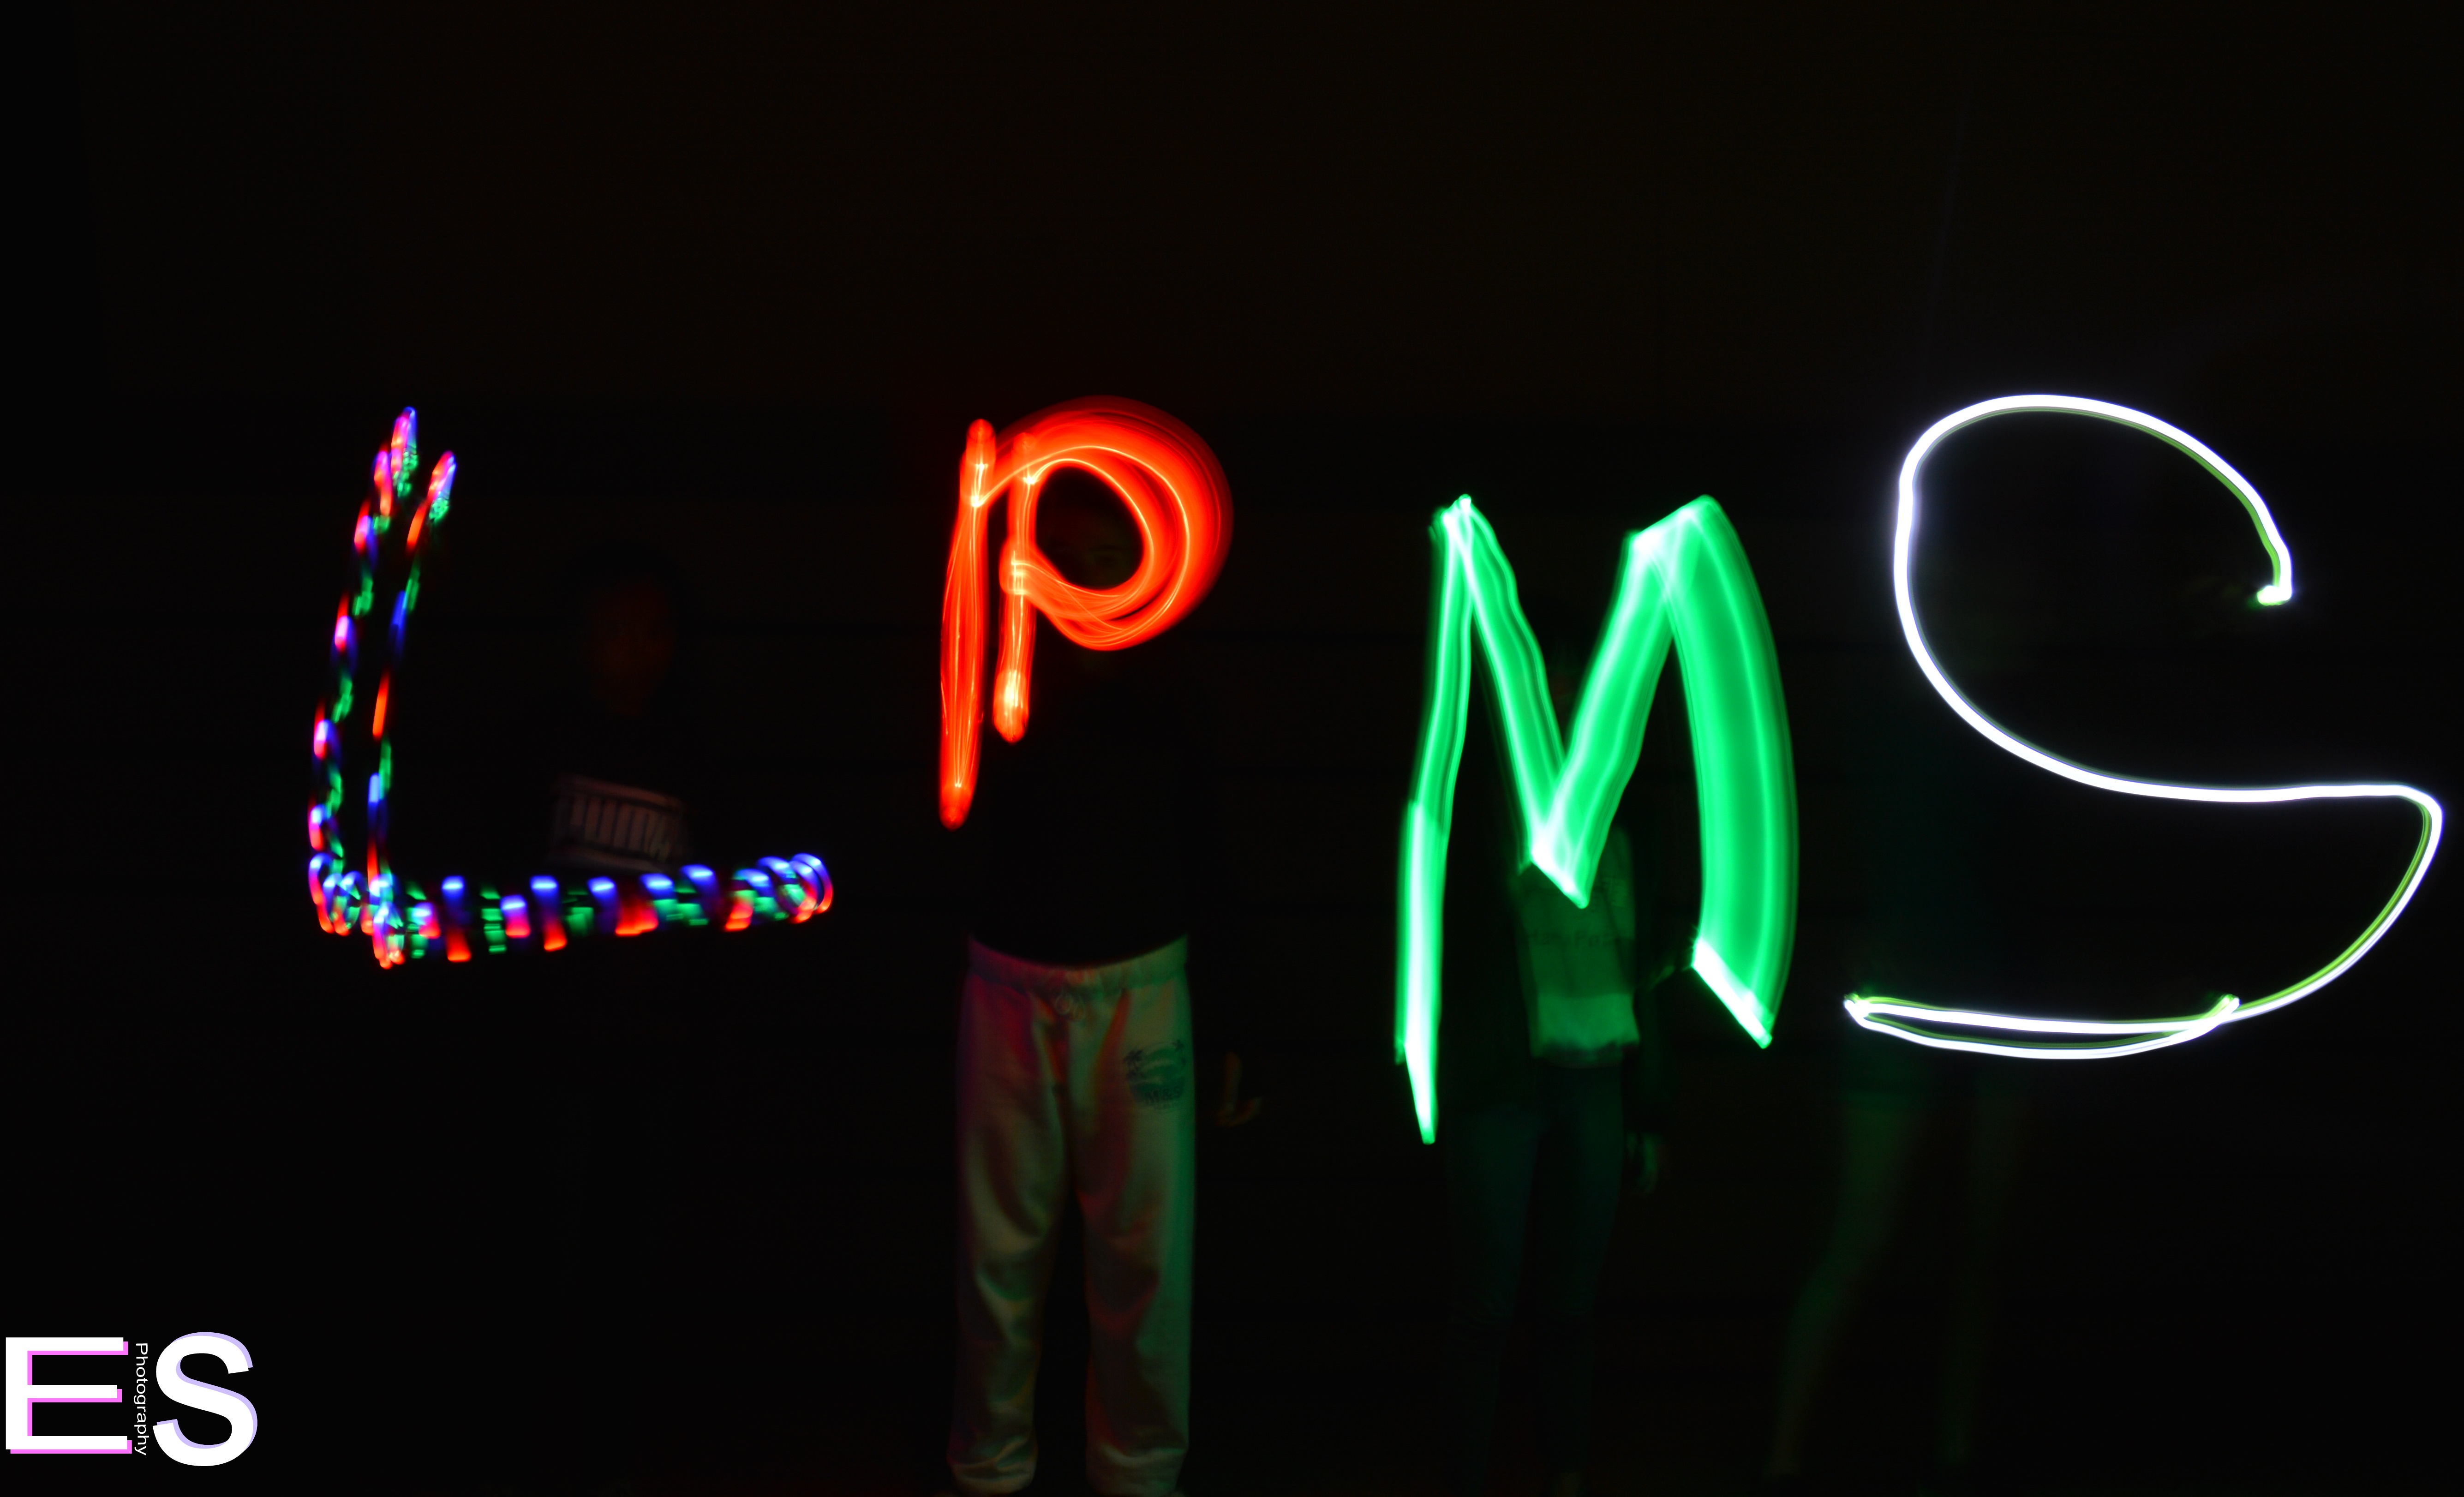
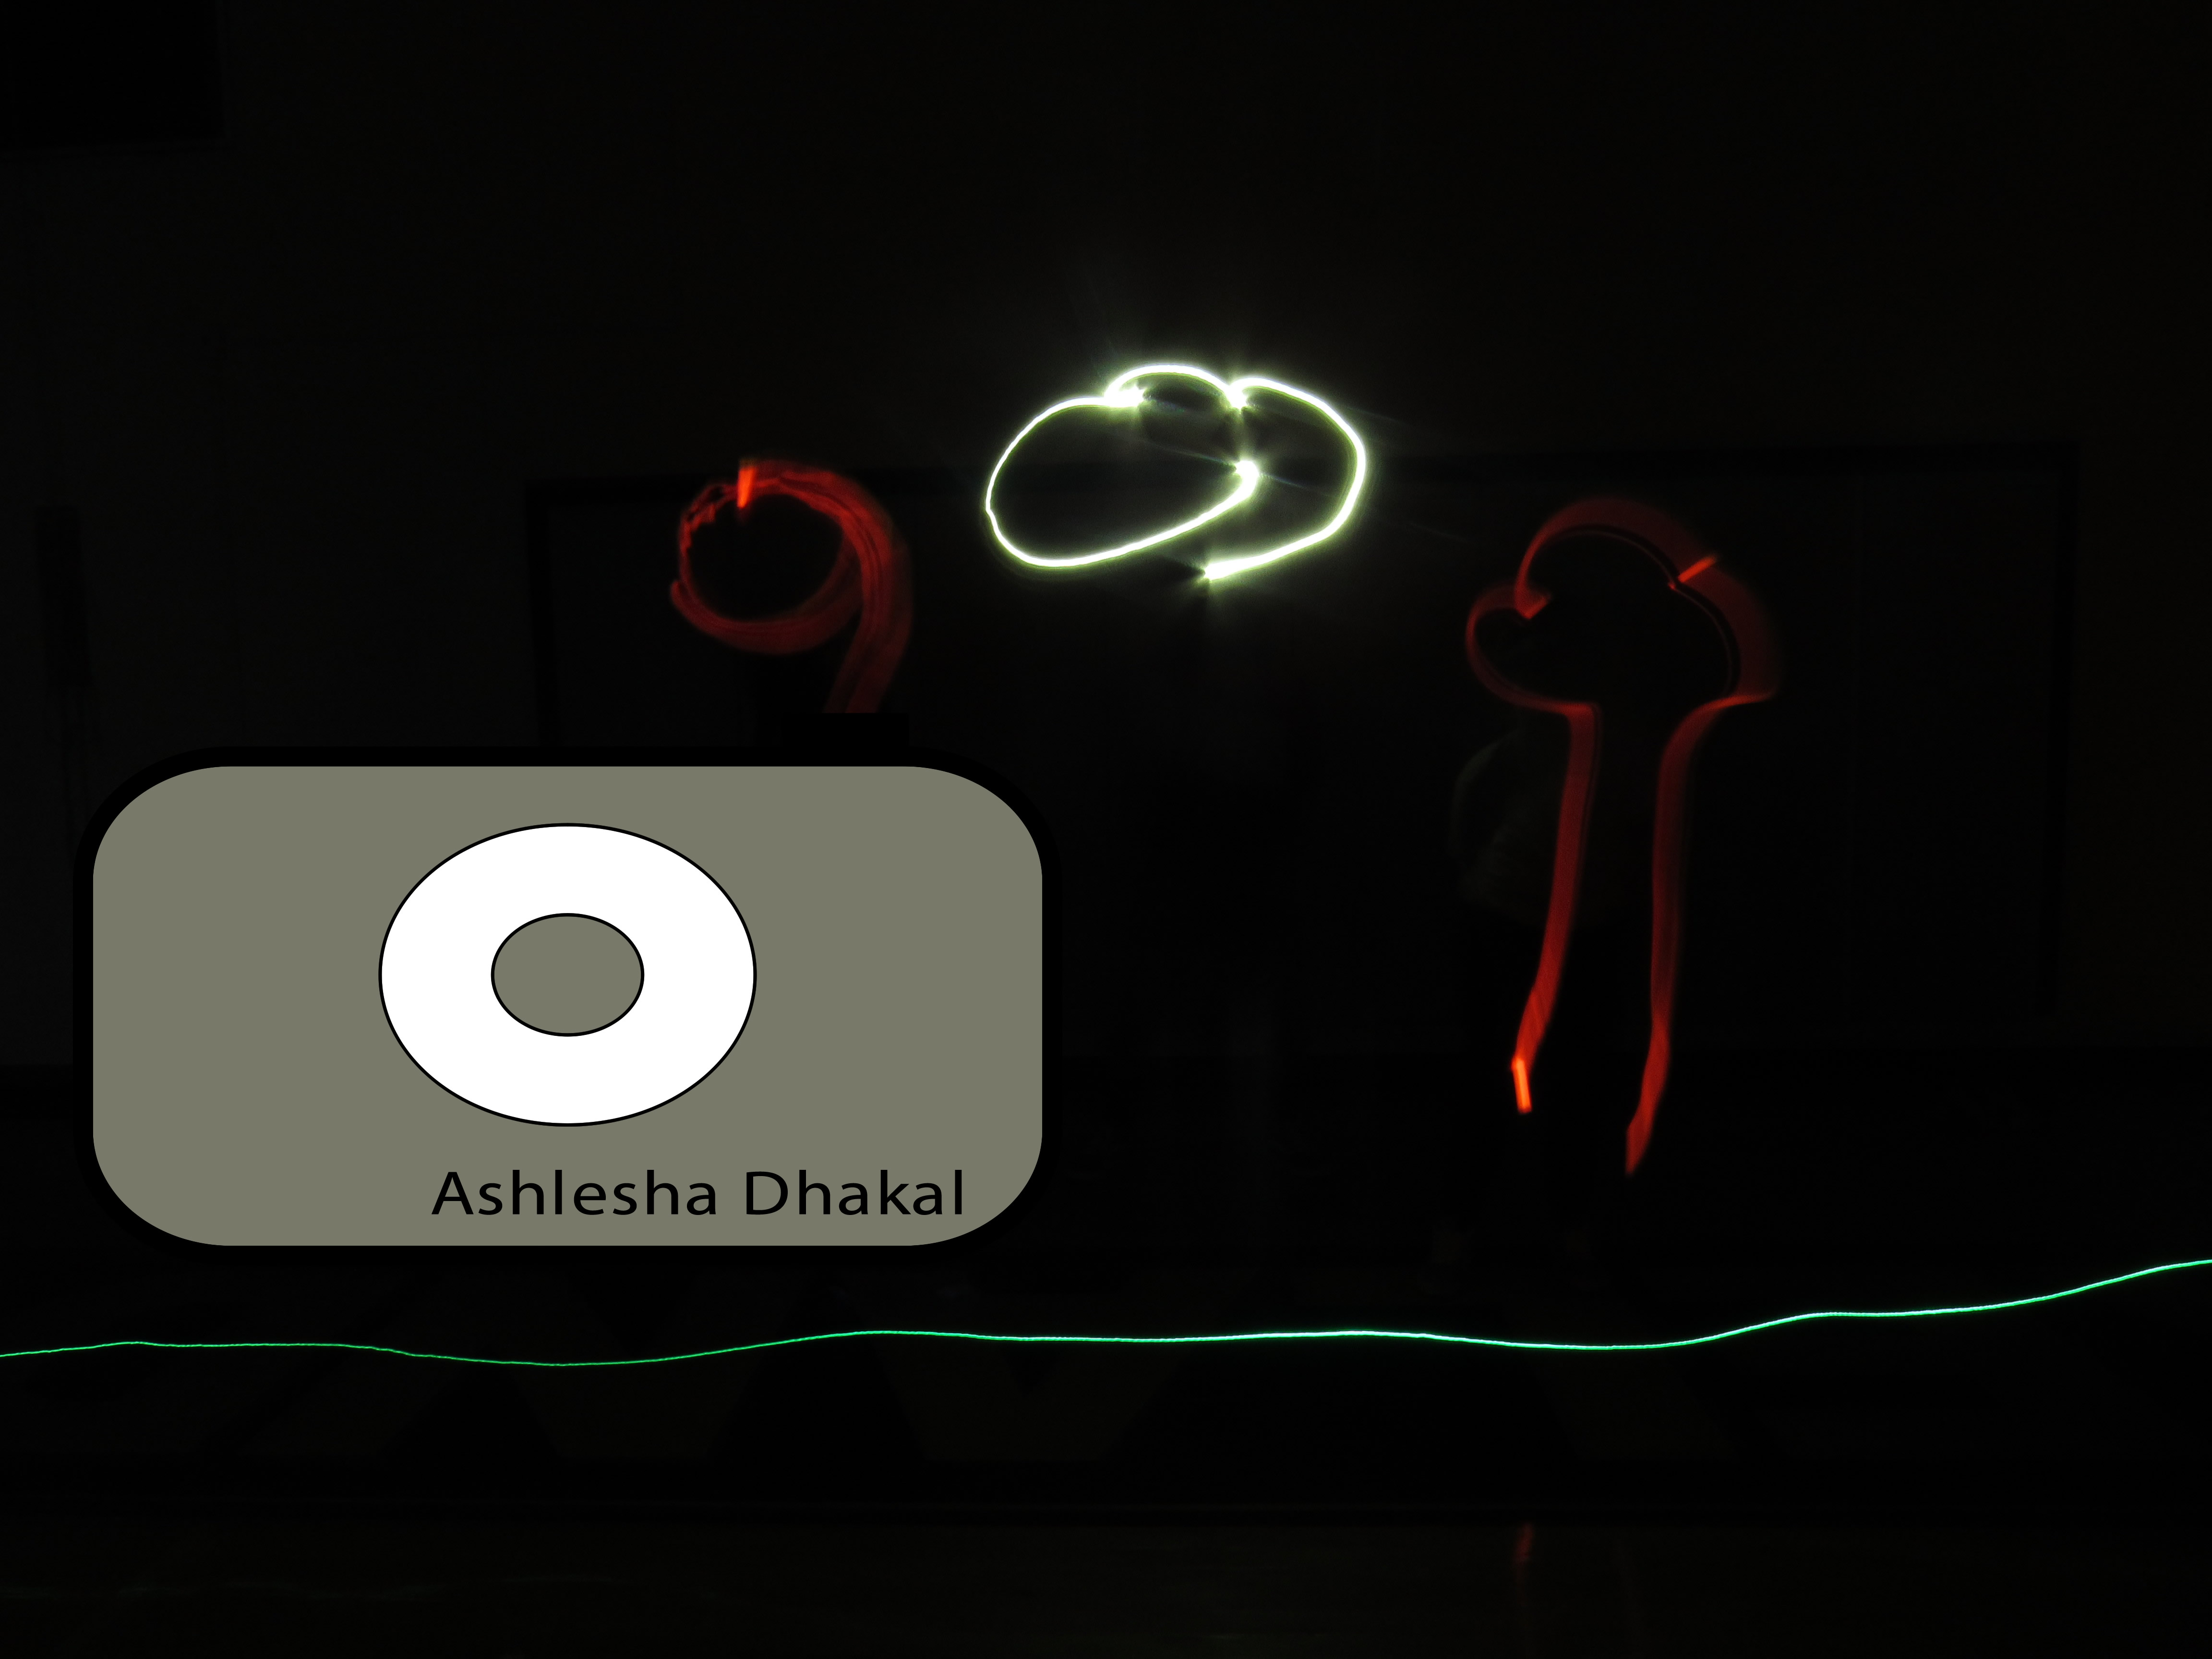
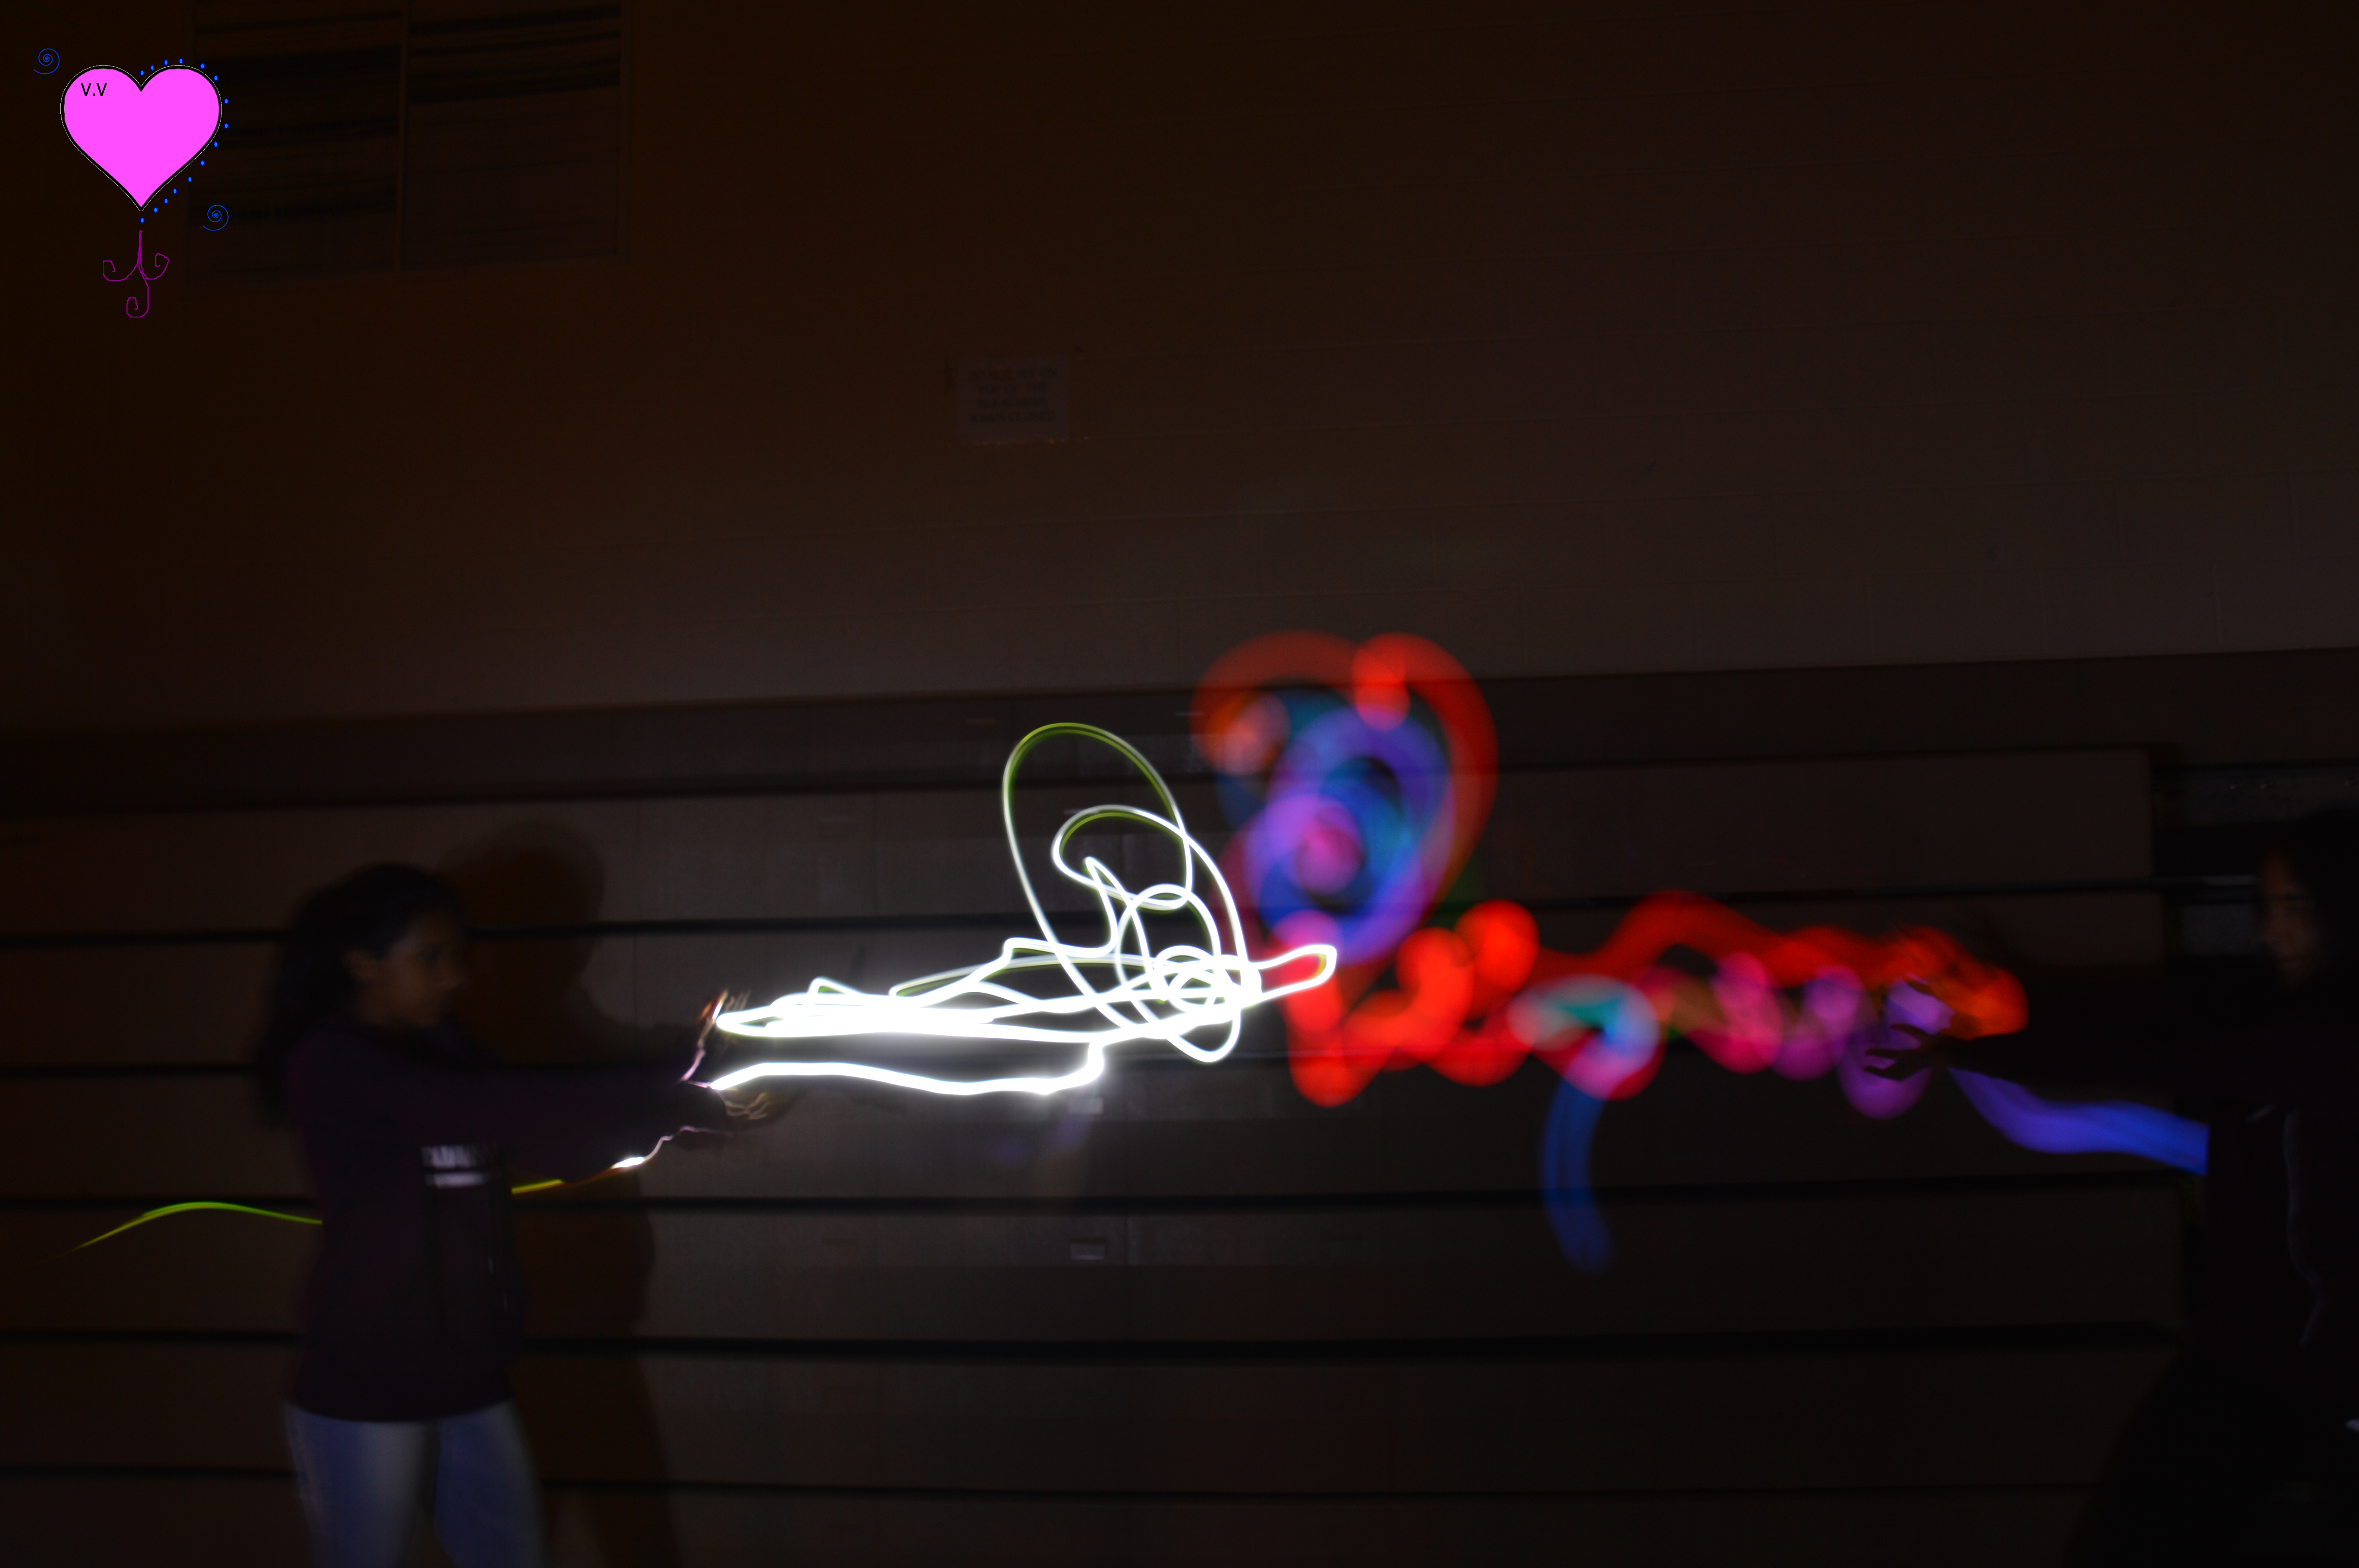
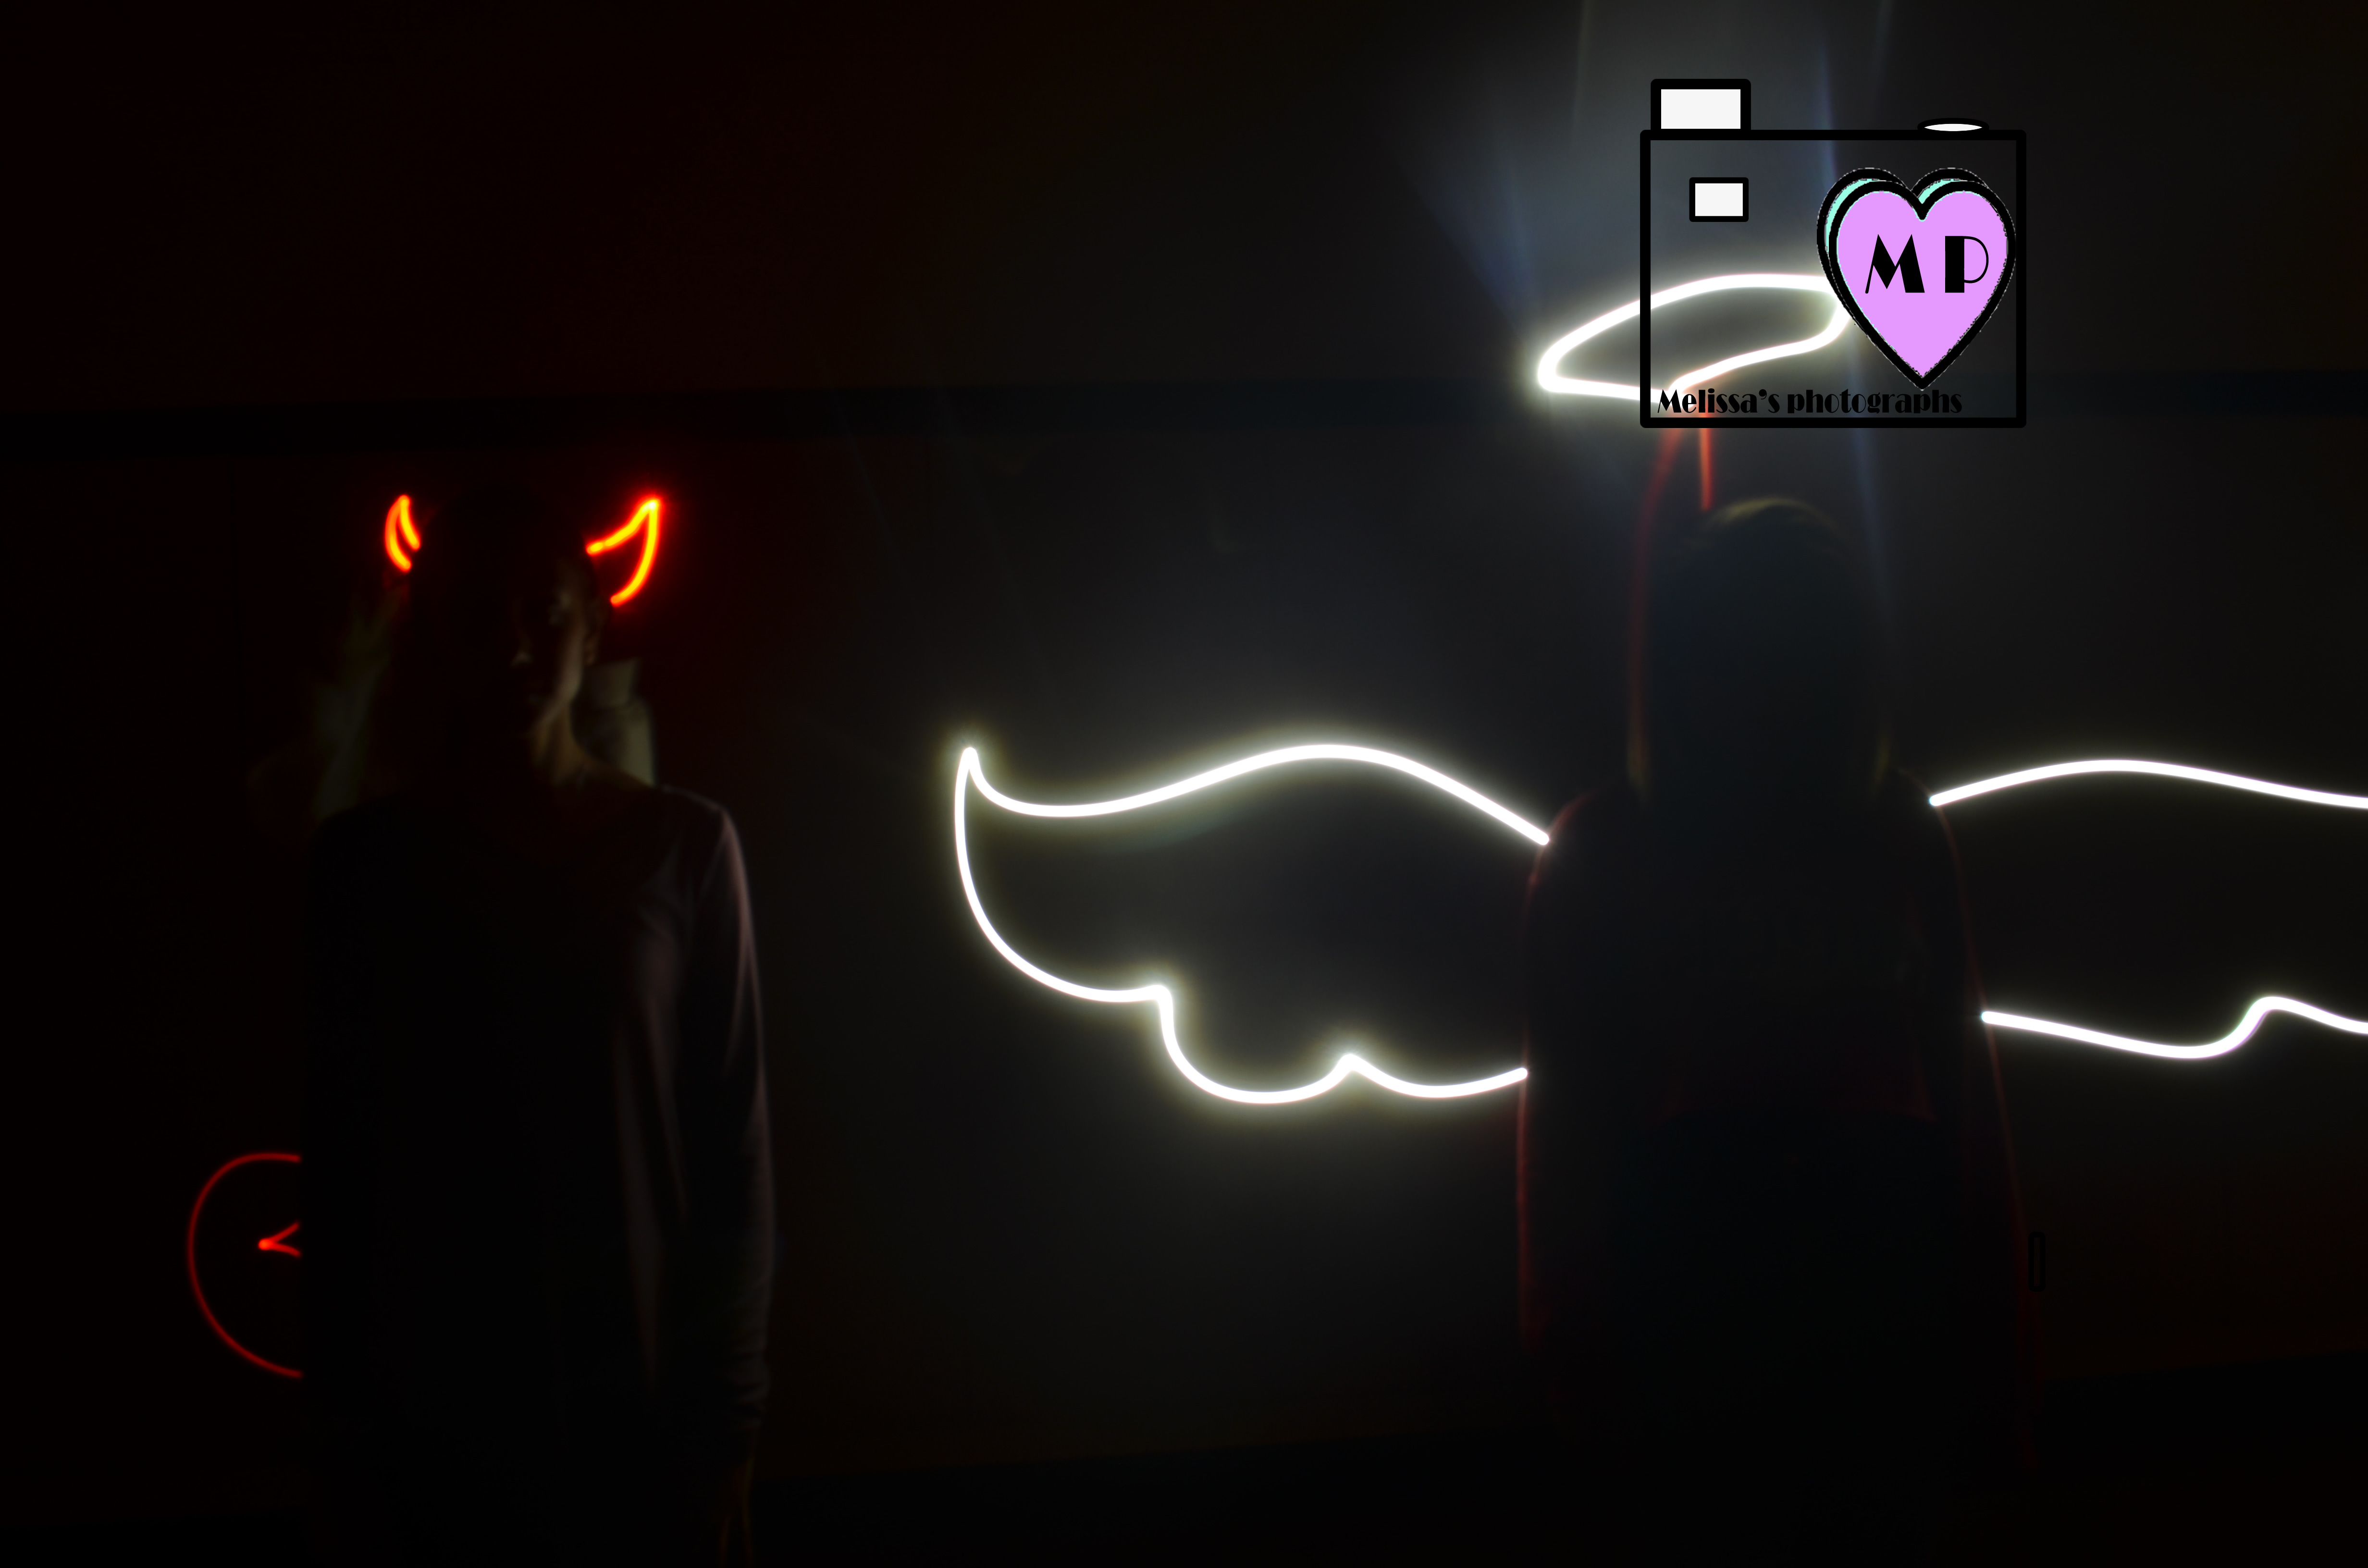
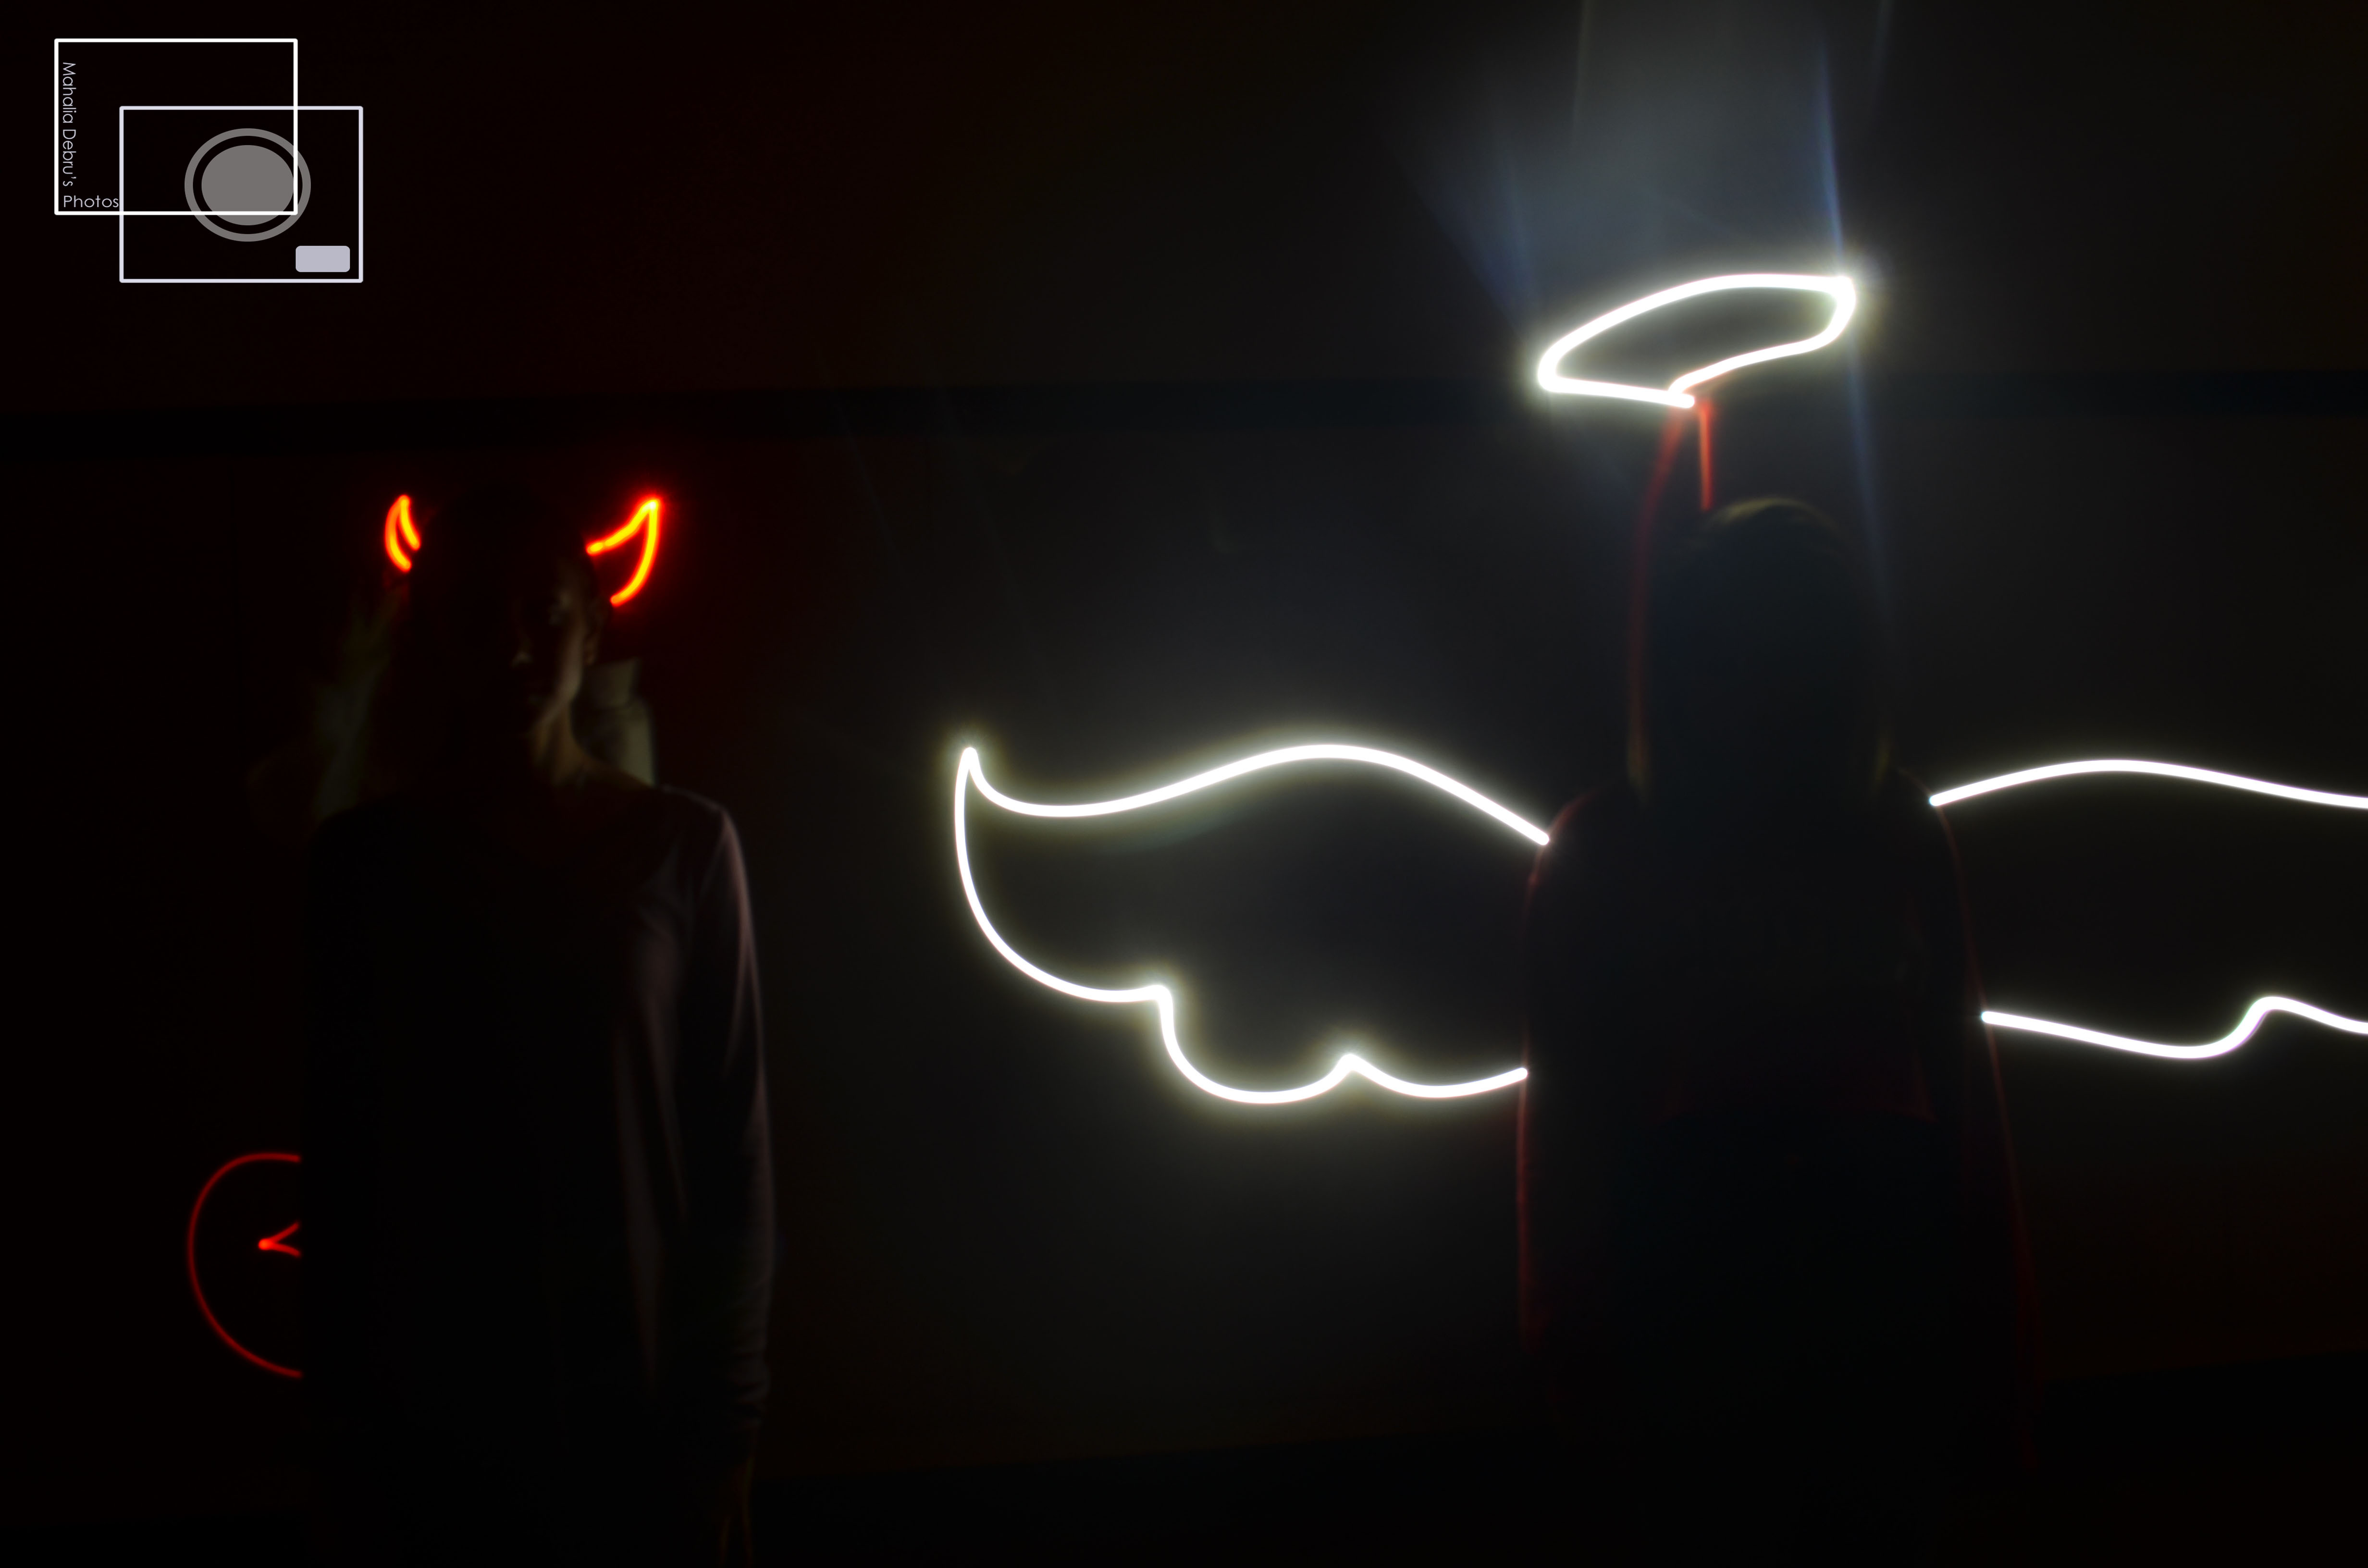
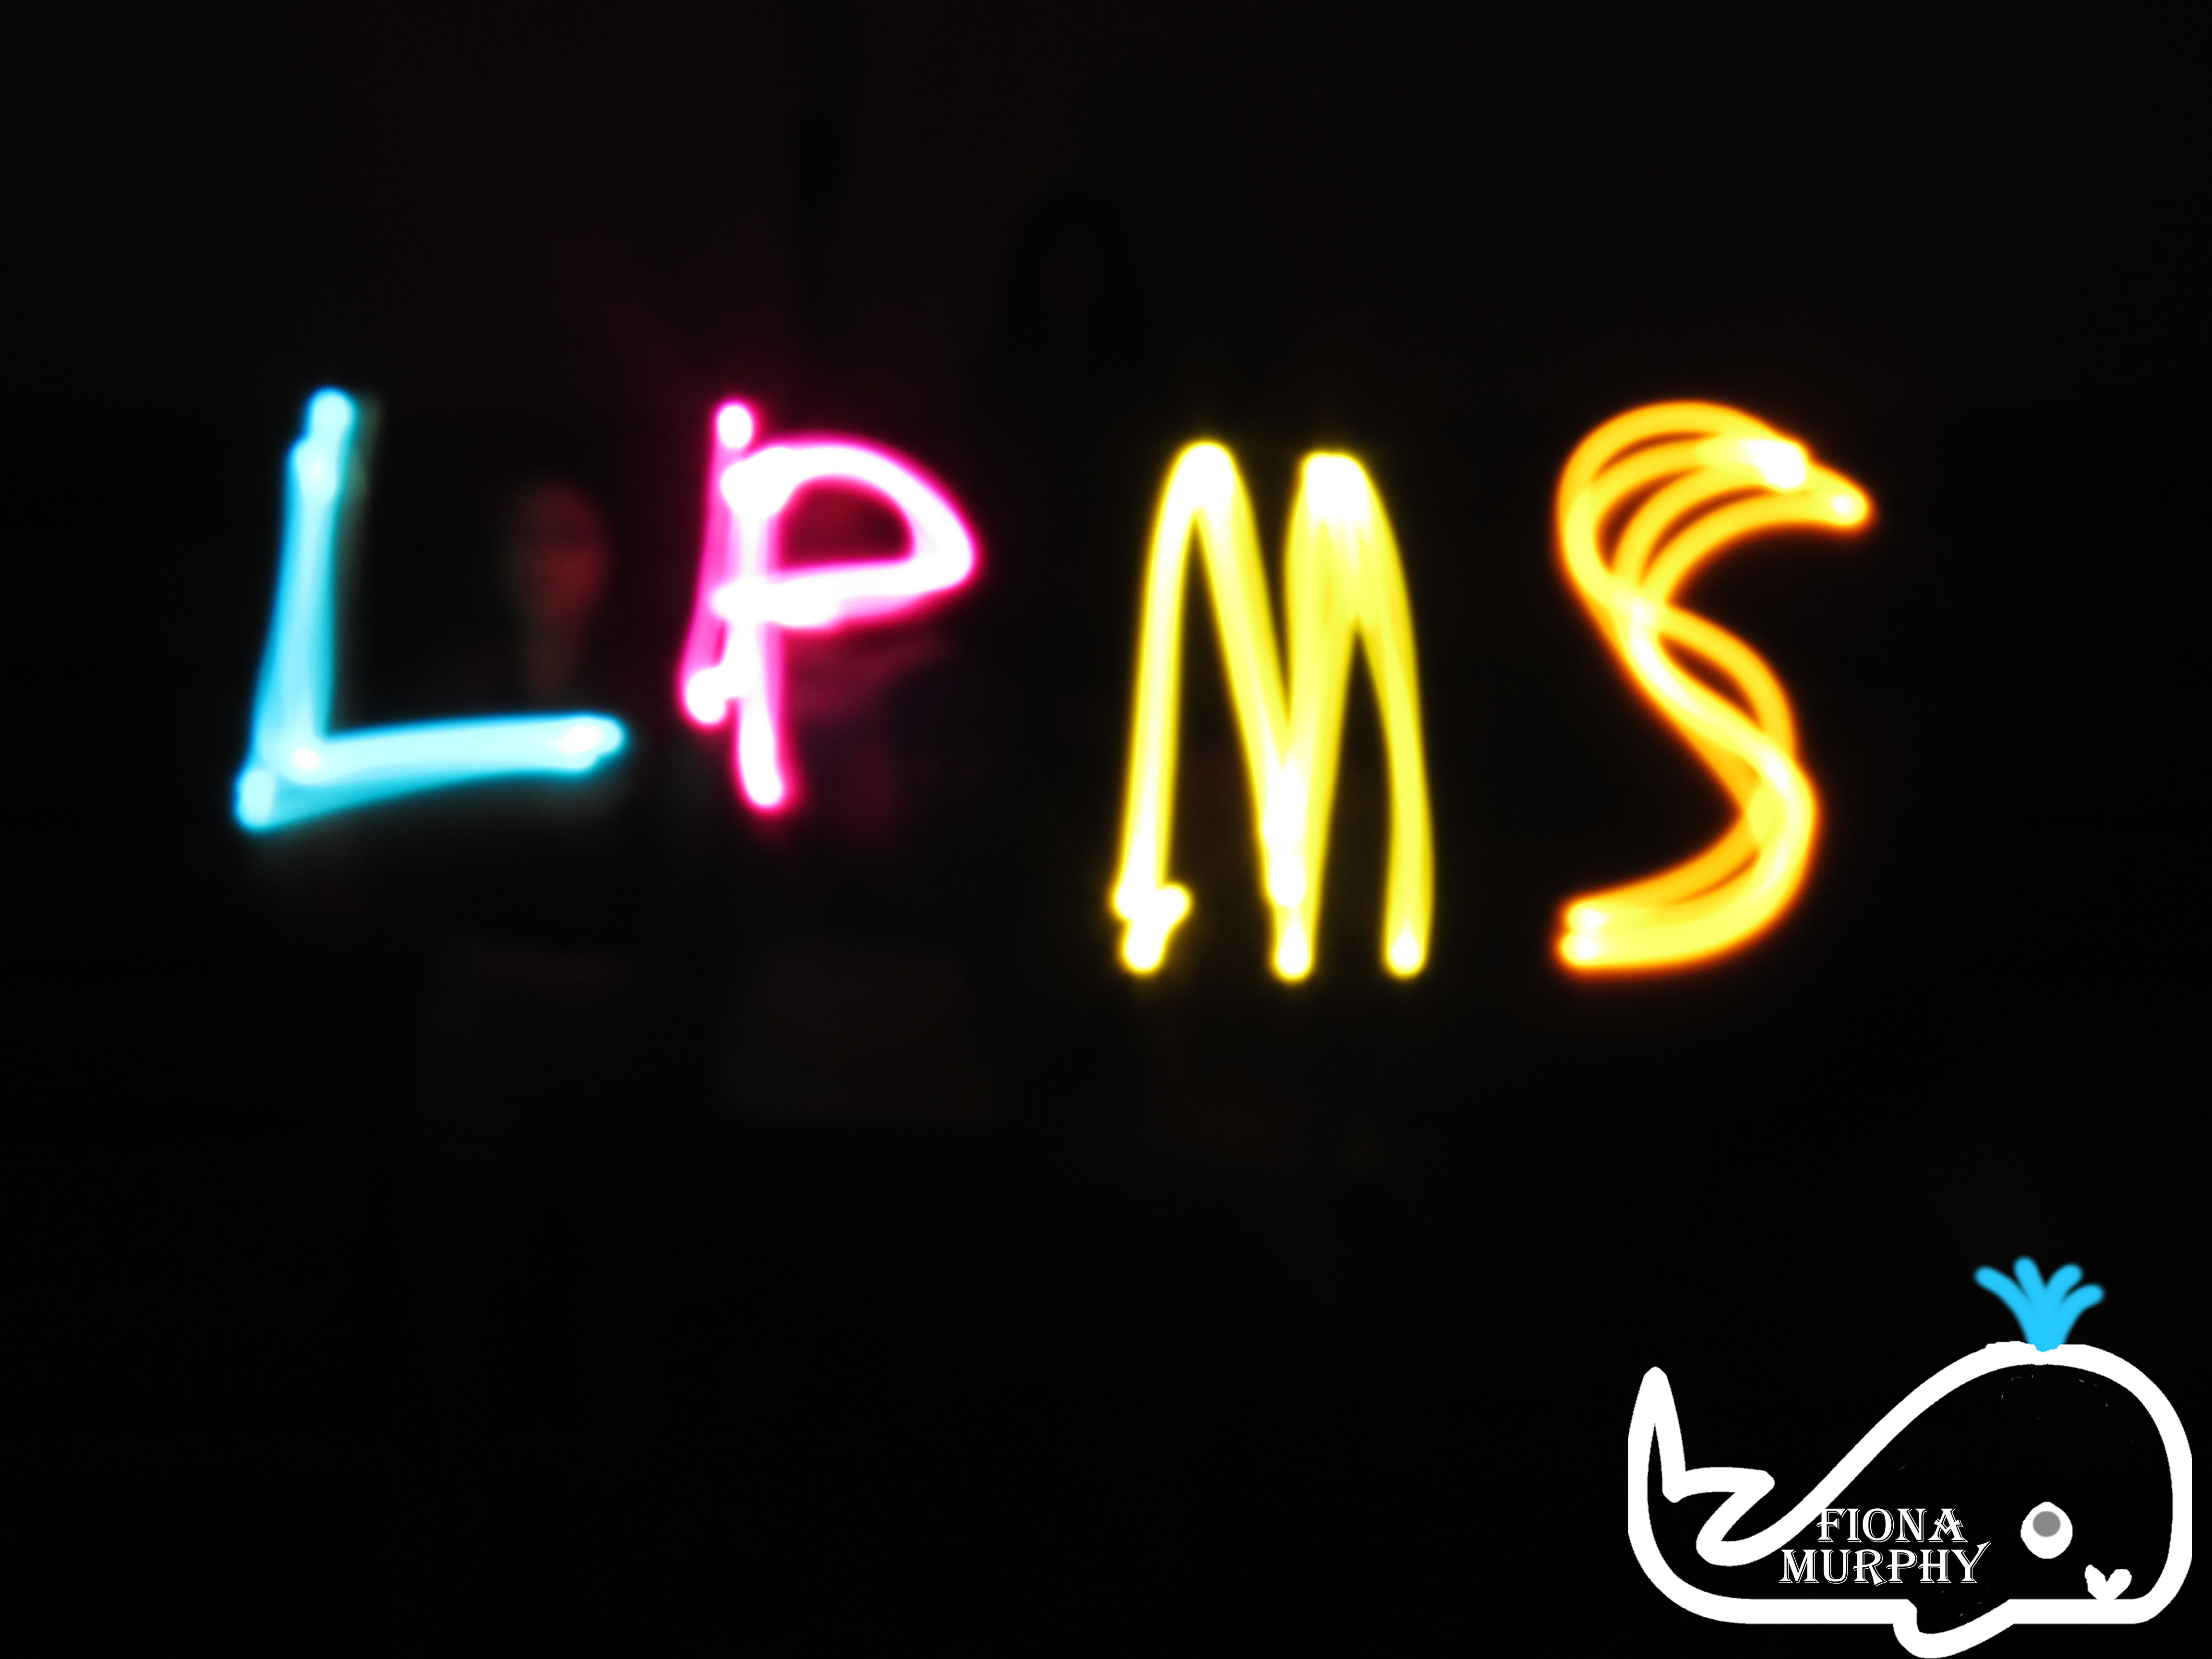
Light graffiti was probably the best project so far. Although, it was hard to set up, once we had the correct setting it was so easy. We set our camera to bulb. That allowed us to have as much time as we needed to create the picture. There was many things that worked in this project. Such as setting it to bulb because it allowed us to have the most time to take the picture. There was definitely so challenges with this project. We had to figure out how to make the shot clean and easy to see. The most frustrating thing was when our group had such a good idea, but it didn’t work no matter how many times we tried. We could take this project to the next level by adding objects to light up and a ton of people. If you would like to see the rest of my photos click here.

~Rule of Thirds~

The Rule of thirds is commonly known in photography. The rules include using lined grids in order to take your photos. Many things that did work included using 2 people in the photo on 2 grid lines. This allowed the photo to focus on the people and not backgrounds. Things that didn’t always work were things such as using small objects, because placing grid lines on such small things was a struggle. At first I thought the rule of thirds were some kind of rule all photographers had to follow. I was somewhat correct, because most people follow these rules in the objects/people they photograph.  I later found out the rule of thirds were only certain suggestions people make to take better put together photos. Here is the link to all my other photos! 

Rule of Thirds

In the beginning of this assignment I didn’t think that rule of thirds could really change a photo. Now, my phone camera will forever have the rule of thirds grid on it. Most poses worked but it was hard to not have other people in the photo when taking it outside and in the gym. For some photos it made a difference on the overall effect of the photo and for others it didn’t. The best photos had the subject more concentrated on one of the lines rather than spread out. Below are two of my favorite photos, one landscape and one with a person. Here is the link to the rest of the photos. 

Rule of Thirds

In “Rule of Thirds” we had to find someone or something to take a picture of on the line of thirds. The rule of thirds are invisible lines that you put objects on to make your photos more interesting. I used all different lines in the rule of thirds. For me, taking pictures of people worked better than a stationary object. This is because I can move the person anywhere I want in the frame, whereas the stationary object usually can’t be moved as much. Taking pictures with motions didn’t work out as well because the pictures usually got blurry. At the beginning of the project, I thought the rule of thirds was hard an I couldn’t find good ways to place my objects. In the end, I became better at taking photos with the rule of thirds, with both people and objects. All in all, “Rule of Thirds” was a challenging but fun project. You can see the rest of my photos here.

There is no gallery selected or the gallery was deleted.

Light Graffiti

We took out pictures by adjusting the camera settings so that the camera would only pick up movement of glowing flashlights and glowsticks, not people or anything in the background. Not having the timer set for the right amount of time did not work. The pictures would come out incomplete. The shapes we were trying to draw also have to be shaped/drawn correctly so that our picture actually made a scene instead of looking like just scribbles and random lines. However, the pictures worked and turned out nice when the timer was set for the right amount of time and everybody correctly outlined their shapes/objects. It was very frustrating to draw the object we needed to draw because there was nothing to draw and the air needed to be traced based on what the shape might look like. I think that this project could be taken to the next level if multiple people could be traced in a scene to make it look like an event was happening. To see the rest of my pictures click here

Light Graffiti

In this project, we had to make the shutter speed bulb so we had time to draw with the torch. First, we painted the person with light. Then another person cam in and drew with the torch. The easy part was taking the picture because once you got the hang of it, it was easy. The hard part was drawing with the light because you can’t see what you are drawing. It was frustrating when you draw something and the final outcome was nowhere close to the idea. You can see the rest of my pictures here.

Light Graffiti

for this assignment I had to change the camera to Manuel and changed the shutter speed for 15 seconds. We also had to have a dark setting and we used a flash light or glow stick etc. we tried to draw a smiley face but because we are bad artist in did not turn out the way we wanted. a picture that would bring it to the next level would be something moving. too see the rest of the picture click here.

Dark Photos

The objective of the dark photos project was to make yourself seem photo shopped into a black backround. It was hard trying to make yourself stay the same color while changing the backround to make it pitch black. The easy part was taking the photo since you didn’t really need that much lighting. There are my photos below.

Light Graffiti

This assignment was very fun. We experimented with different types of lights and created beautiful images. In order to acheive this, our group increased the shutter speed to 15 seconds so we had enough time to draw what we wanted until the picture was finally taken. A few things we had trouble with was drawing the actual pictures because we had poor drawing abilities. This is one of my favorite photos, you can see the rest of them here

Light Graffiti

To take the pictures, the shutter speed is very slow, so it can absorb the light, and it gives us time to work. The IOS is 100 so it isn’t light sensitive, and also so we can just capture the light we want to get. It worked when we traced over the drawing with the light a couple of times, and it also worked when we had more than one person working on the drawing.  Some frustrations were when we would have a drawing that was good, but the time on the camera was to little, so it didn’t capture part of the drawing. Some ideas for this project is that we can draw with the light near the camera lens, and it could look like something was on the lens, like a bug, or the lens looked broken. You can see the rest of my pictures HERE.