Light Graffiti

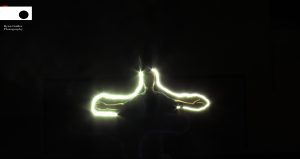
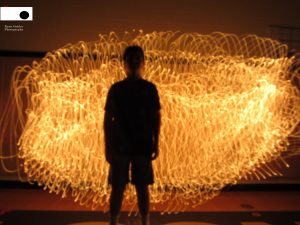
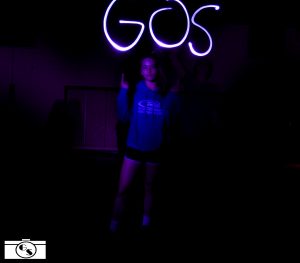
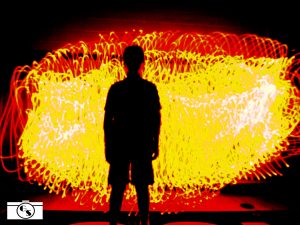
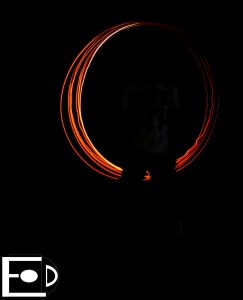
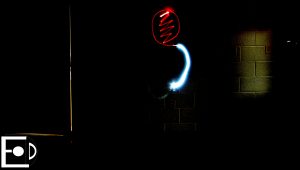
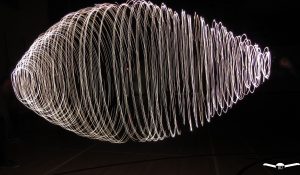
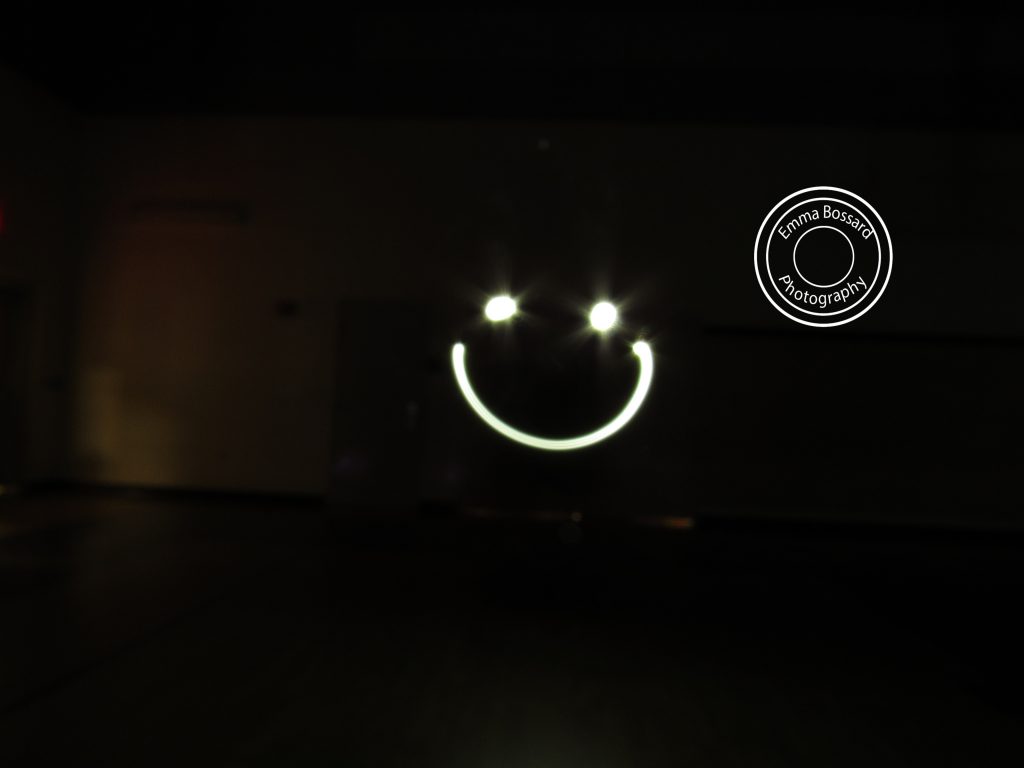
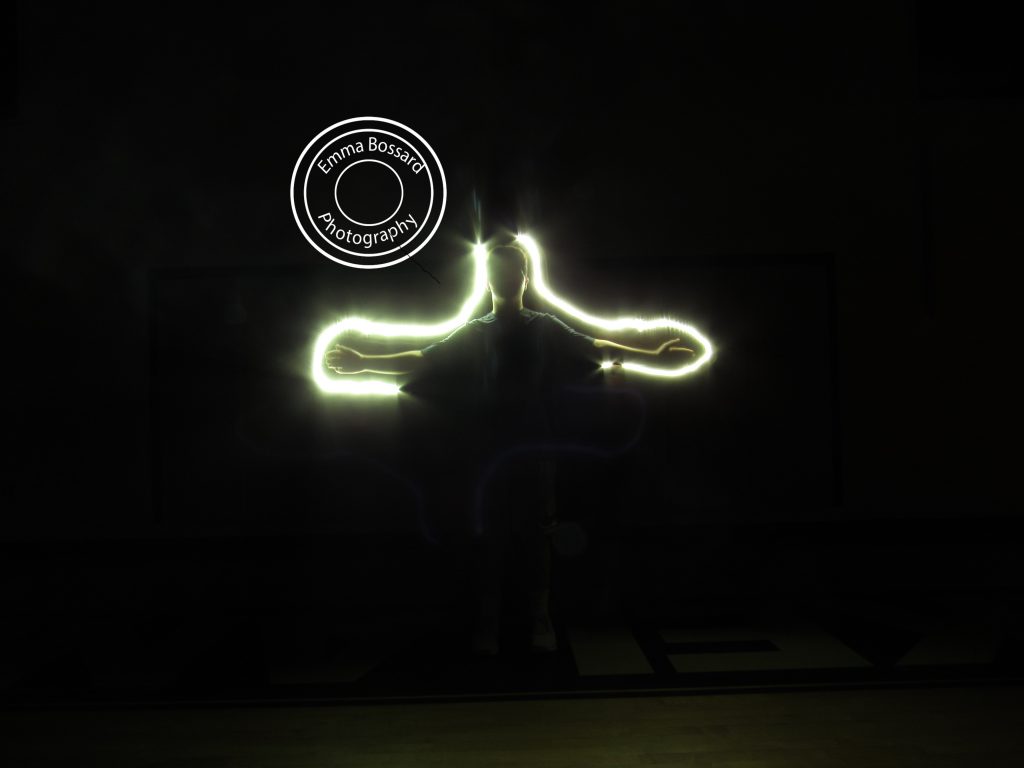
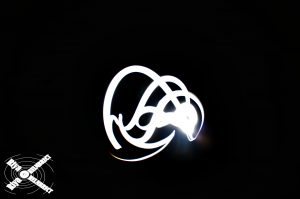
For this project we had to change the ISO to 100 and change the shutter speed to the right length that you need to draw the picture. Then you will have a person be the subject and depending on the drawling have 1-3  people drawling things with the flashlight. What worked with this project is having the shutter speed on bulb. This helped because it allowed the people drawling to have exactly enough time to draw what they needed to. What did not work was having the light turned away from the camera. This just made the background be completely lit up. What was frustrating was having very cool ideas but they were to complex to use them also was when we shinned to much light at the wall causing many shadows. If I were to take this to the next level I would go outside during night and use Christmas lights.


To check out more photo’s of y group visit the link below

https://photos.app.goo.gl/bl6luvR8J6ZqMt5m2

Light Graffiti

I took my photos by keeping the bulb open for 8 seconds. The background was really dark so the light stands out. We changed the ISO to only let a little bit of light into the lens. The only way the light showed up clearly was shining the light directly at the camera. If you didn’t shine the light at the camera, it would not have shown up. It was frustrating on how you had to stay still unless the picture would come out blurry. To make the photo better, have more people, and more colors to make the photo more creative. 

Here is the link to the rest of my photos: https://photos.app.goo.gl/Qu74NDsoQTDSm0AF3

Light Graffiti

We took our pictures with professional cameras. We had to change our ISO to 100, F5.6, and our shutter speed differed on the picture. We had to press the button, and then move the lights around to say something or be something. Since we changed the shutter speed to a longer period of time, we have up to 15 seconds to draw.  It was pretty easy to draw the pictures with the light. Also, flooding people with the light so that you could see them worked. Although, sometimes the lights wouldn’t be facing the camera completely, or we wouldn’t get the right shape. It would be cool to get many different colors to make a really cool picture.

Click here to see the pics: https://photos.app.goo.gl/kWBw23GmqdcxNkwn2

Light Graffiti!


For this project, we had to switch the camera to manual, ISO 100, and the shutter speed to about thirteen seconds. First, you have to turn all the lights out and the background needs to be dark. Make sure the settings are correct as the same ones as above. Next you need to have a light source. For example, we used a flashlight, Christmas lights, and any light available. Next, press the photo button and start to draw with the light facing the camera. Whenever the light is on, it will show up in the picture. You also need to light up the person who is in the photo if you want to see them. Taking the photo and drawing was easy but making sure there were no extra lines of light was difficult during some photos. It was very frustrating working with some people but at the end we did it! #goteam Next time when I do this project, I would use more lights and different colors to take this project to the next level.

To see the rest of my beautiful photos, click on the link: https://photos.app.goo.gl/hbvnZ0HgHbJaCngi2

goodnight.

Light Graffiti

The first thing you need to do to take a photo is you need a flashlight. Then you turn the ISO to 100 and turn the shutter speed to the time you need to draw.l Then you draw the image you want. Things that worked were simple shape, names and tracing a person. A way to take better photo you could have different color light if you don’t have the you could use your phone light and put your thumb on it it will turn red so you can add color to your photos. Things that did not work is thing that take a long time because you put too much light in the photo.

Photo are here 


Light Graffiti

For my pictures I put the ISO on 100, the F5.6 and the shutter speed on bulb. For bulb, the shutter stays open for as long has you depress the button. The importance of having the shutter open so long for this is so the camera can trace the light and pick up the drawing. For the most part it was easy to draw with the flashlights. One of the harder things that didn’t work was that sometimes we couldn’t hold the light toward the camera lens. One of my frustrations was that I had a flashlight that was to bright and completely blew out the whole photo. To take this to the next level would be to go outside at night and trace objects in the real world.

See all of my photos here: https://photos.app.goo.gl/GM5Cxr8yG2Viu3B63


Light graffiti

https://photos.app.goo.gl/5KXvtfs6gMTJgVm13

We used the ISO and F-STOPS setting on the camera. In order for the light drawing to show you need to use shutter speed, try to leave it open as long as possible. It worked to have multiple people draw the light so that way you can get more done in such a short period of time. It was frustrating when the people in the picture would move cause that makes it blurry and throws the whole picture. It was also frustrating when people from other groups would shine light on our project and mess up the picture. It would be cool to draw multiple figures at one time.


Light Graffiti

link to album: https://photos.app.goo.gl/DkfIzgiGGgJPHLwr1

In this project, we changed the iso and opened the shutter for a certain amount of time in order to capture the light. We went into the dark gym and got to work! We had to make sure that the light was facing the camera. The shutter would open for the amount of time we set it for (8-15 seconds) and we would draw. Writing words was the most frustrating part. We had to do our movements slowly and we had to think them out. If someone really wanted to, they could trace an entire scene with the light, if they left the shutter open for a very long time. 

Light Graffiti

https://photos.app.goo.gl/WreEzoIlIADlWokJ2

To take these pictures, first we had to set up the camera. The shutter speed had to be about 8 seconds. After that, to take the picture the model had to stand still, someone had to paint the picture, then someone had to use the light to create the “graffiti”. The light graffiti worked, but it was hard for some people to stay still. It was frustrating because sometimes other groups would flash their light into our camera, ruining the picture. If I did this project again, I would create cooler images and have more colored lights.

Light Graffiti

Our goal for this project was to take pictures that achieved a “light graffiti” effect. We would do this by setting the shutter speed to 15 seconds so that the lens would absorb enough light that we were flashing from our phones, Christmas lights, and/or glow sticks. Throughout the project, our group had to overcome some obstacles. For example, whenever we set the shutter speed too low, we wouldn’t have enough time to paint. Whenever we set it too high, an excessive amount of light would hit the sensor. Other times, we just needed to redo the process because we needed more practice to “paint” the subject. Also, the subject would have to stay completely still. Even the slightest movement from the person or camera would cause the picture to appear blurry! However, something that worked was editing them on Adobe Photoshop. It was easy to enhance our photos using curves and other effects.

https://photos.app.goo.gl/mSQYgXHK2bpgKwCr1