Light Graffiti

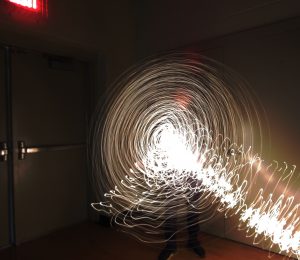
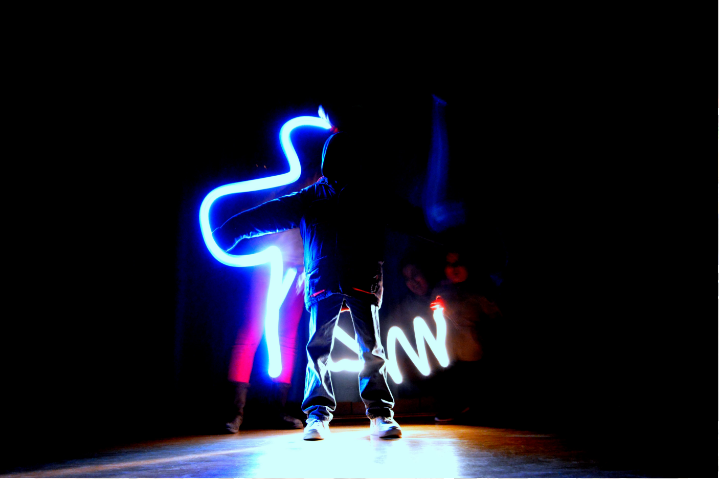
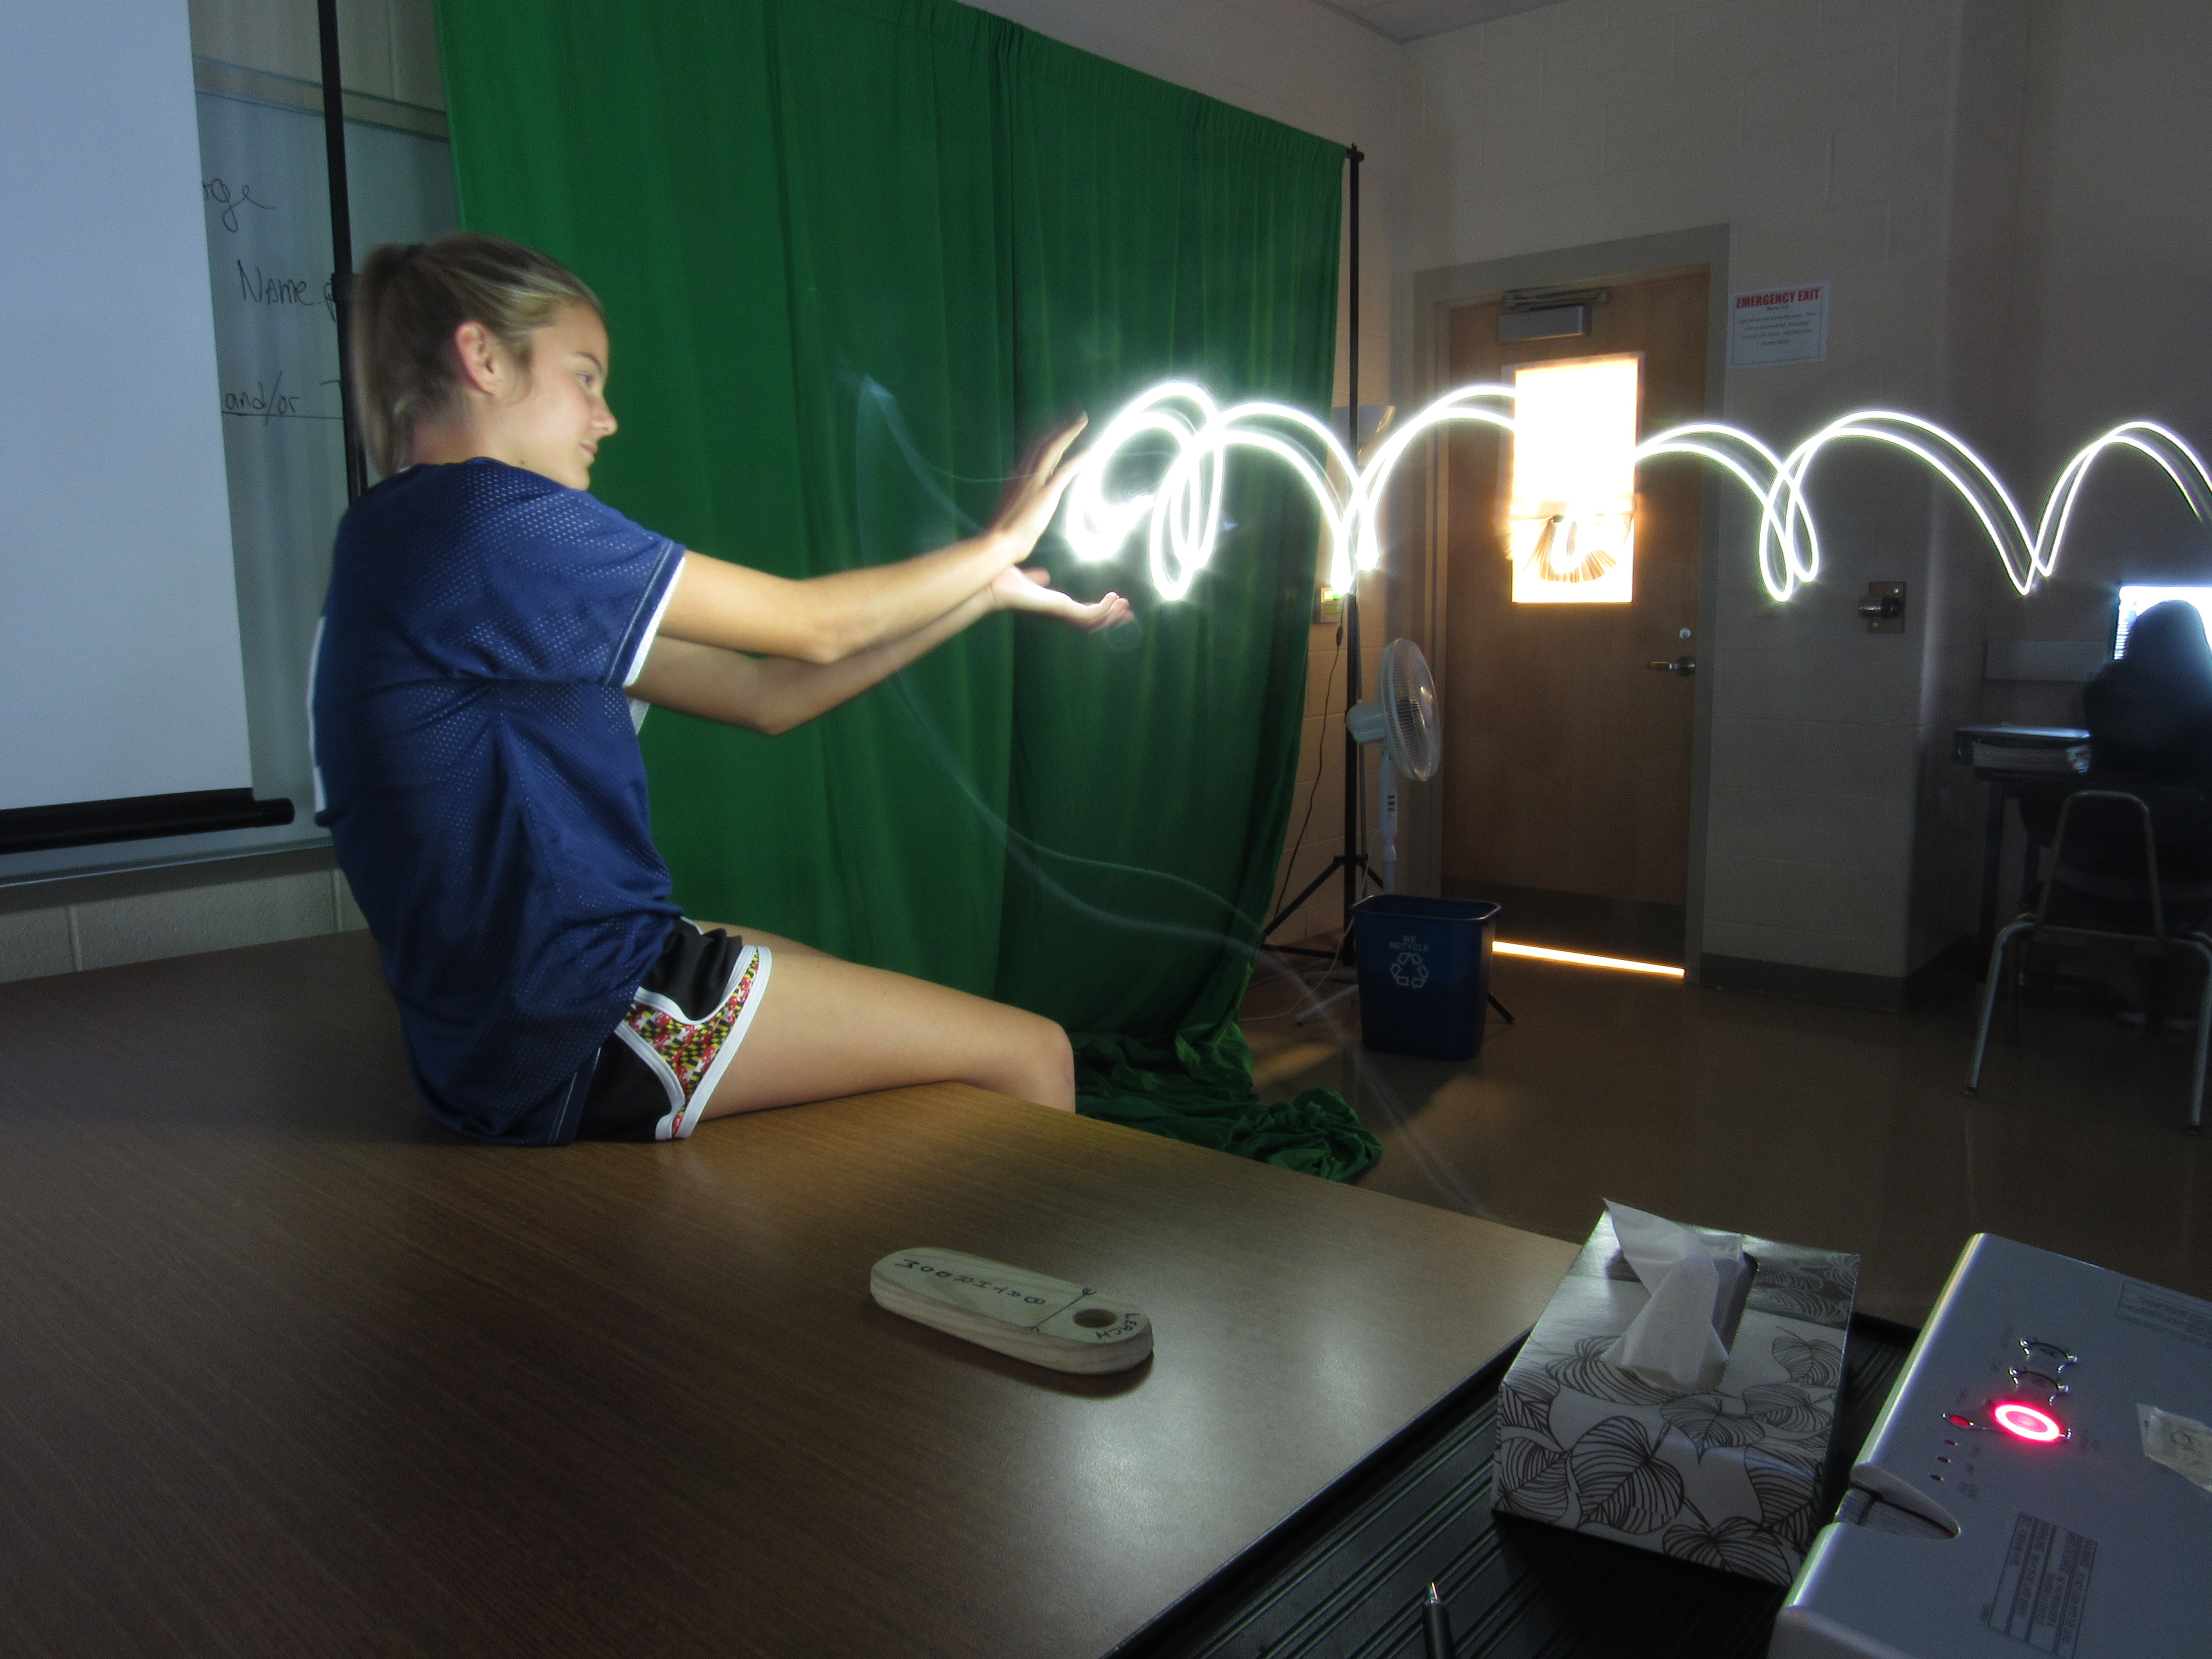
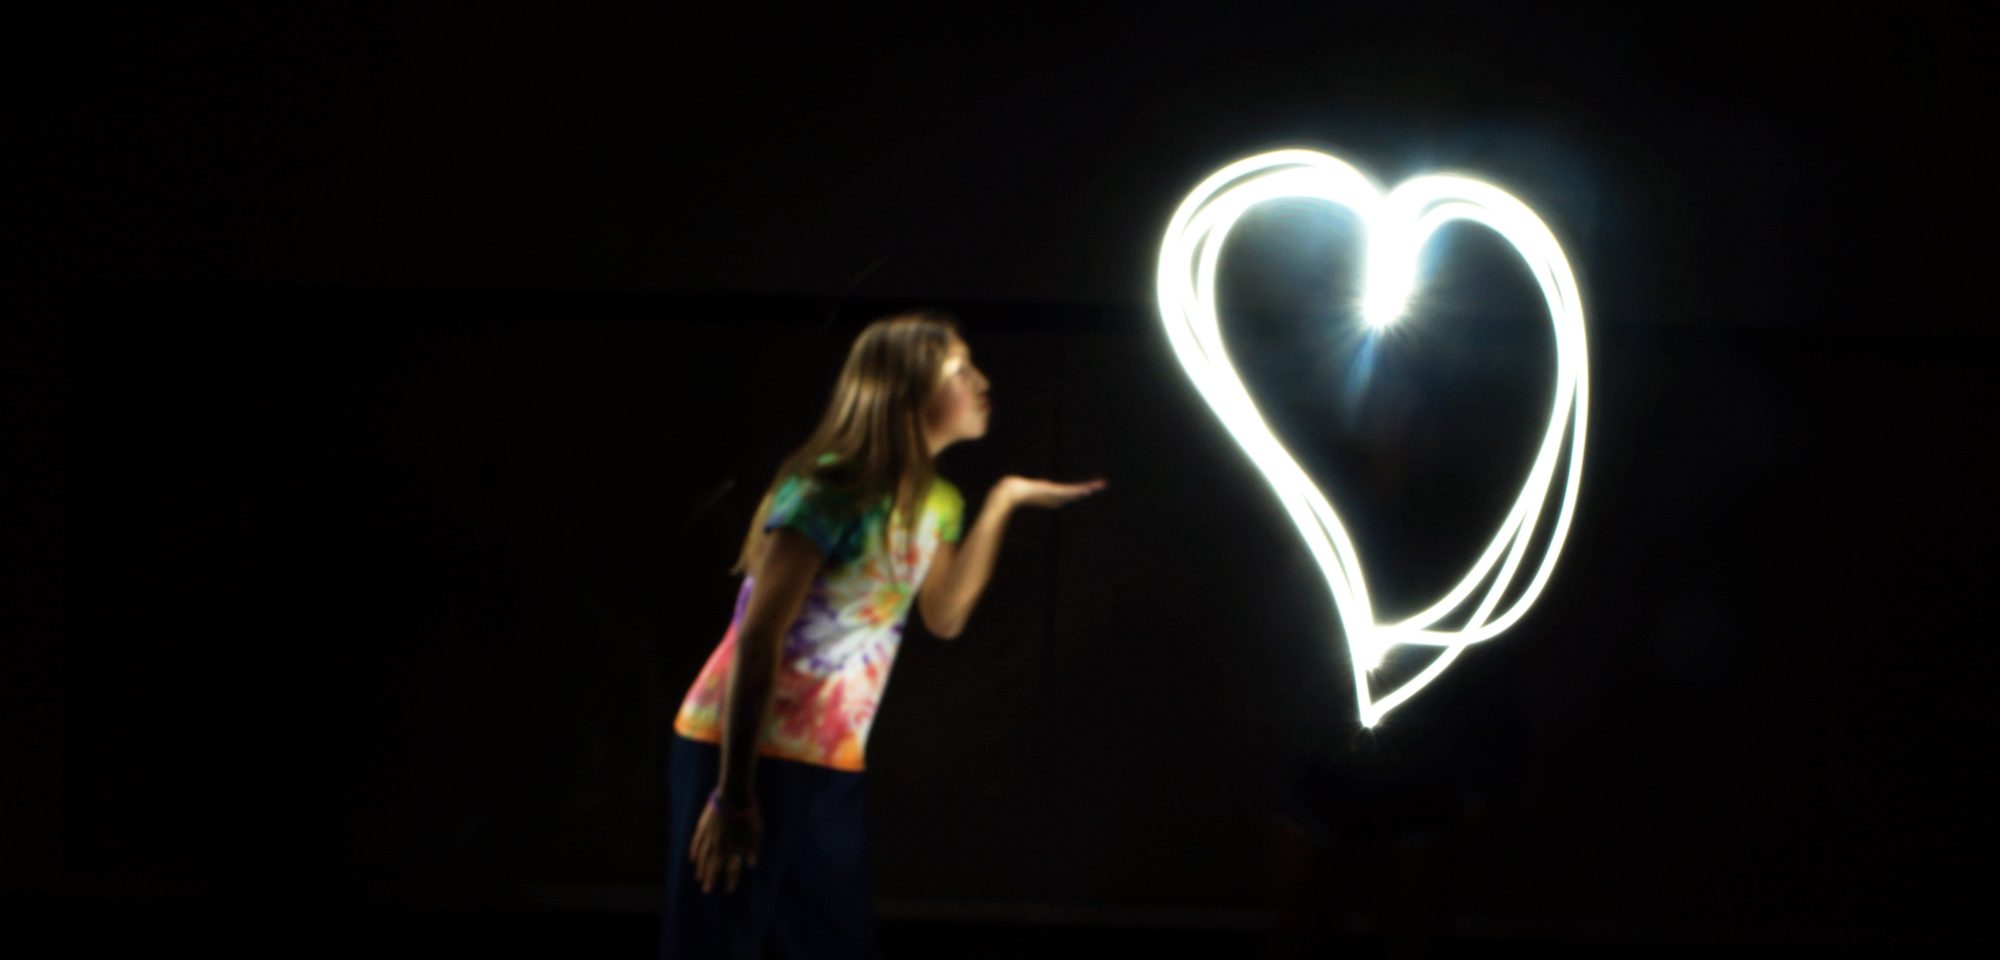
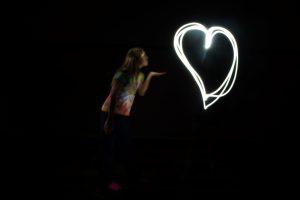
This week in class, I had to create “Light Graffiti” by using different sources of light, and certain shutter speeds. During this project I set my shutter speed to at least 5 seconds, depending on the picture I wanted to take. Also, all of the lights had to be off, so no other light would interfere with the picture. I edited my photos on Adobe Photoshop, to darken the background, to get a photo I was satisfied with. A challenge in this project was trying to hide the people creating the light. The rest of the project was easy to learn, and apply to my photos. The picture below is my favorite picture…

Click the link below to see more of my photos!!

https://photos.app.goo.gl/Uh2oiyw3KhYLVTPM2

Light Grafiti

The project this was a part of was was Light Graffiti. It was a very cool Project. You had to put the shutter speed on 15 seconds so you could light up the scene and then you put your Flashlight towards the camera to make cool light designs to make the picture cool. It was hard to create a cool design done without going crazy and ruining the picture. Also,it was easier to already have someone in position to light the picture. Also, it was Frustrating because you could not know what you were painting in the air. I think we could do it out side where it is dark and get more cool lights.

Album Link :https://photos.app.goo.gl/H9hjWeyNqq73Ns8K2


Light Graffiti

In Photography class we had to take a flashlight and have a room completely dark and than we had to draw some thing and someone would have to take a picture and than your drawing would show up like the examples I have below. Also, we had to mess around with the photos a lot in order to make it look like that for example we had a certain time limit to draw something and than we had to keep a straight face throughout the whole time until the picture was taken.


https://photos.google.com/album/AF1QipP4YK7CRzhW12MRKHm4khpC-lSawjsZYopCJVYy


Light Graffiti

We are going to continue to use the manual settings on our cameras to paint with light or do light graffiti.  We’ve used the ISO and F-Stops (aperture) setting when we took out portraits with the black backgrounds.  For this project, shutter speed will be really important.  In order for you to “paint”, you will need to leave the shutter open as long as possible.  This will allow light to hit the sensor, but it will also give you and your teammates the chance to work.

I have left examples and tutorials at the bottom of this post to give you a place to start with settings and give you some ideas.

It’s going to be frustrating.  You’re going to run out of time to paint, your painting will take practice, the settings won’t be right, the camera will move…..  But, have fun and keep trying.

Here’s what you will need at the end:

+ 5-10 final graffiti images (per group)

+ How did you take your pictures? Settings? Steps?

+ What worked? What didn’t?

+ Frustrations

+ Ideas for taking this project to the next level

+ 1 photo in your post, must have logo

+ An active link to your Google Photo Album

+ Post must be in the “Light Graffiti” category