Infinite Backgrounds


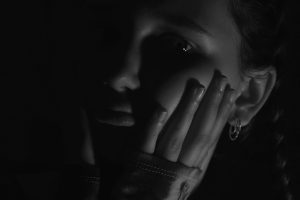
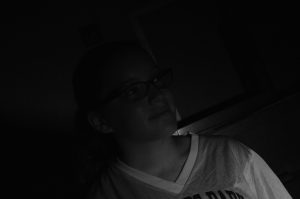
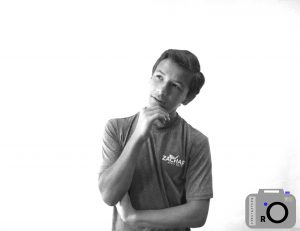
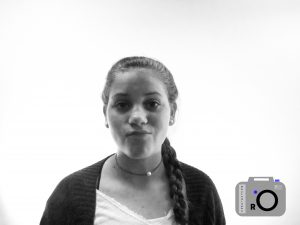
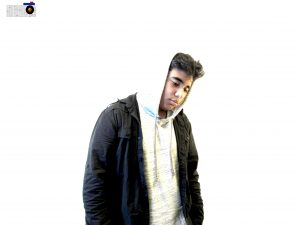
This project was about making the backgrounds of the picture look infinite, that meant trying to avoid showing shadows. I had to adjust the camera’s ISO, Shutter Speed, and F-stop to get my picture just right. The hardest part of the project was editing the photos so that you couldn’t see the shadows, so I had to crop out a lot of things. The easiest part of the project was posing for the pictures. I hope you like my pictures as much as I do.  Link is below.


https://photos.app.goo.gl/iFgsXty5OoUlxQS12


White background

Album link: https://photos.app.goo.gl/ToLn4nPtwudBwvu23

In this project we were told to create an infinite background and have someone pose in front of the camera.  We used the ISO, F-stop, and the shutter speed to create the effect of a never ending background.  Some of the challenges of this project were getting all the settings on the camera correct so that the background looked good and not having a shadow on the background.  Some things I found easy in this project were editing the pictures and posing in front of the camera.  Above is a link to see all the pictures I edited and below that is my favorite picture that I edited.

Portraits

Our goal for this project was to take pictures with a white background and edit them once we finished. In order for the background to appear white, we had to adjust three settings on the camera. These manual camera modes included the ISO, Shutter Speed, and F-Stop. I edited these photos on Adobe Photoshop, applying curves to brighten, lighten, or emphasize certain tones within the picture. Using these editing tools worked very well. Also, using an external light source worked. This ensured that the background would be less dark when the picture was taken. However, the background would appear yellow if the lighting wasn’t good or if the settings weren’t adjusted in a way that would create this effect.

https://photos.app.goo.gl/I8qYd6VuIYGWd47o2


White Infinite Background

We worked with an infinite white background. We used the manual settings on the camera. It was difficult to get the person to stand out while having a solid white background. We used ISO, F-stop and Shutter Speed settings to determine how much light is in the picture. We also used the flash to illuminate the person. If the background was yellow or visible, you could edit it on Adobe Photoshop to make it disappear. I changed the curves, brightness, and contrast to make the background infinitely white and have the person stand out at the same time. Overall this was a difficult but fun project.

LINK TO ALBUM: https://photos.app.goo.gl/x5xka5mhFUoZYBFZ2

Photo taken and edited by me
Photo of me taken and edited by Ansh

Portraits

This week in class we had to take pictures of each other and edit them on Photoshop. When we took the pictures we changed the F-stop, ISO and shutter-speed to get the best looking picture. When editing via Photoshop, I turned my pictures black and white and played around with the curves to get what I thought were the best pictures.

The link to the rest of my photos: https://photos.app.goo.gl/sCU06atUmMG00nbk2

This was my favorite picture taken of me, by Ryan Boswell.

White Background

Album Link: https://photos.app.goo.gl/qWMhIc3jrxwcCC3N2

Reese Owens


My group and I took portraits with white backgrounds and lights. We used Adobe Photoshop to edit the pictures and play with the curves.

White Portraits

This project was very similar to the last one. Except in this one we had to have a pure white background instead of black. To do that we had to have more light going into the camera which we did using Shutter speed. We had “models” stand in front of white sheets of paper and toke random pictures of them. We used ISO and Manuel to make each picture look different and unique. It was easy to find friends to take cool/silly pictures with. It was also very easy to edit the pictures using Adobe Photoshop. It was difficult to have a white background without shadows because we don’t have a professional studio or professional lights.

https://photos.app.goo.gl/cj6hXPYNzFCuyHTh2


Black and White Portraits

The process of this project was to make sure all the camera settings like ISO ans shutter speed where set correctly or else the picture would have a black background. Then I had to desaturate the photo so that the photo will be in all black and white. On Adobe Photoshop, I , played around with the curves to make the photo to my liking. The curves setting on Photoshop worked really well and sometimes the IOS settings were off and we had to retake pictures because they didn’t have a black background. Here is one photo I took;

Here is one photo of me that was taken and edited by someone else;

Here is the link to the rest of my edited black and white portraits;

https://photos.app.goo.gl/feototddYrHvyzML2

White Backgrounds

This week in class we had to take pictures with white backgrounds. In order to do this we had to adjust the ISO, and shutter speed to make the backgrounds have no shadows. Another challenge with this assignment was to make the background white as well as having good lighting on the person’s face.  Everything else on the project were simple fixes such as the distance from the background and angle of the lights. This is one of my favorites because the background looks infinite. The bottom one is me taken by Ella.

This is the link to the rest of the photos https://photos.app.goo.gl/C2vQXEW9zispiTaP2

White background-Portraits-Jack Swisher

https://photos.google.com/album/AF1QipNMwEYIN_XUJ1Sm4s8xRQTqvQKlrXemNWVZNhrk


In order to produce the magnificent linked photographs above,  I used many camera settings.  These pictures are much lighter than your average image.   To create this lightened effect I employed a very slow shutter speed.  In other words, the light being emitted from the background and my subjects had lots of time to reach the lens.  This is why the backgrounds are completely white creating an look of nothingness in the background.  ISO settings in these images are very high.  The images are extremely sensitive to light which is made clear by their bright appearance.  All of these settings were manipulated manually and required a photographer’s expertise.  These images were edited using Adobe Photoshop.

During this project it was easy to edit the photos and add the link of their album into my website.   From my past experience I was able to maneuver the download and upload process but occasional ran into problems.  Once I forgot to convert an image an image into a  jpeg and had to retrace my steps to locate it.  Overall this project challenged me and produced professional images I am proud to share.