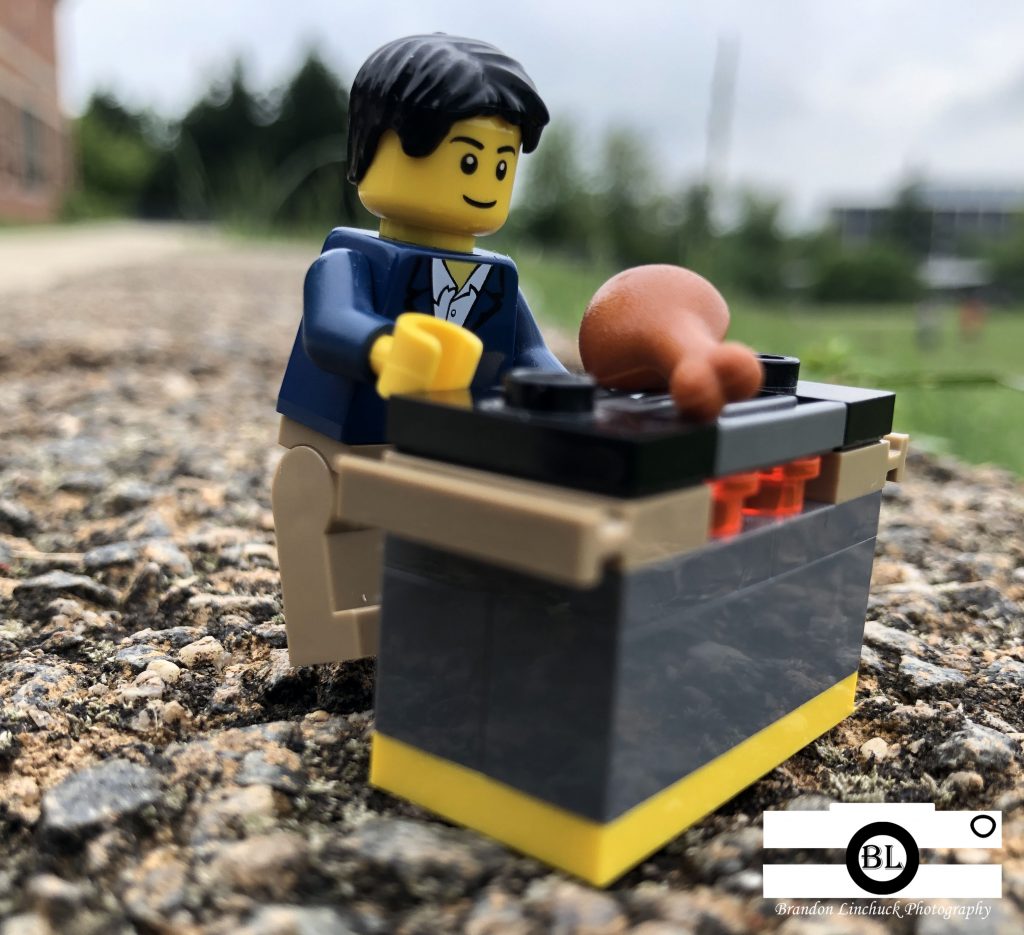
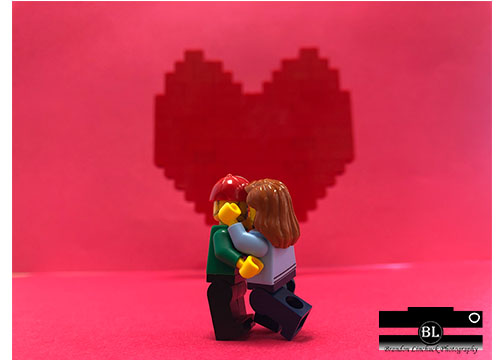
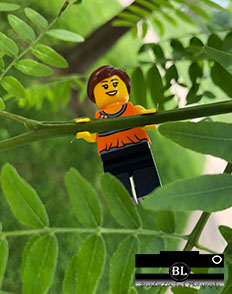
In this photo, I had to get up close to Lego characters and take macro photos of their actions. I had to make sure it was as if the Lego had been in the real world. Like my previous Macro Photos project, we had to take macro photos of the Legos and their actions. The most challenging part of this project would be positioning the Legos into certain actions, as they can’t stand still easily and aren’t flexible. If I had the ability to take more photos in different locations, I would take more photos outdoors with various actions and characters. Maybe even some funny and weird photos.
Grilling the chicken.The American Dream.Hanging in there.
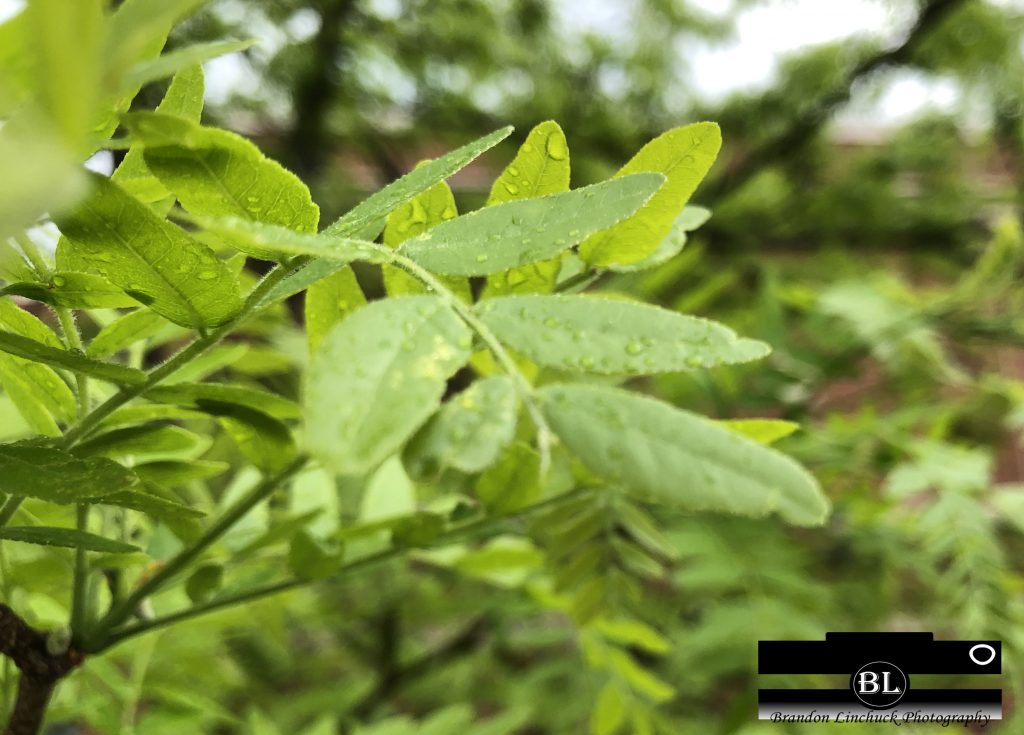
In this assignment, I had to get all close and personal to the objects I was taking photos of. I had to try my best to have it as clear as possible, as well as close up. One thing that worked out for me was the amount of objects I had the ability to take photos of. However, there was a hard part, and that was getting the camera to focus on the main object. I used an app called VSCO, which was new to my camera-taking experience. If I had the patience and correct stuff to take a good, closeup image of something, I would possibly attempt to do a bundle of raindrops on a single leaf. To view more of my macro photos, click here!
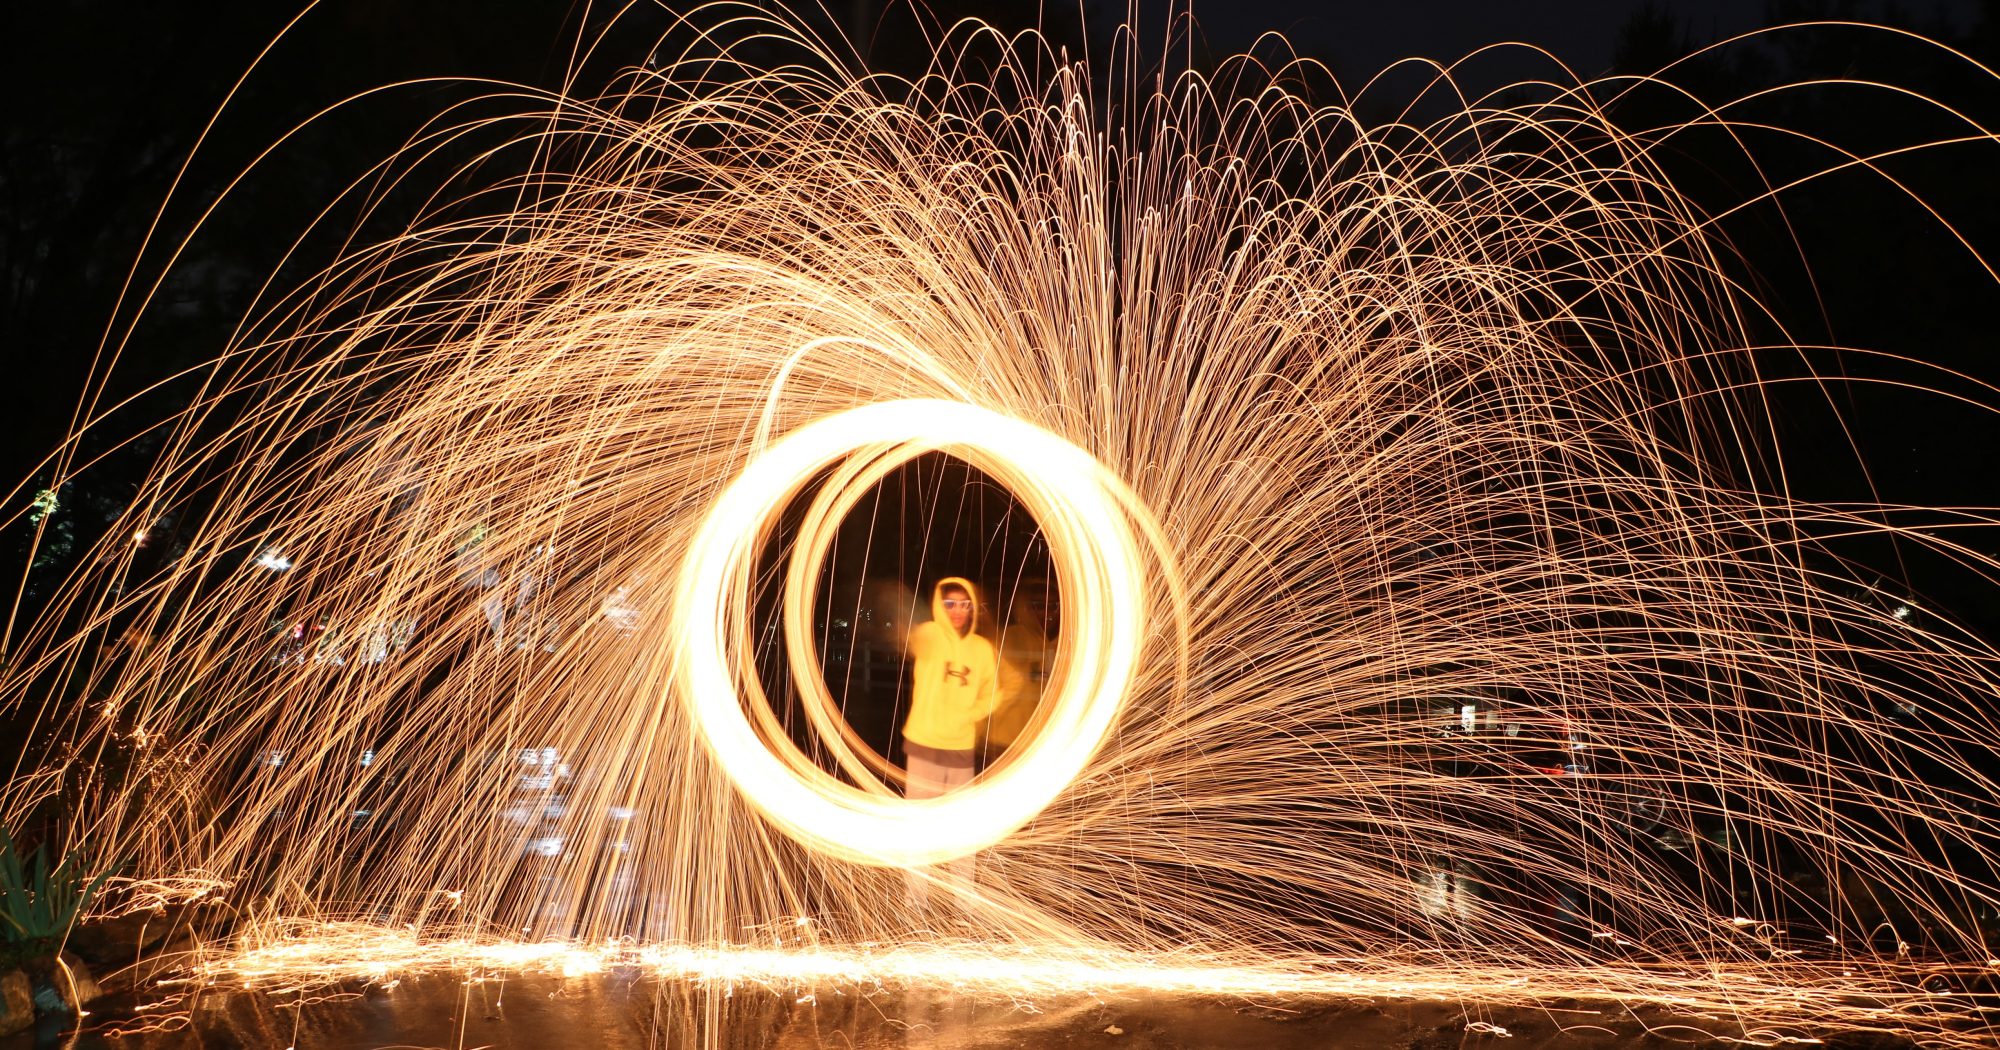
In this project, it was my duty to capture motion in a photo. For example, if someone were to be jumping, I’d have to capture them in mid-air as they go up or come down. While my phone doesn’t have specific settings to help capture the action photos, I did use the burst mode. The burst function captures a bundle of photos, compresses it into 1, and you can choose which photo(s) to keep. One tip that I have for anyone who would like to try out this project is to make sure it isn’t staged, so that it isn’t someone faking a run or doing a pose. Make sure the motion is actually happening and it will capture the motion as is. One sport that would be really good to include for this project could be soccer. From heading a soccer ball, kicking it, and punting it, this sport can demonstrate many different forms of motion. To view more photos of this project, go to this link!
This project was pretty simple, in my opinion. My objective was to find objects to frame the border of the photo, but still have the main object visible. In the photo I provided, the railing of the stairs frames the photo, and still gives me a clear view of my friend Ela. This project is much different from my Rule of Thirds project. The Rule of Thirds project was based off of getting things to either take up one-third or two-thirds of the photo using the grid lines. This project didn’t use the grid lines, but they still could have been useful. This photo I attached is my favorite, mainly because it catches the details of the railing and my friend. The railing is in the perfect position, and so is Ela, so it was a clear shot. One major challenge I had faced within this project had to of had been making sure the photo actually had a frame, and that it wasn’t just something on two sides. To view more framed photos, visit this link. I have cropped a few so that other objects do not intercept with them.
This project had many pros and cons within it. One thing that I would say that didn’t work out so well would have been the weather outside. Well, not really the weather, but the wind. It made it much more difficult to take photos. But, I’d say the lighting and the positioning of the objects and the photos worked out perfectly. At the beginning of this project, I thought that the Rule of Thirds was a bit confusing and difficult. But then, I figured everything out and it became easier for me to take photos for this project. For the Rule of Thirds project to even work, I had to activate a grid onto my camera. This helps position the main focus of the photo. The horizontal and vertical lines also turn the photo into thirds, so you can make your photo proportional. To view more photos of this project, click here!
This assignment, like the black background project, was to take photos with the perfect amount of lighting and to make the white background seem infinite, or invisible. The one thing I could say that worked well within this project would have been the amount of light. The camera absorbed the perfect amount of light to let us take good photos. One thing that hadn’t worked well would have been getting the shadows to disappear using a heat light. The cords weren’t so long, so it was hard for us to get the shadows to go away. To view more white background photos, click here!
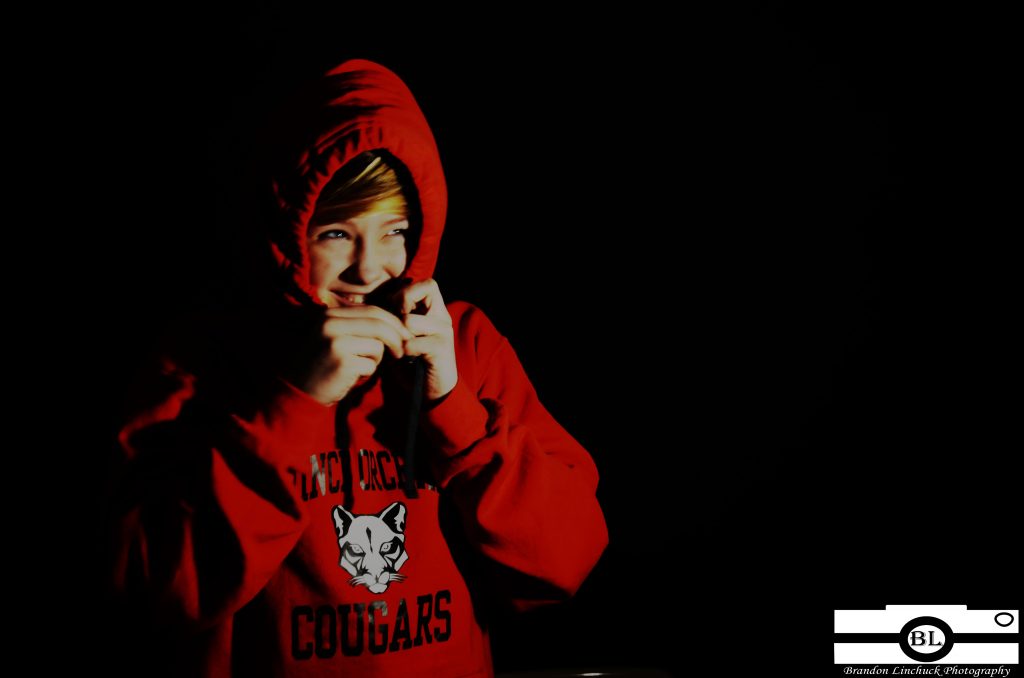
In this project, the main idea was to get the black background to look infinite, or invisible to the scene. I had to adjust the contrast and brightness of the photo, along with the lighting. One thing that I could for sure say that worked well was the light the camera absorbed. I would say it picked up the perfect amount of light. The one major thing that I say didn’t work would have been the movement of the people in the photo. If we were to move, we would become a blur, or look like we had morphed. Click here to view a few more black background photos!
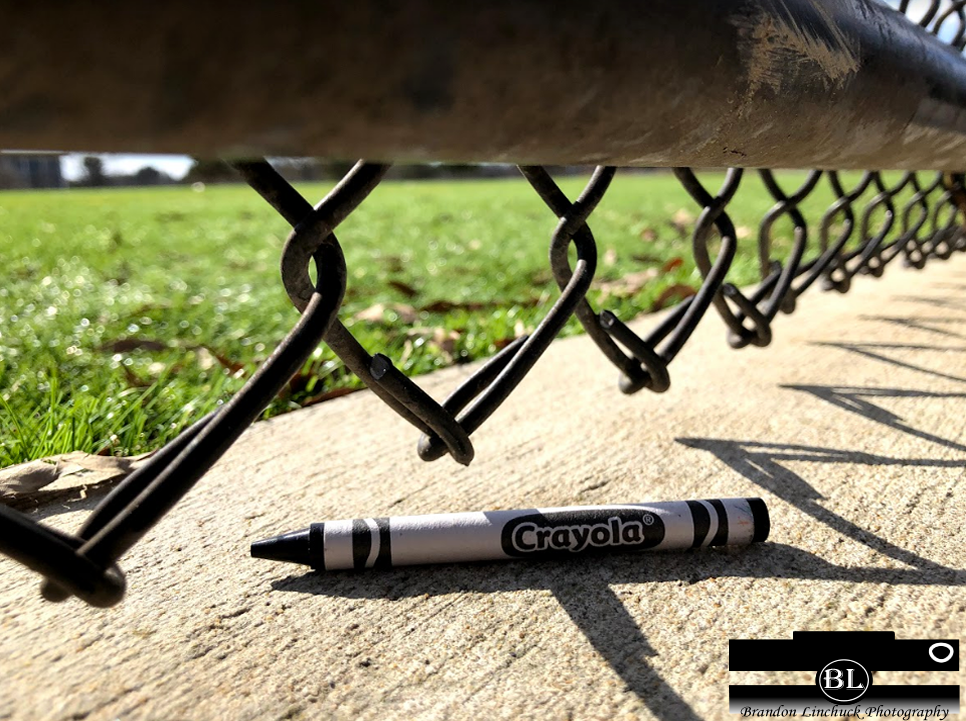
This project was an interactive and comparative project in which I needed to find different objects that have the same or nearly the same color as a crayon. Using the crayon, I put it near or in front of the object to create a photograph in which the crayon and object appear to be the same color! One challenge within this project was knowing that I didn’t have many objects to work with or compare to, meaning I had more of a difficult time taking photos and making good comparisons. One thing I found to be easy, probably, was the timing of the photos. Not many things were moving or going on in the background, so that helped improve the focus of the camera. To view the rest of my 24 Colors photographs, click here!
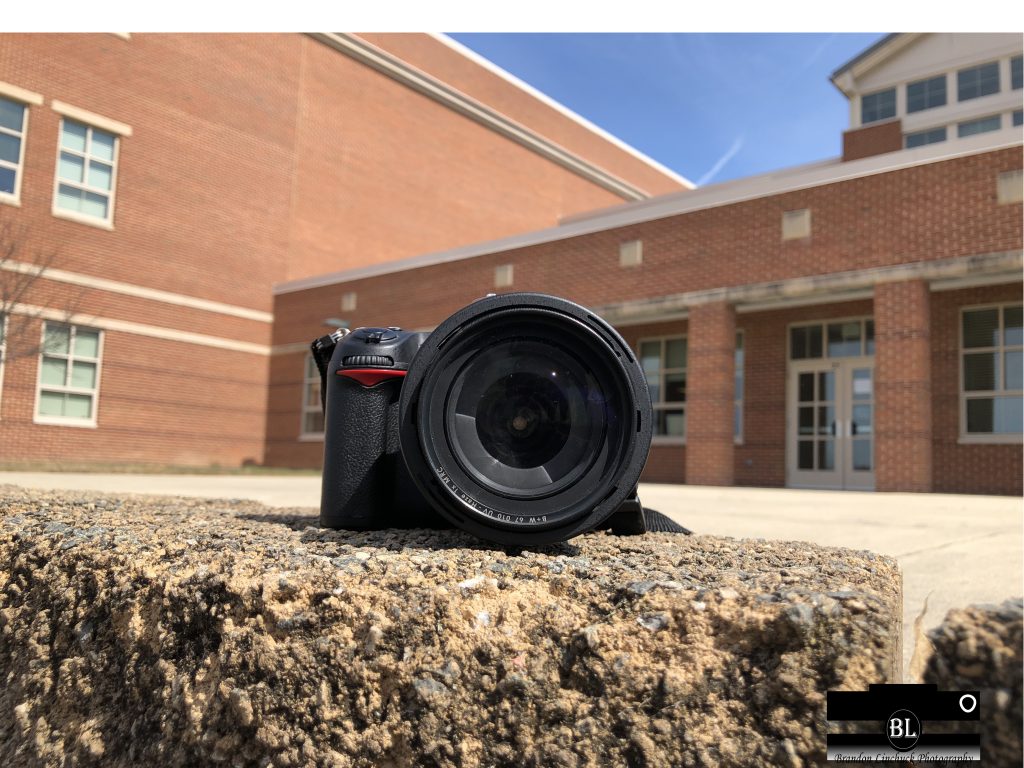
When I am in need of a photo for school projects or other stuff, I’d typically search a key word off of Google. I would usually take the photo freely, not even caring about giving credits to the owner of the photo, as I personally thought it was free for use. Most of the time, I do give credits to the owner of the photograph by mentioning the link/website directed towards the photo. I feel that my photos would need to have some credits in them, as they are photos I took within my own free time. I would like some sort of credit for my photos, whether it would be my name, include my logo, or even have a direct link to my website. As you can see from the picture provided, my logo is unique in many ways. I enjoy my logo for many reasons. One being that my initials “BL” are in the lens of the camera and in a noticeable font. I made the bottom half of the camera fade to white, so I have space to insert my “company” name. I didn’t want it to take up a mass portion of the photos, as I want them to be enjoyed. My camera is a traditional box camera, which is another unique feature. Personally, I think the logo was a bit hard for me to make, considering it was my first time creating a logo and having to think if it would show up in different backgrounds. Considering the fact that I had to get everything into equal dimensions and in proper placement, I wouldn’t consider this an “easy” project. You need the perfect colors, font, dimensions, shapes, font size, and much more.