White background

For this project we had to take pictures in front of a white background and to edit I added black and white in the picture.Things that worked were that the light wasn’t to bright or we can’t see our faces.Things that worked were if the lights were less bright.Click HERE for all the pictures.

Framing Your Subject

In this project we had to use objects in order to frame our subjects. In my photos I used fencing and pillars to frame my subjects. This project was much easier then the rule of thirds project because although I was worried about centering the subject I was able to use the rule of thirds background that I had in order to create my photos. Some of the challenges were finding good types of framing because some of the photos that I originally had took did not work because the framing wasn’t right.

Click here to see my other photos

5 shots

In the assignment we had to take 3 objects and take 5 different pictures.The challenging part for me was to find an object and the angle so it will look good.The hardest photo i did was the one with the person because i couldn’t find angles.The project helped me with better angles of an object.To see the rest of my pictures click here.

Infinite Background(White)

During this project, the main goal was to take a picture and make the background look like it disappeared. We made the ISO higher to make the white background even brighter. As well as a lamp that someone in each group would hold. A challenge during this project was making sure we had the correct ISO. The easier part of this project was to hold the lamp at the correct angle. Below is a picture of me and a picture I took. Click here to view the rest of the white background portraits.

Rule of Thirds

I used different angles made the picture more interesting and unique. When taking pictures front on they were less interesting. My thoughts changed because I thought it would be harder to take photos but it’s not very hard. On the caution sign picture, I placed the sign in the top left corner and lined it up with the top left point. When I took the picture of Mary I placed her on the top left corner. You can look at the other pictures here.

Rule Of Thirds

In this project we had to use a 3 by 3 grid in order to correctly place an object or person. I had a hard time trying to get objects lined up with the lines of the grid. When I got it lined up the picture turned out good. In the beginning of this project I wasn’t excited but now I think it has truly helped me take better photos. When I was taking these photos I was looking for an interesting background that way it wouldn’t look bad.

Click here to see the other photos

Framing

In this project, we had to frame our subjects. I took pictures inside and outside with Anika as my subject and used many different regular structures to frame her. I like the photo below because. This was project was different from the rule of thirds project since your eye had to move around the picture, but here you wanted the subject to be the main focus. Some challenges were making sure the subject was in the frame in an aesthetically pleasing manner and finding aesthetically pleasing frames. I enjoyed this project more than the others. Click here for the other pictures.

White Background

For this project, we had to make the background look infinite. We had to make it look like there was no background. I adjusted the camera to make it more light sensitive therefore, the background looked at bright as possible. While I was editing I found it super easy to adjust the brightness. One thing I struggled with was getting the right adjustments on the camera. It was very challenging to get rid of the shadow.

Click here to view the rest of my photos.

Framing Your Subject

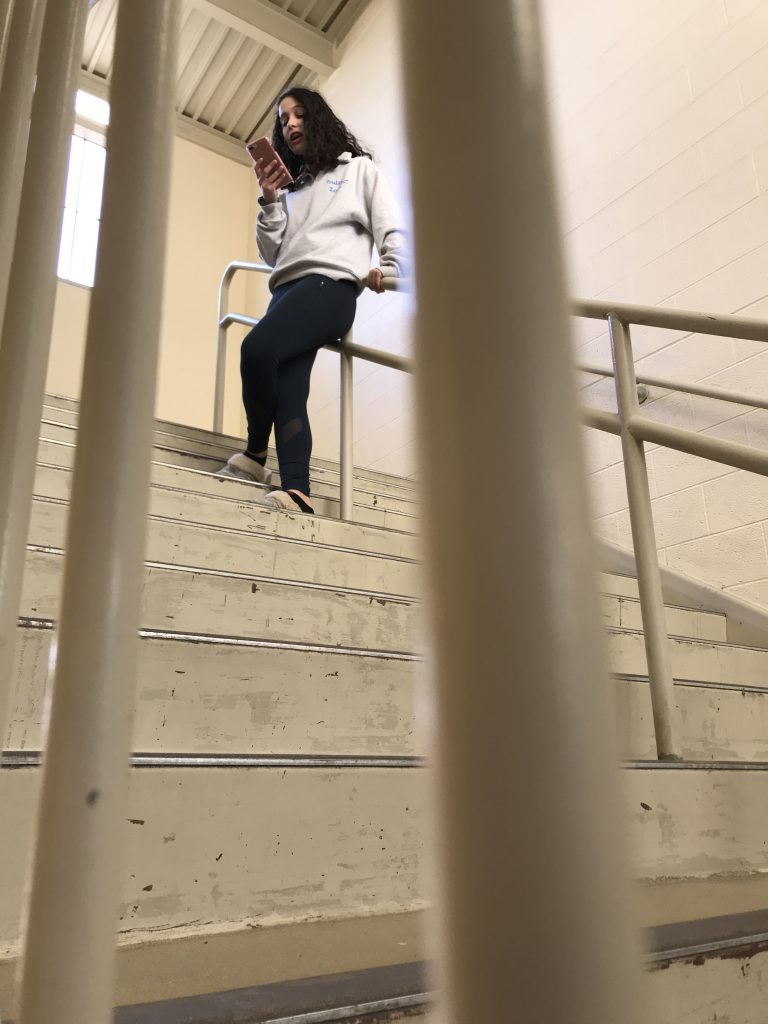
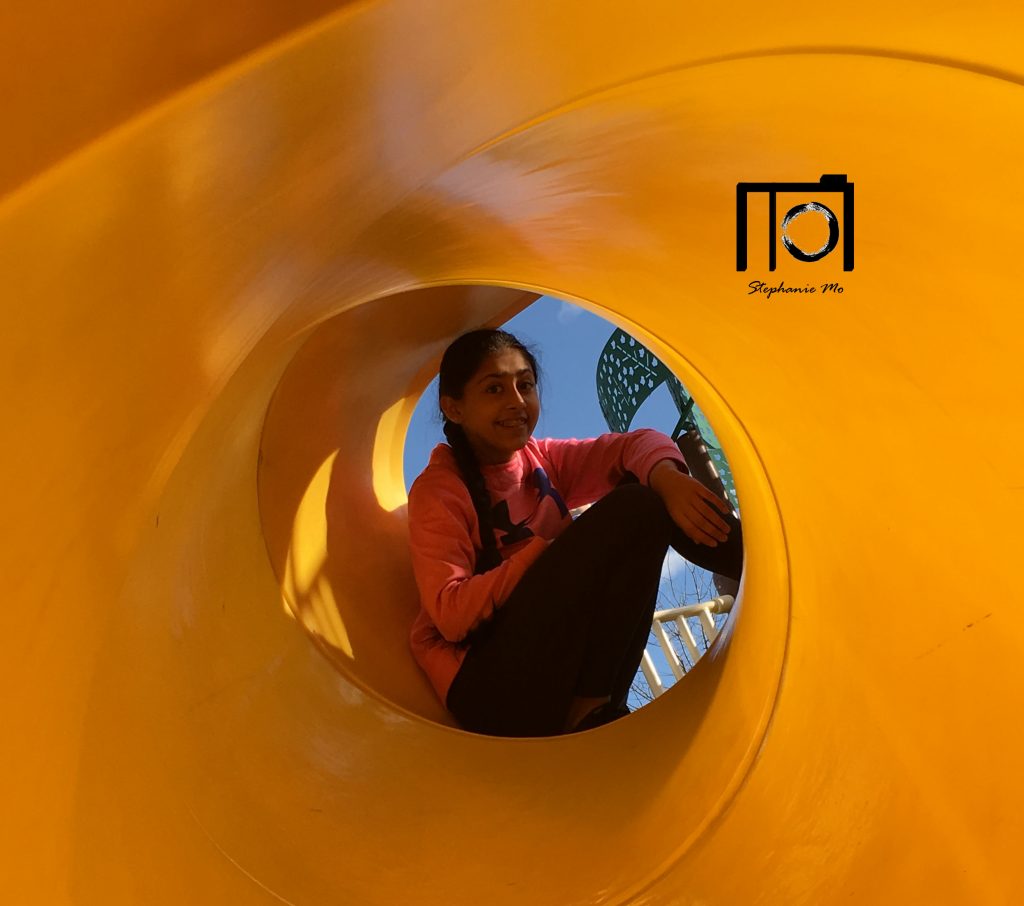
This project was pretty easy for me. We had to use a person or an object and take a picture of them, while another object is framing them. For example, you could use a door frame and have a person inside the door frame. The door would be framing the person. The composition of this project differs with the rule of thirds one. For rule of thirds, the object is not the center and you see most of the background. This one, however, is normally the center and there really is no background. This photo is my favorite because I used a tree to frame her and I love trees. I also love it because the shadow falls really nicely on her face. Some challenges that I faced were making sure that the frame was interesting enough and not boring.

Click here to see the rest of my photos.

Framing Your Subject

In this project, it was all about framing your subject and placing your subject in a frame. I took pictures inside and outside with Stephanie as my subject and framed her in various locations around school. This photo is my favorite because I framed her with natural shadow made by the trees around us. In my opinion, I think its really creative to frame your subject with a shadow because shadows can be difficult to take a photo of. This project was different from Rule of Thirds because in Rule of Thirds your eye had to travel back to something. In this project, the main focus was the subject. Some challenges were making sure the subject fit in the frame right, shooting locations, and making sure that it looked creative. Overall, I really enjoyed this project.

Click here to see more photos!