Last Project!

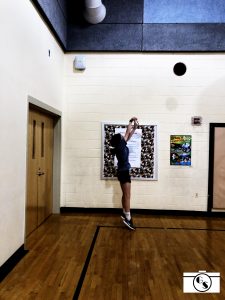
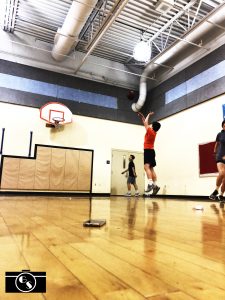
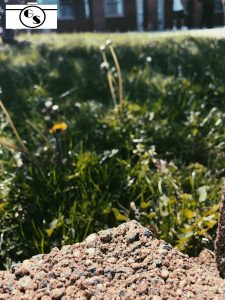
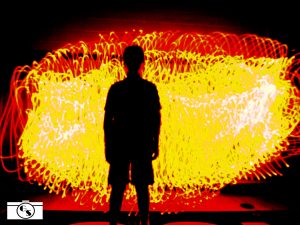
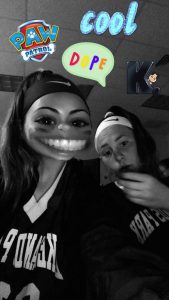
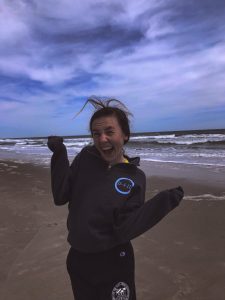
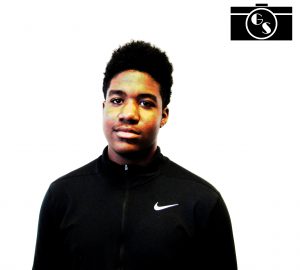
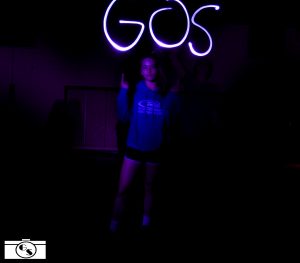
During this semester, I have learned a lot (isn’t that surprising). I have learned many new techniques and methods on how to take photos. For example rule of thirds, black and white backgrounds, and many more. After taking this class, I have grown to like taking photos and learning different ways on how to take them to make them look different, special, or just flat out stunning ya know. If you look at a photo from the beginning of the year and now, the photos are very different and I think I have definitely improved. my favorite project was probably the close up photos. It was fun to look at the little details after the photo was taken of the object and it wasn’t very hard. Although, that was my favorite, I did like all of the other projects too. Photography in the future does not interest me as a career but I would like to take it in high school so i can learn more about it… even though you do lots of writing in that class too lol. I do like taking photos and editing them with different apps and websites, but I don’t think I have a future with it. For this last project we had to take two different photos (one good and one bad) of 10 different things. It was really easy to take the bad photos and a little difficult to take good flicks because we didn’t have much to work with. Here are two of my okay photos from this semester in PHOTOGRAPHY:

To see all of my photos go to this link: https://docs.google.com/presentation/d/1BddmC42gKQ70xHNND5C0bab1oUMsJJ6ybmWEktBUOl8/edit?usp=sharing

sorry this is long, you are probably falling asleep now. Have fun next year dealing with the annoying soon to be eighth graders!


Action Photo!

For this project we had to take photos of something/someone in action. I used my iPhone and held down the button to take a burst. I then picked out the good photo. Next, I edited the photos on the computer and added my logo to my two “favorites”. I do not have any tips because I suck at photos but i will recommend Mr. Frank Fitzpatrick. His email is  @Frank_Fitzpatrick@mcpsmd.net. If i could take an action photo if any sport or thing, I would do a surfer under a wave or a football player during the game. To look at more of my stunning, beautiful bracelets, go to this link: https://photos.app.goo.gl/Er0ZRUMXCJuZN3lx1

have a wonderful day! bye.


Getting up Close and Personal!

For this project we had to find different images and take an up close photo of the details in them. Flowers and outside objects worked better than objects inside. Also using natural light was much easier then the crusty ceiling light. I have never taken a photo of something so close, so I tried something new and focused on the little details. Sometimes it was difficult to get my phone to focus on the certain spot I wanted it to, but eventually it focused. If I had the equipment and ability to get to mars or the moon, I would love to take up close photos of the different types of surfaces. I would love to take a photo of the sun but that wouldn’t end well. To see more of my gorgeous photos other than these two beauties, go to this link: https://photos.app.goo.gl/uit91hJo9TW689N6A

Processed with VSCO with c1 preset

Smile!

For this project, we had to ask a person to smile and then not smile for a picture. It was really cool to see the difference in what people look like when they were smiling and when they were not. I don’t think this project was very difficult because all you had to was take a picture of someone. Although, it was a little difficult to pick and choose which person made the biggest difference. The biggest change I saw was the way a person looked. For example, a kid looked mean and not very friendly when he was not serious, and when he smiled, he looked nice and welcoming. Bias could affect a job as a photographer because if you take a photo of someone without them knowing, you could think they are different then what they actually are. If I was hired as a photographer, I would ask what type of photos they want and a little bit about their background. For example, if I was taking a picture of someone for graduation, i would ask them whether they wanted it to be more like a #scholar or more like a kid who just graduated and barely passed.

To see kool photos go here: https://docs.google.com/presentation/d/1BaEUzeo7fJHQZ4dEbM1CzE5SNwuFSwrsYJbPprr_pZM/edit?usp=sharing

Light Graffiti!


For this project, we had to switch the camera to manual, ISO 100, and the shutter speed to about thirteen seconds. First, you have to turn all the lights out and the background needs to be dark. Make sure the settings are correct as the same ones as above. Next you need to have a light source. For example, we used a flashlight, Christmas lights, and any light available. Next, press the photo button and start to draw with the light facing the camera. Whenever the light is on, it will show up in the picture. You also need to light up the person who is in the photo if you want to see them. Taking the photo and drawing was easy but making sure there were no extra lines of light was difficult during some photos. It was very frustrating working with some people but at the end we did it! #goteam Next time when I do this project, I would use more lights and different colors to take this project to the next level.

To see the rest of my beautiful photos, click on the link: https://photos.app.goo.gl/hbvnZ0HgHbJaCngi2

goodnight.

App Review!

The app I used was snap chat. Snap chat is an app for many people to take pictures and videos with many types of filters and send them to friends or put it on a story where all of their friends can see. Snap chat is totally my favorite because i like the filters and stickers I can add to a photo.
Here is a photo I took with the app:

My favorite website I used was Polarr. It is a website that you can upload photos and edit them with different filters and settings. I like this website because it had good filters and quality. This is the link to the website: https://photoeditor.polarr.co/

Here is the photo I edited:

Newseum!

I used the Fire Escape photo by Stanley J. Foreman in 1976. As they were coming down from the fire escape, the ladder fell and the 19 year old kid died while the two year old kid lived. This is photo was very sad and felt to the heart. People around thought that they would be okay but they weren’t. I was drawn to the photo because the setting and scene of the photo was very capturing.

I also used the photo Camera Captures Horror by Charles Porter IV by 1995. The fireman holding the baby from the deadly terrorist attack. This photo is very sad and touching. The photo had very good lighting and it was a good photo.

If I was taking the photo, I don’t think I would be able to separate being a person and photographer during these times because it was very tragic and emotional. Most photographers had to separate their personal life and job during these attacks. For the ones who did a good job, their photos turned out well and really captured the moment and what was happening at that time.

My favorite photo was the FBI exhibit. I liked the artifacts and readings about the bombings and attacks. They were very interesting and caught my attention. I thought it stood out to me compared to all of the other exhibits. The FBI exhibit had many  different stories and attacks that were told in detail. For example, there was a story about how ISIS captured one of ours and held him hostage while torturing and eventually killed him. Therefore, the FBI exhibit was one of the best exhibits I saw at the Newseum. bye now.

Link to the Pulitzer Prize can be found here: http://www.pulitzer.org/prize-winners-by-category/217

goodnight.

Rule of Thirds!

For this assignment we had to take four photos with human life and 4 photos without while using the rule of thirds. It was much easier to take a picture with a person in it then without. However, using the sky was easy because it took up two thirds of the picture. My thoughts changed from the beginning of the project because the rule of thirds is a little bit different and harder. This is because finding the correct line to put it on is difficult. In the first photo, Mr. G (the goat) is on the left vertical line in the rule of thirds. In my second favorite photo, the sky is taking up two thirds of the rule of thirds horizontally.

To see the rest of my beautiful photos: https://photos.app.goo.gl/7iE9qZq1vtka0ZVJ2


white background!

In this project, we had to adjust the shutter speed and the amount of light that came into the photo. We produced a photo that looked like there was no background. It was an easier process to take the white photos then the black. This is because the white background fit in with the picture better and it was easier to find which setting the camera  needed to capture the right picture. The settings worked great and by standing further from the wall, the picture came out better. I thought the light didn’t help as much as I thought it would. For the black background we didn’t use any background because we took all the light out of the photo and the background just looked black. However in the white background pictures, we used a white sheet of paper on the wall and stepped a couple feet off of the wall the capture the image. This was efficient because you couldn’t see the persons shadow.

For the rest of my photos go to this link: https://photos.app.goo.gl/5dmoY9FptdZtnsbd2