Pro’s vs. Joe’s

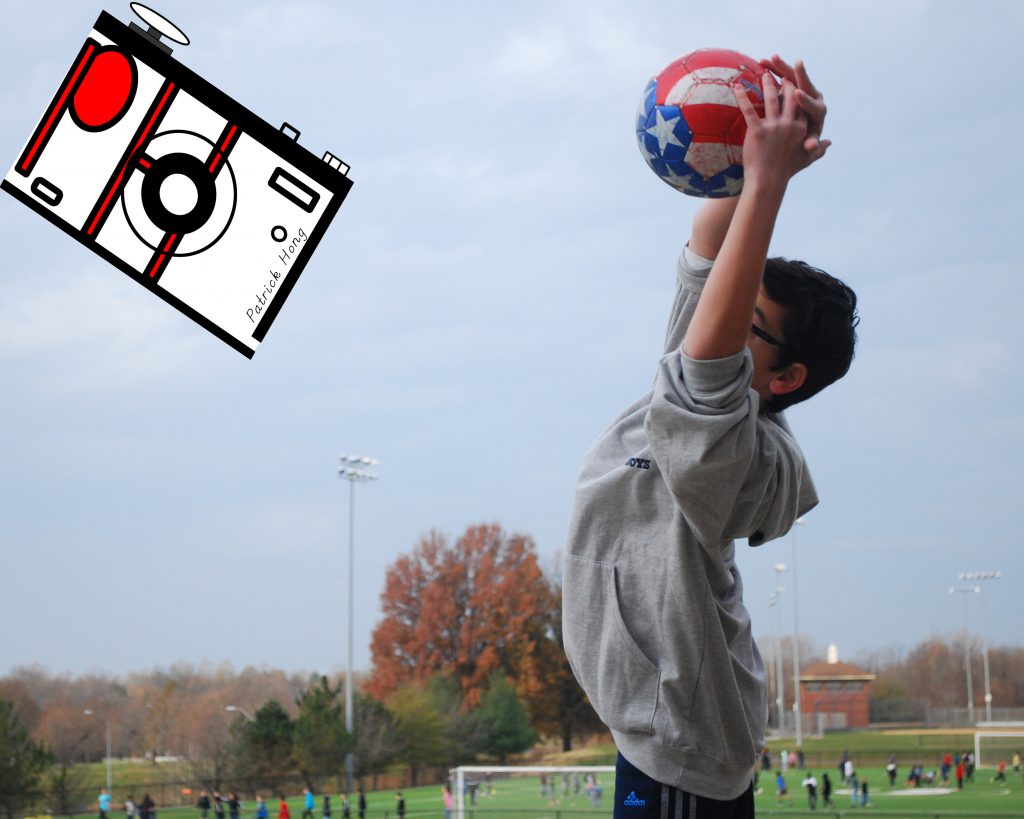
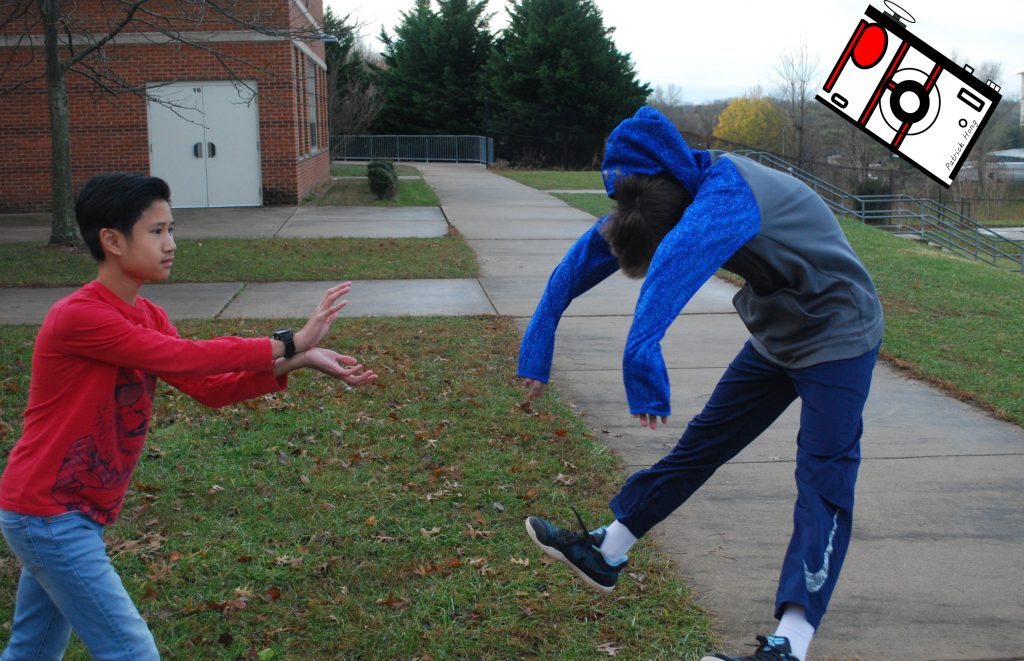
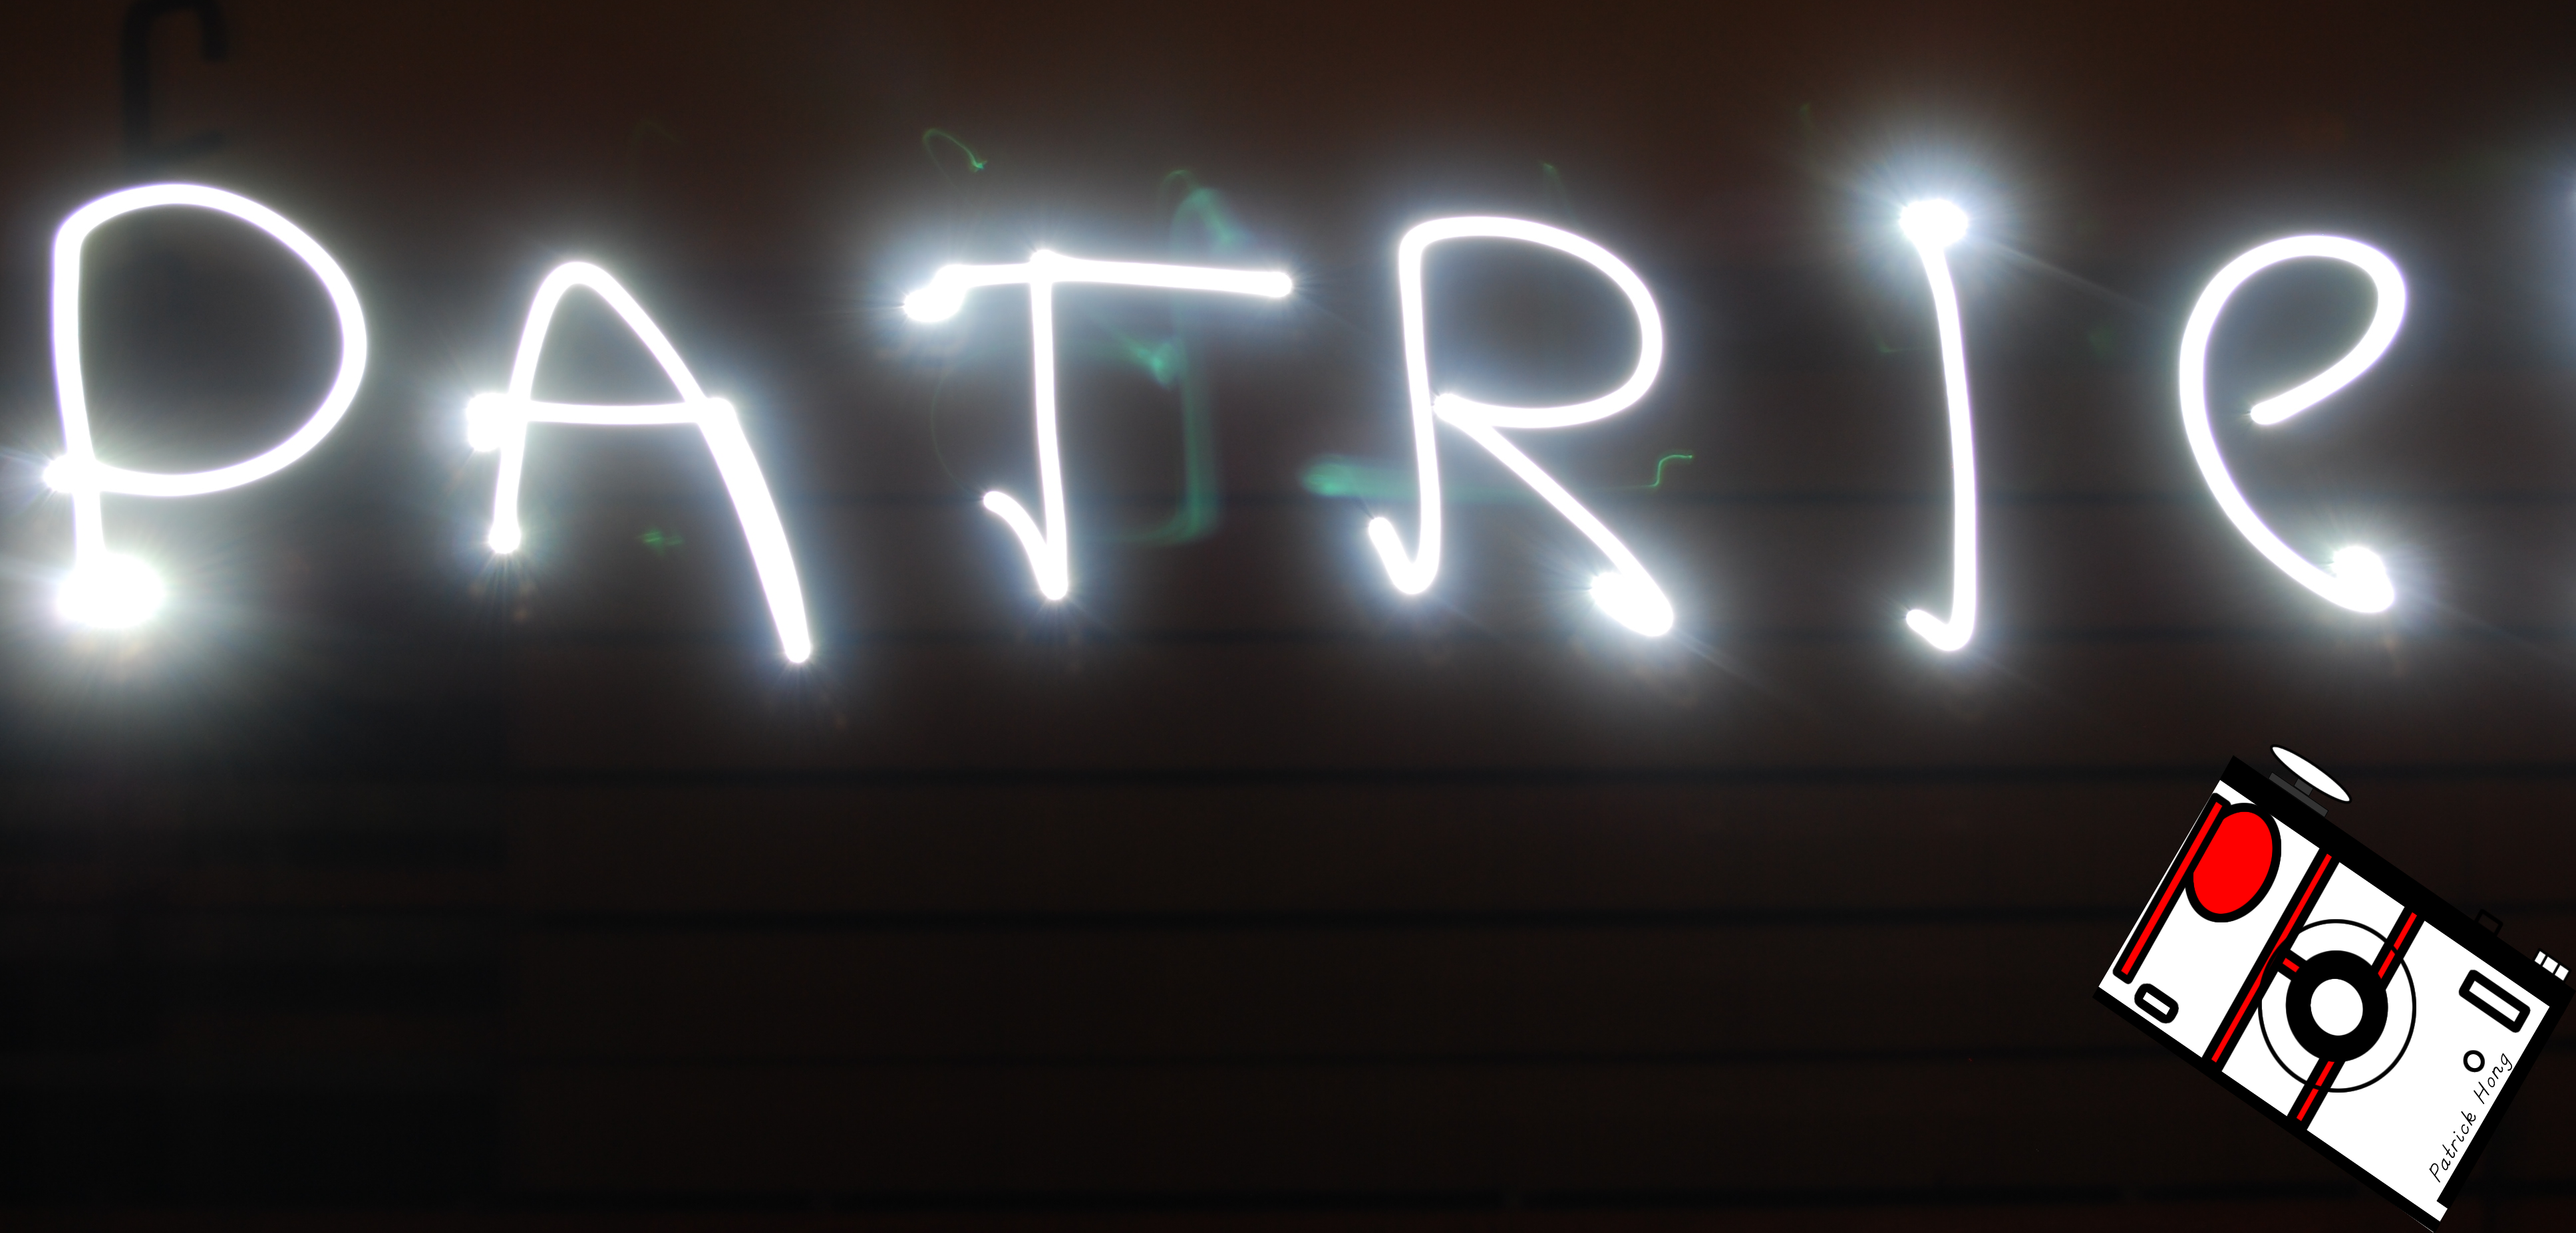
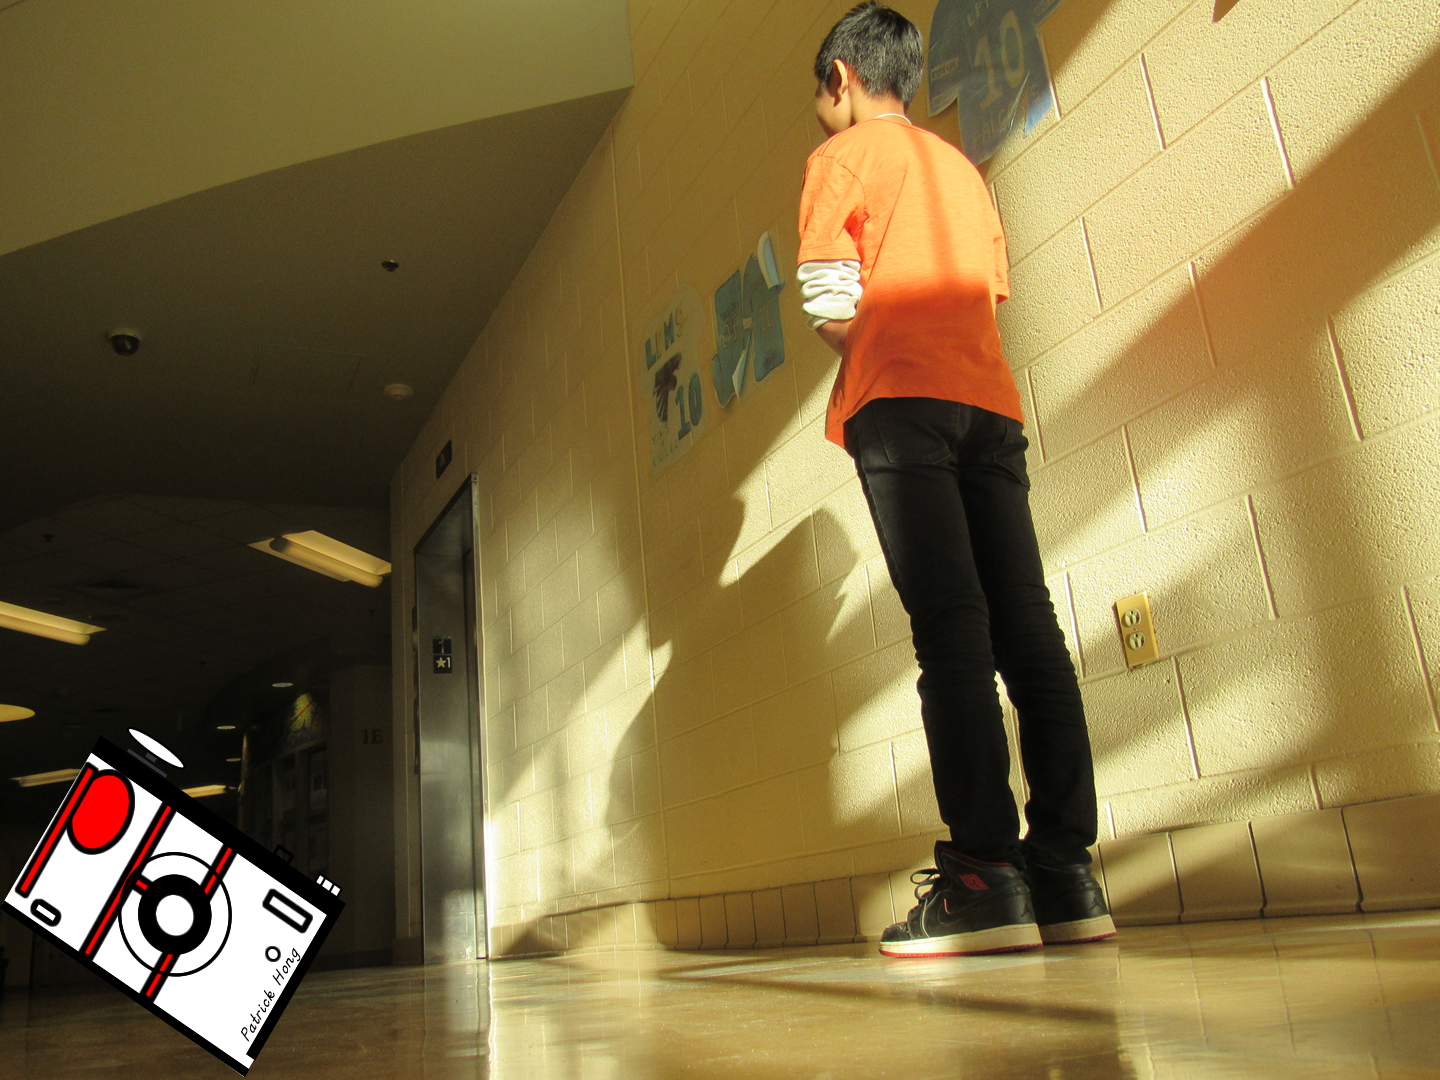
Over the entire semester, I have learned many tips on how to take proper photos. Photography class was a very entertaining, yet hard-working class. My thoughts on photography have completely changed. I now view photography as a very intricate topic with many different viewpoints. I have also changed the way I take pictures. Using all the techniques we have learned, I now usually used Rule of Thirds and different angles in my pictures. My favorite project was light graffiti because it was very interesting to see how the pictures turned out after we drew them in the dark. The light graffiti still amazes me. Photography is a very interesting career, but I don’t believe I will become a photographer when I grow up. I may continue to take photography into high school, unless there are other options that interest me more (since I already took photography this year). It has been a pleasure being in this class for the first semester. My favorite photo is shown below.

Getting Close

For this assignment we had to take macro pictures. This meant that we had to get really close to the object in order to capture tiny minuscule details that we normally don’t see with the naked eye. Taking macro pictures may require certain apps like VSCO if you want better pictures, but your phones and cameras may already have auto macro settings. For this project, taking pictures in the outdoors provide better lighting because when you put your camera really close to the object, it blocks some of the light so if you’re inside it really impacts the picture. Trying to get good pictures were difficult because we really had to find things that looked interesting really closely. It was also challenging with the lighting. We had to make sure the camera didn’t completely block the light. We also had trouble keeping the camera still. At such a close proximity, we had to keep our hands steady in order for the camera to adjust. If I had the time to get there I would go to the Amazon Rain forest to take pictures. The Amazon Rain forest is full of animals and plants that are very unique and special. Animals like parrots, leopards, and more can be great macro pictures. 2 of my favorite photos are shown below. The rest can be found here.

Set in the Street

For this project we took pictures using a combination of the styles used by Carrie Mae Weems and Justin Bettman. Each picture told a story within a kitchen background. All we had was a yellow wall, a kitchen table, a lamp, and some chairs which is Carrie Mae Weems’ style. We also took the picture in a public scene, inside the school which is Justin Bettman’s style. Carrie Mae Weems is a photographer that takes pictures in a kitchen which tells a story. Justin Bettman is a photographer that takes pictures in a public scene with only a background. This creates the illusion that the people in the picture is in a completely normal background but they may actually be in Times Square. For the pictures I took, I used Photoshop to edit them. In Photoshop I first turned the picture into black and white. Then I messed with the hues a little more to match the style of Carrie Mae Weems. After that I used the elliptical tool to highlight the area below the lamp. I then went to modify, feather, and then changed it to 200 pixels. I finally hit inverse to highlight the area where the elliptical did not cover. I changed the area to a darker hue so it made the darkness above the lamp more convincing. If I were to take a picture of my family to show a story, I would take it in the living room. This is because we mostly gather there and do most of our things there. At least at one point of the day, we are all in the living room. You would probably see us watching a movie, on our electronics, or doing other things. One of my edited photo and zoomed out photo is shown below. The rest can be found here.

Action

For this project we had to take picture of objects (people) in motion. The project had to involve a variety of people doing different actions. To capture good pictures we had to set the ISO on 800 so the light setting would look natural. We also had to set the shutter speed on 1/800 because the objects tended to move very fast. 1/800 means that the shutter of the camera would only stay open for 1/800 of a second. This would also take clearer images of the objects in motion. We also used our previous knowledge of Rule of Thirds and different perspectives. We sometimes had to lay on the ground to take a better looking picture. I would recommend, if you are trying to take “action” photos, to stand very close to the object in motion. The camera would focus better if it was closer. Also you should take pictures outside for better light quality. If I would photograph a specific sport, I would take pictures of basketball games. Basketball games involve a lot of movement and interaction between players. Also, dunking pictures look great. 2 of my favorite pictures are shown below. The rest can be found here.

7 Days

This is a picture of one of the many rivers in the Chesapeake and Ohio Canal National Historical Park. This picture shows that I am thankful for water because many people in the world don’t have the surplus amount of water that we have in the U.S.
Though this picture may look confusing, it symbolizes the diversity in our country. The more diversity in our country, the more unique it is. I am thankful for that because everyone can express their personality however they want to. 
This is a picture of the Statue of Liberty. This picture symbolizes my thankfulness for the liberty I get for being in this country. Liberty is not something to take for granted because much of the world doesn’t have it. 
This is a picture of a heart (with candy inside of it). This symbolizes my thankfulness for love. Everyone needs to be appreciated and loved in a certain way. I am thankful that I am loved by my family.
This picture obviously symbolizes my thankfulness for my family. I am thankful that I have a mom and a dad to come home to everyday. Not everyone has a family to come home to, so I am thankful for my family.
This is a picture of a house. I am thankful for having a home that shelters me from the cold and gives me electricity. A house warms me in the winter and provides me a bed to sleep in at night.
This is a picture of food (specifically grapes). This symbolizes my thankfulness for food. Though food is a necessary component in everyone’s life, not everyone has it. I am thankful for food because everyday, I can come home and eat a piping hot meal for dinner.

Smile

For this project we had to take 15 pairs of photos (in our case 20 pairs because we were in a group) of people. One picture had to have them with a smile while the other had no smile. The difficulties of this project were asking complete strangers to take their pictures. This was kind of awkward in some situations and sometimes they would look really intimidating. However, after we asked them to smile, their face would turn into a whole different person. I saw many intimidating faces “light up” once we asked them to smile. A smile can turn anyone into a completely different person. Bias could affect a photographer because when we look at a person, we judge them based on their current appearance. When photographers do this, they lose many opportunities that they could have had if they just asked a simple question. If I was hired to be a photographer, I would ask my client/subject questions such as, “What would you consider to be your best achievement in life?” or, “What is your favorite emotion to experience?” (such as happiness or sadness). Asking questions like these helps me perceive the person better and also helps rid the bias. You can find the pictures we took here. Overall, this project helped us learn that “You can’t judge a book by its cover”.

Light Graffiti

For this project we went to the gym to create light graffiti in the dark. We first had to turn off all the lights and set up the camera. To take these types of photos we had to change the shutter speed so that the camera would stay open for a long time to take in the light while we draw the image we wanted to create using light from our phones or other light producing object. The camera we used had the bulb setting which allows us to keep the camera open for as long as we wanted to which allows us an infinite amount of time to draw our images. All we had to do was hold the button that takes pictures until we finished, then the light graffiti image will be created. If we wanted light to show up we would shine the light towards the camera. If we wanted to highlight an object we would shine it away from the camera, while “highlighting” the object. What didn’t work for this project was drawing “perfectly”. It was difficult to remember where we already shined the camera at and how big the camera’s range was. What was easy was that we had the bulb setting which allowed us to draw as long as we wanted, unlike other cameras that only gave you several seconds. I was frustrated at my group sometimes because they would fool around or they couldn’t draw very well. Also at some times the camera would act weird and if we didn’t draw the picture fast enough, the light in one area would be much brighter than the rest of the picture. I think that this project would be even better if we had several people drawing at the same time with many different lights. We could draw a forest or a city which would be cool. One of my favorite pictures is shown below. It is a picture of my name, but the k was cut off due to the lack of room. The rest can be found here.

Rule of Thirds

For this project we had to take photos that followed the Rule of Thirds. The Rule of Thirds is where there are 2 lines going across the screen vertically and horizontally, creating 9 boxes. For the camera we turned on the Rule of Thirds mode to help us take the pictures more easily. To follow the Rule of Thirds we centered the object along one of the lines so all our photos (if not most) follow the Rule of Thirds. In the beginning I always thought that you had to place the object in the center of the picture but now I know that that’s wrong. The Rule of Thirds creates a very focused and more developed picture rather than placing the object in the dead center. For this project we were not able to place one of the Rule of Thirds line on a thin object. We tried to place one of the lines on a goal post but it didn’t work very well because it was too small. What worked for this project was lining the Rule of Thirds lines along the edges of the object if it was too big for the screen. As showed below, I took a picture of the school building and lined the edges of the building on the Rule of Thirds lines. My favorite image with a person and without a person is shown below. The rest can be found here.

Portraits: White Background

In this project we had to work together to create an infinite background with white backgrounds on manual mode. To take the pictures we had to adjust the camera settings such as, ISO, Shutter Speed, and F-Stop. These settings allowed the camera to take in more light or less light. This would create backgrounds with no shadows and the illusion of an “infinite” background. For the white backgrounds we adjusted the ISO to be around either 3200 or 1600. Then we changed the shutter speed to adjust the light setting of our photos. For most of them we put them at 1/40 or 1/30. To edit our photos we went to Photoshop and changed the light settings even more. If we still had problems we would crop the photo. For this project, taking multiple pictures with different camera settings really made things easier because it gave us many options to choose from. However, if we took photos that were too bright or too dark, we wouldn’t even be able to edit them in Photoshop. This project required us to handle the camera without it being on auto. Below is a picture that I took and a picture of me. You can find my group’s white background photos here.

Portraits: Black Background

In this project we had to work together to create an infinite background with black backgrounds on manual mode. To take the pictures we had to adjust the camera settings such as, ISO, Shutter Speed, and F-Stop. These settings allowed the camera to take in more light or less light. This would create backgrounds with no shadows and the illusion of an “infinite” background. For the black backgrounds we adjusted the ISO to be around either 800 or 400, sometimes even as low as 200. We also changed the shutter speed to adjust the light setting of our photos. For the shutter speed we adjusted it based on our clothing and if there were shadows or not. The shutter settings ranged from as low as 1/30 to 1/60 (since we already adjusted the ISO). To edit our photos we went to Photoshop and changed the light settings even more. If we still had problems we would crop the photo. For the black backgrounds we would have problems with the lighting so we had to move the light to be in front of the camera. However, if we took photos that had too much or too little light, we wouldn’t even be able to edit them in Photoshop. This project required us to handle the camera without it being on auto. Below is a picture that I took and a picture of me. You can find my group’s black background photos here.