Last Post Quinn Hilbert

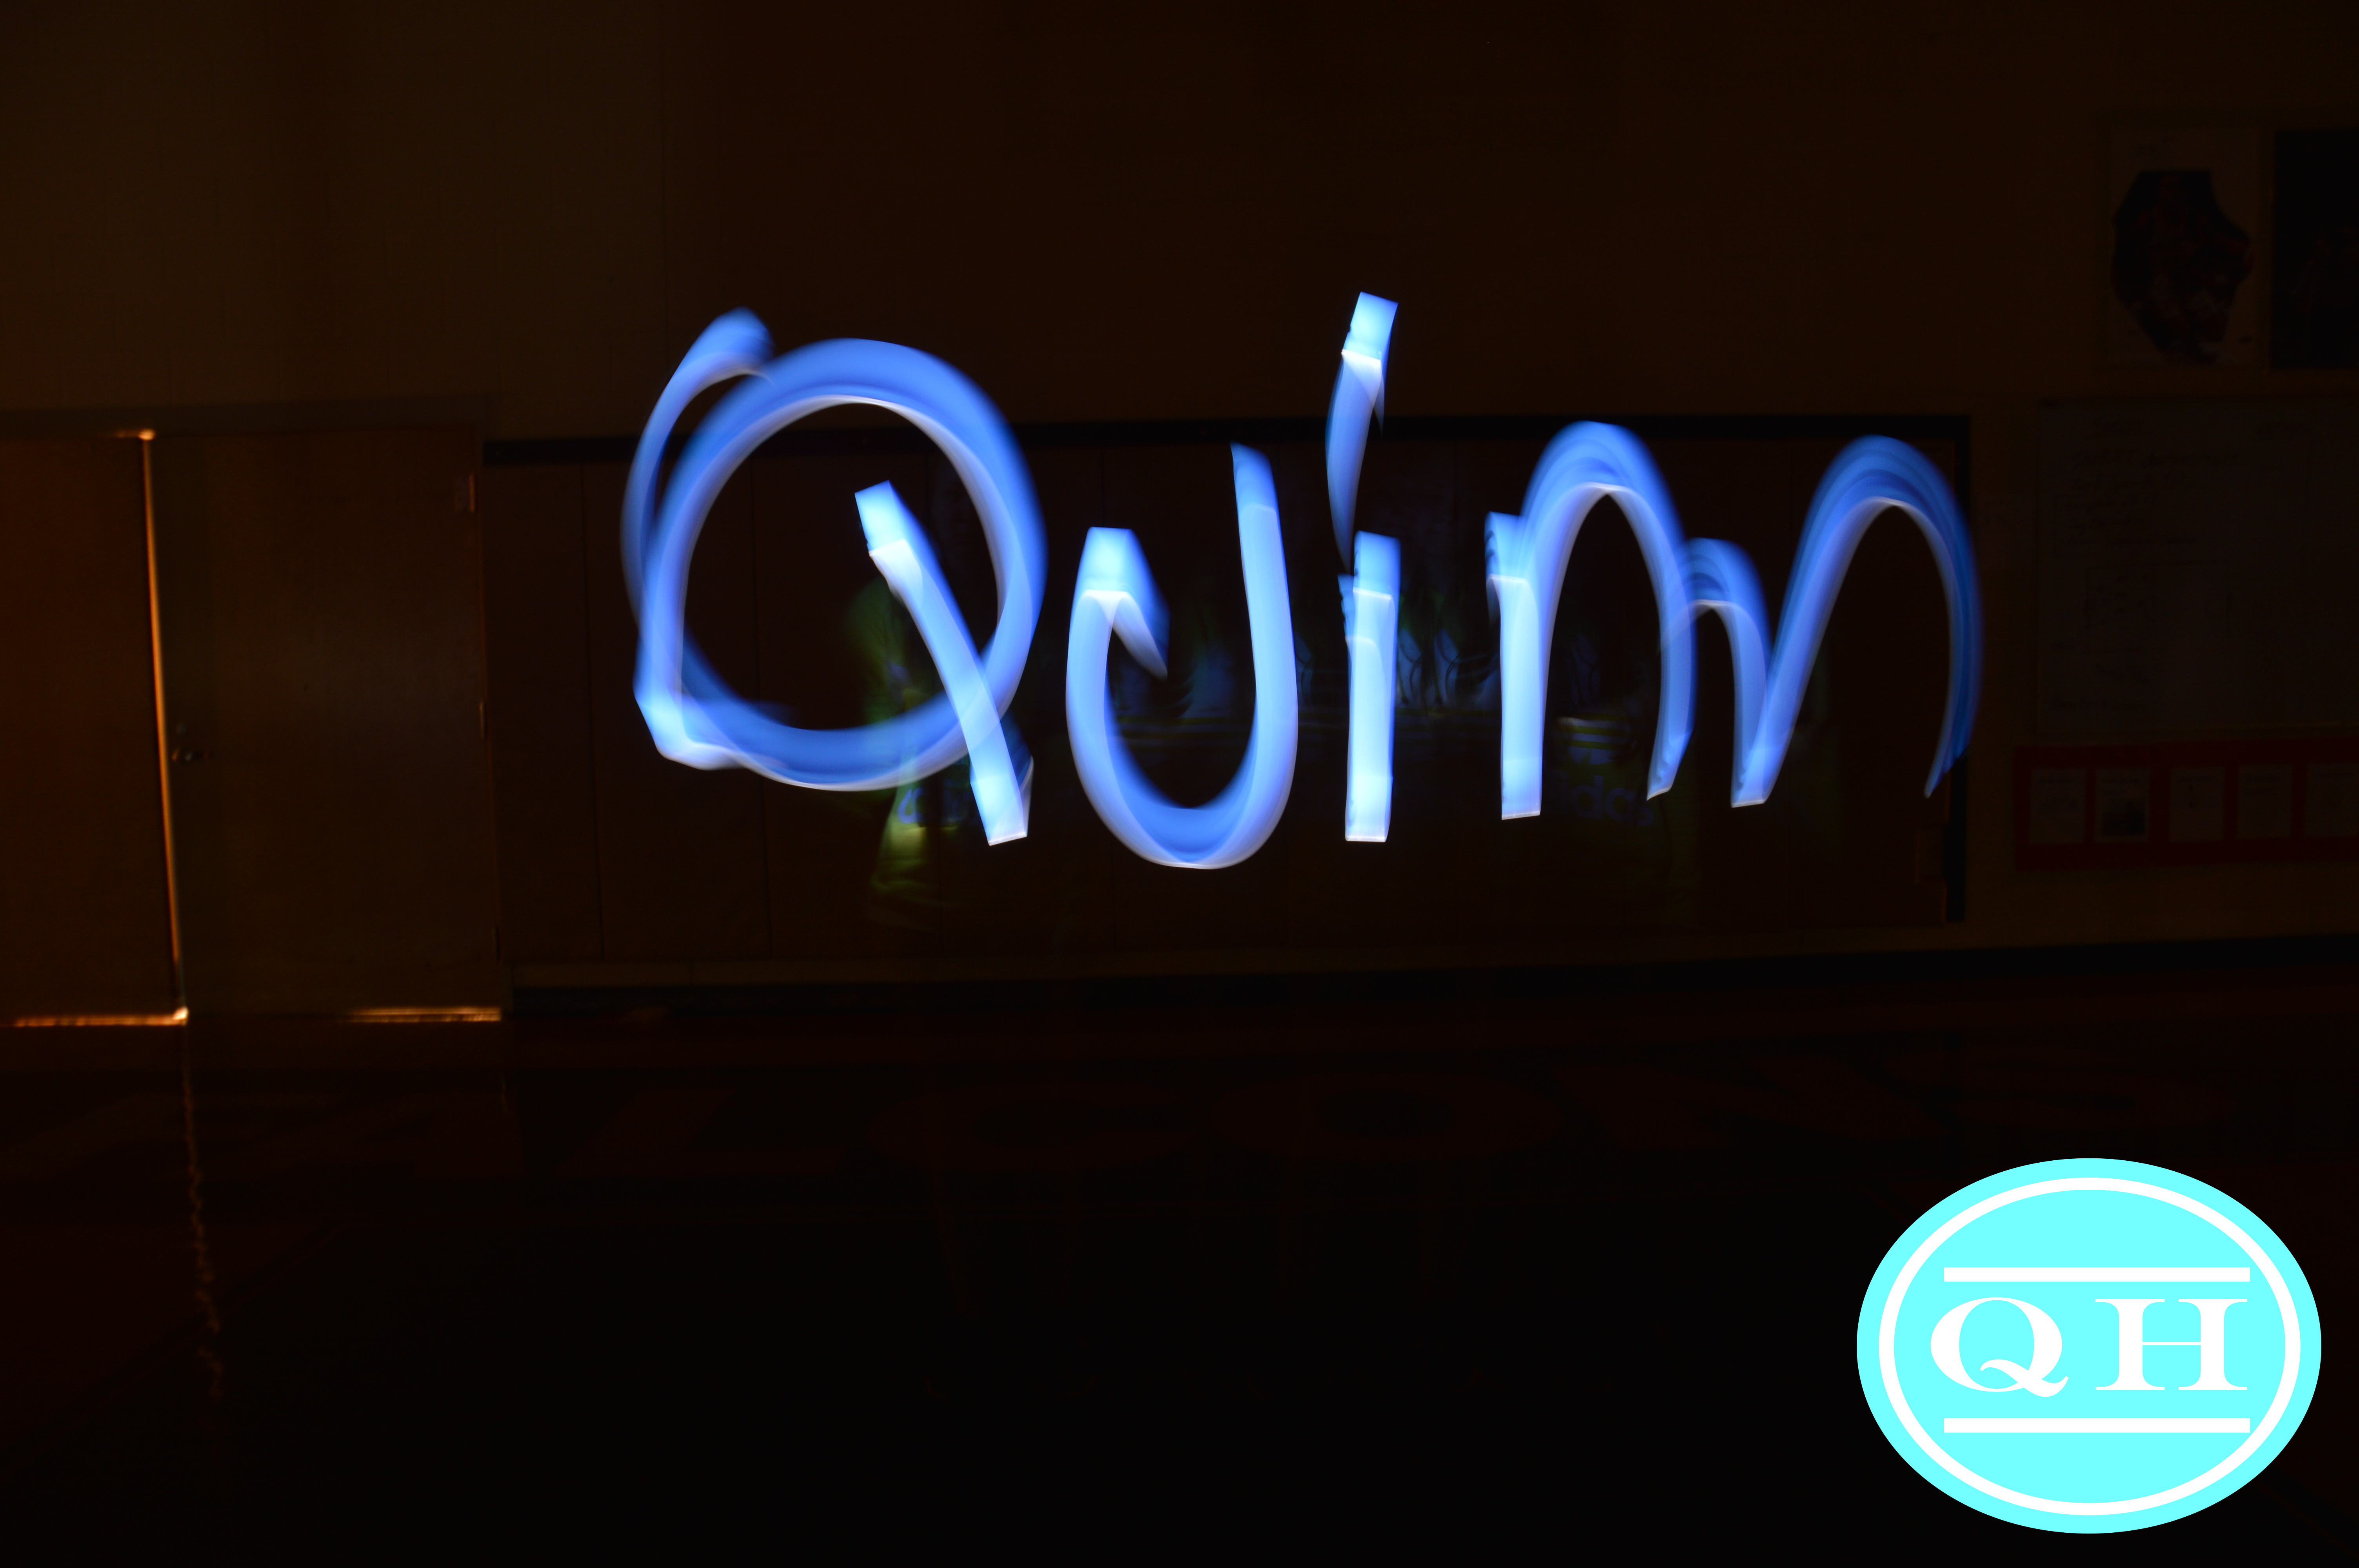
This semester was so much fun, I learned so much about photography. This class really help me learn how to take good photos using different techniques. My thoughts on photography didn’t change, I was always interested in photography. But this help me grow as a photographer. I did change the way I take my photos, I think my photos skills have improved over the semester. My favorite project was Light graffiti because I though it was very cool. Also, I think it looks very interesting and you can make your own designs and patterns. Photography interests me as a career. I will continue learning photography in High School, because I really enjoy it and I ‘m interested in it and I want to keep growing as a photographer. In the end, I think photography is a very cool and a good skill to have. Below is my favorite post of this semester.

:

Up Close

For this project we had to take a least 10 photos of living and not living things; up close. The thing that work well for this project was using VSCO , this made it easy to get a close up photo of a object/person, without it being fuzzy. I did try something new and that was using the app VSCO. The challenges I had were finding objects to take close up photos. Also it was hard taking a photo of someone eyes because of blinking and the camera not focusing . If I had the ability to take a good close up photo, I would want to take a photo of a butterfly or dragon fly, up close. If you would like to see the rest of my close up photos click HERE.

Quinn’s Set In the Street

For this project, We had to use the table set and take 4 photos black and white photos. These photos should have different emotions and feelings. Also we had to take a photo of the full set in color. This project was inspired by Justin Bettman and  Carrie Mae Weems.  This two amazing people had the idea of making a story with a really cool backgrounds. They took a series of photos are these created a story line. To edit my photos I used Photoshop. In Photoshop I made my photos black and white.  Then I change the contrast and lighting.  Next, I used the elliptical tool and made a oval under the light. Then I clicked Modify. Then Clicked feather and put it in the number 200. Then I click inverse and it highlighted the top part. Then I played around with the lighting and color. In did this to all of my pictures below. We did this to make it look like we where in a real room. This made It darker above the light and so the light only shinned below. This gave it a cool effect that we were in a real dinning room. If I had to chose a place to tell my family’s story it would be in a park. You would see my brothers and I fighting, then my mom and dad yelling at us, Eating food and playing games. Also, the sun would be shinning with a bright blue sky with some clouds. 

Sad and alone 
Happy Dinner
Fighting Dinner
Dating Dinner 
Reality 

Quinn’s Action

For this project, we had to take 8 to 10 photos of people or things in action. The people can be jumping, running, kicking, etc and  you have to take a photo of them when they are in the middle of doing that action. Or, you can get a picture of a object dropping in the air.  The thing that help me get good images was counting down from 3. So, when I said 1 the person would do their action or they will drop the object.  This help me to know when to take the photo.  My tips if you want to take action photos I would count down, and make sure the camera still as you take the photo. The actions I would have done if I could would be skateboarding, kicking a ball, fencing and swimming.  If you want to see the rest of my photos click here. 

Quinn’s 7 Days

For this project we had to take 7 photos of things or people we are thankful for. The first photo I took was of my dog. I’m thankful for my dog because he makes me happy and helps me when i’m stress. The second photo is part of my family. I’m thankful for them because they help and support me for everything that I do. The third photo is of my friend, i’m thankful for her because she always makes me laugh and smile. The forth photo is of my ukulele, I’m thankful of it because it helps me get out stress and if I had a hard day I would just play some tunes. The fifth photo is of my phone. I’m thankful for my phone because that’s how I Face time and text my friends and family.  The sixth photo is of New York City. I’m thankful for New York City because that’s where my aunt lives and I love seeing her. New York City is like my second home. Lastly I’m thankful for my brothers. I’m thankful for them because sometimes we hang out when we aren’t fighting with each other. If you want to see my photos there down below. 

Quinn’s Smile Project

The difficult part of this project was finding people who would let me take a photo of them. Many people I asked said no. The changes I see is that their face gets lighter when they smile and they look a  totally different person. Being bias could affect your job as a photographer  because maybe you want to take a photo of someone but they are scary looking.  But some how you see them smile and they don’t look scary anymore. Also, they may look a way but then their job,life,feelings, or personality could be different than their outside look.  When you are hired you should ask your client, Who are you? I think this question will give you a fair photos. If you would like to see my smile project click here.

Quinn’s Rule of Thirds

For this project we had take photos of objects and people but we needed to use the rule of thirds. The rule of thirds is imagery lines that help you take photos but the main part of your photo needs to be off to the side.  In other words, Your object or person shouldn’t be in the middle.  I used the rule in my pictures below because I lined up the fake line with the tree. This made the tree the main part. Then when I took the photo of a person they stood on the side so they line up with the line.  To take my photos I made sure I took the pictures of objects and people off to the side and lining up with the line.  My thoughts of the rule of thirds is that it really help me take a good photo that focus on a object or person. Also it help me take a photo that is not just in the middle but on the side.  My thoughts change from the beginning of the project because, at first I didn’t really get how the rule of thirds work but now I do because I practice a lot, I got the hang of it.  The things that work for this project was the lighting and lining up the objects and people with he lines.  The hard part was finding cool and different places to take the photos.  Below are examples of the rule of thirds, and if you would like to see the rest of my photos click here. 


Quinn’s Light Graffiti

I took my photos by going to a dark room and using phones, glow sticks and flashlights to draw objects and our name.  The first set was making the camera lined up in middle right where you want to take your photos. Then we change the setting too this allowed us to take as long as we need drawing with the lights. Someone had to hold down the button then let go when the others where done drawing. Then we had to wait for a few seconds to allow the picture to prepossess. The thing that work was using our phones as lights. My group and I had an idea to go online to find a plain color background then we took a screenshot, turn up the brightness, then we drew.  The things that didn’t work was trying to draw a landscape, this was really had to color all the way in. The things that frustrated me was standing still because if you moved you could end up fuzzy. An idea I have to take this project to the next level is to take a photo of a landscape with people or animals then you try to recreate the same image. The same colors and try to add ideals into the drawing. Below is my favorite photo from this project and if you would like to see the rest of my photos click here.

Quinn’s Portraits

For this project my group and I stood in front of a black background. To make the photos darker we turned off the lights so there wasn’t a lot of light.  We had to  play around with the ISO to make the background all black and without shadows. I edited my photos by using Photoshop. I played with the contrast and brightness to make the the photo darker but still able to see it. I also cropped out unwanted background for my photos.  The thing  that work the most was making the ISO settings perfect. It wasn’t that had to find the perfect ISO. The hard part was trying to angle the lights perfectly so you can see the person but also make sure there wasn’t any shadows in the background. Below is a photo of myself and I photo I took of someone less. If you would like to see the rest of my photos click here.  

Quinn’s Portraits

In this project we had to go in fount of a white background with lights shinning on the background. When we took the photos we had to adjust the ISO on the camera so that it brought in all the light. This made the  background  all white.   I edited my photos with Photoshop, I changed the contrast a bit and the brightness to help with the yellow spots.  I also crop the photo to get rid of unwanted background like people or the classroom. Many things work with this project.  One example is when we had to stand in front of the lights so there wasn’t any shadows.  The thing that was hard for the project was getting the perfect ISO. So the background is all white. Below is a photo of myself and a photo that I took of someone else.  If you would like to see the rest of my photos click here.