My photography semester passed by very, VERY quickly. I had so much fun taking pictures using unfamiliar techniques, camera settings, and methods. Using these things opened me up to a array of fantastic pictures that I never knew I could do. My favorite project to do was “7 days” because I took some amazing photos and got to explain how these things make me happy in life. Before starting this class, I thought taking pictures couldn’t be professionally done and that anyone could do it. I then learned that taking pictures is actually pretty complicated. There are many different methods of taking pictures, settings on my camera that I never even thought about, perfect lighting combinations, etc. After this semester, I started finding unique positions to take pictures of and getting the perfect lighting. This class taught me that photography is very fun, and I hope to continue pursuing it in high school (along with my other art interests).
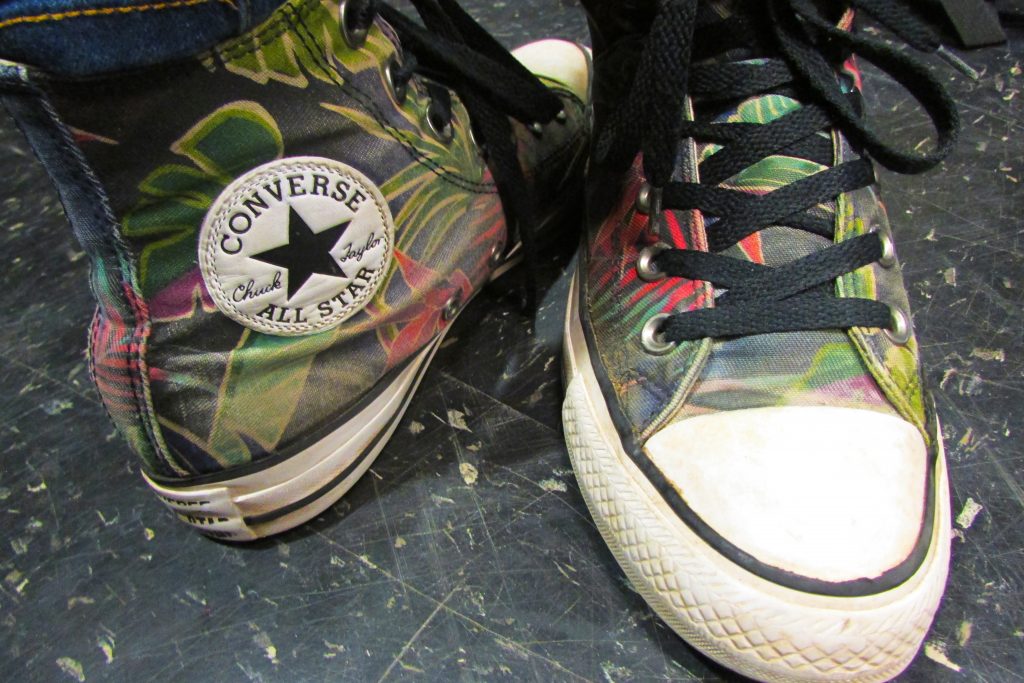
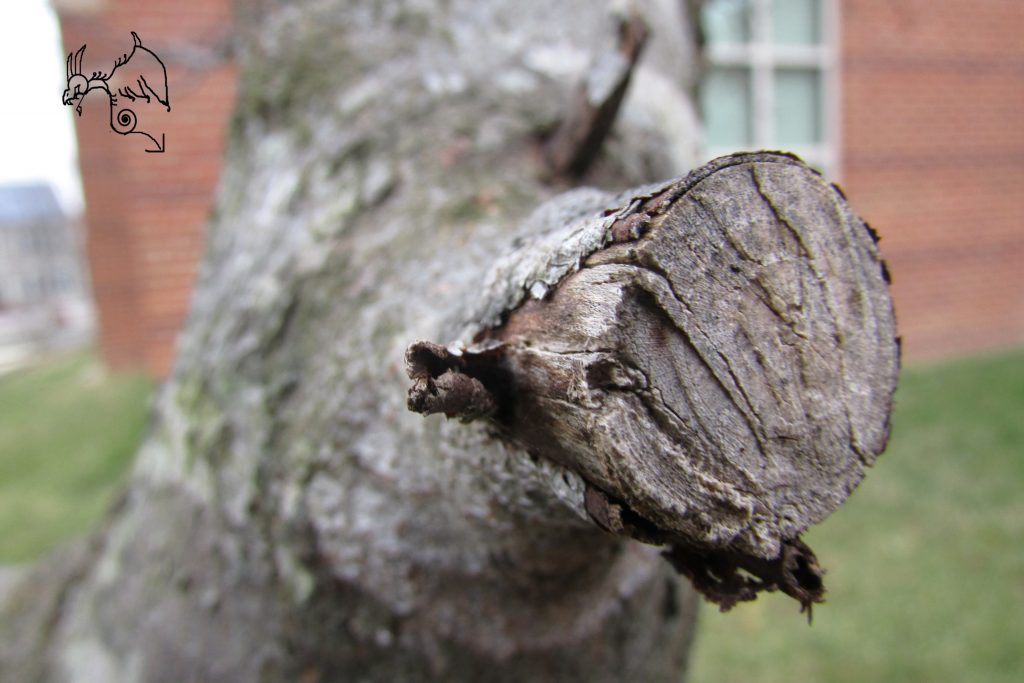
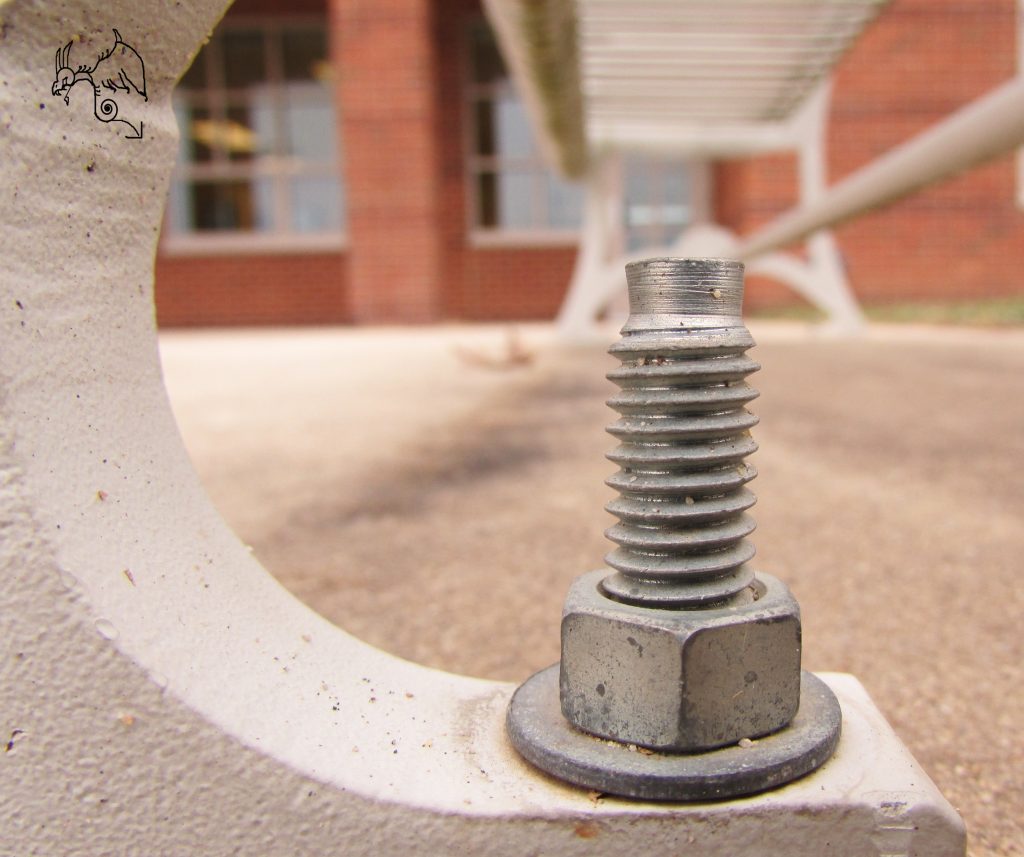
Macro Photography is a method of taking pictures by putting your camera really close to something and snapping a picture. In the majority of macro photographs, the main object is bigger than in real life. By using the macro setting on my camera, I got some really clear and spot on photographs of plants, materials, and objects. I was hoping to find some insects or animals to take pictures of, but I had no luck. In addition, if the camera shook just a bit, the pictures would turn out to be very blurry. If I had professional equipment for macro photography, I would head out into the open and take spectacular pictures of exotic plants, insects, and amphibians. I really enjoyed this project and I can’t wait to see what’s next! -Marie Valouiski
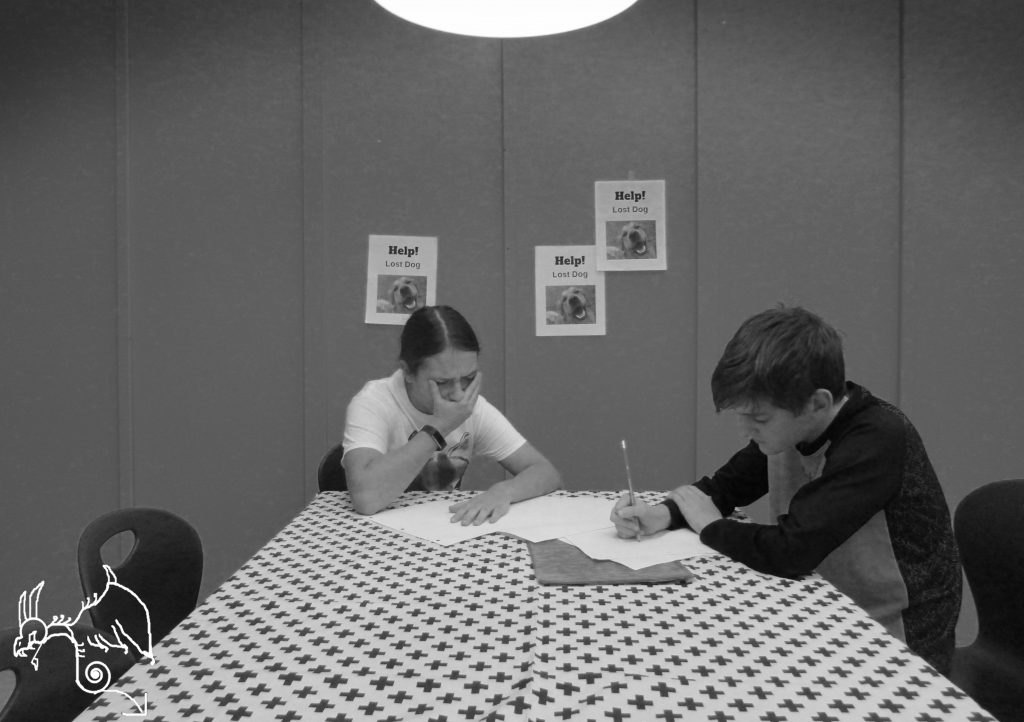
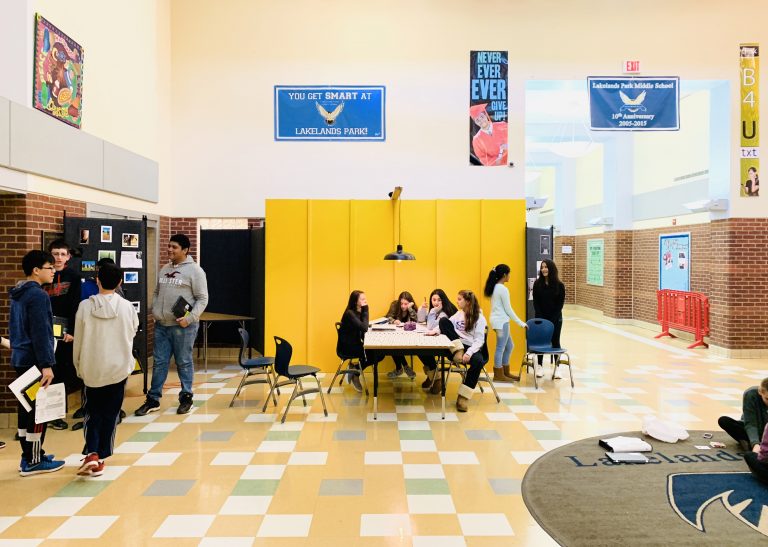
This project was a little bit of a dozzy for me. My team and I didn’t get some photos in time, I was internally panicking, and etc. However, all was well at the end and the project was nice. Our job was to take pictures at a “kitchen table” and portray mood/emotions in certain pictures. We also had to expose the set by providing a photo of it in the middle of our school. We then had to add a vintage look to the photos by setting the pictures in black and white and create shadows. To do this, we had to go to Photoshop and make the photos black and white (obviously). Then, we used the marque tool to encompass the light hanging from the ceiling, and press “inverse” to focus on the top section. Next, we set “feather” to 200 to blend the shadow that would be put in the next step. Lastly, we go to “curve” and pullback the line as much as we’d like to give the top section a mesmerizing shadow. This project was inspired by two famous photographers, Justin Bettman (staged different sets in New York) and Carrie Mae Weems (black and white kitchen table photos that showed a glimpse of her life). If I had to choose a place to tell my family’s story, I would take pictures of places in Russia like Moscow or Veliky Novgorod. You would probably see photos of the nature and old buildings that symbolize how my family (specifically parents and grandparents) lived long ago. I can’t wait to see what we’ll do next! -Marie Valouiski
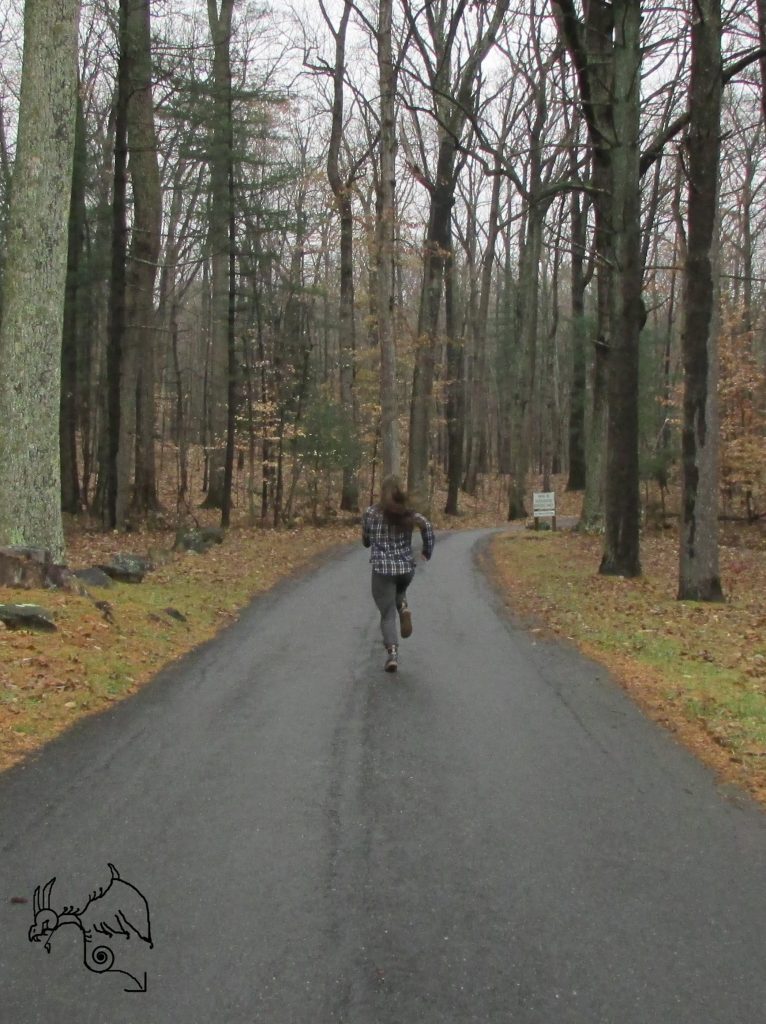
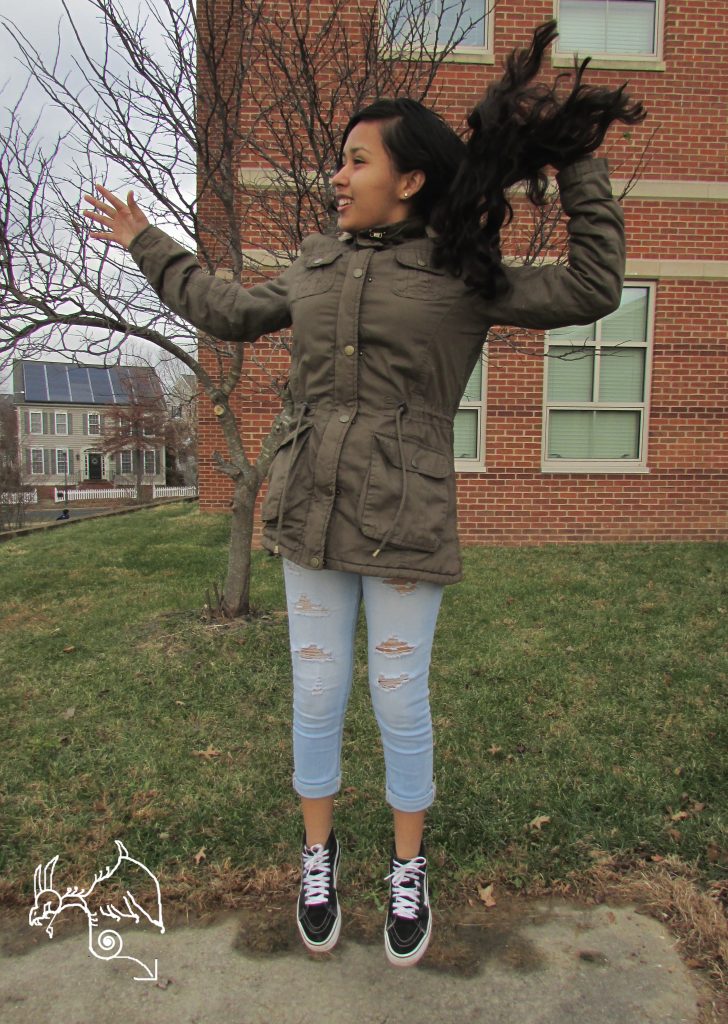
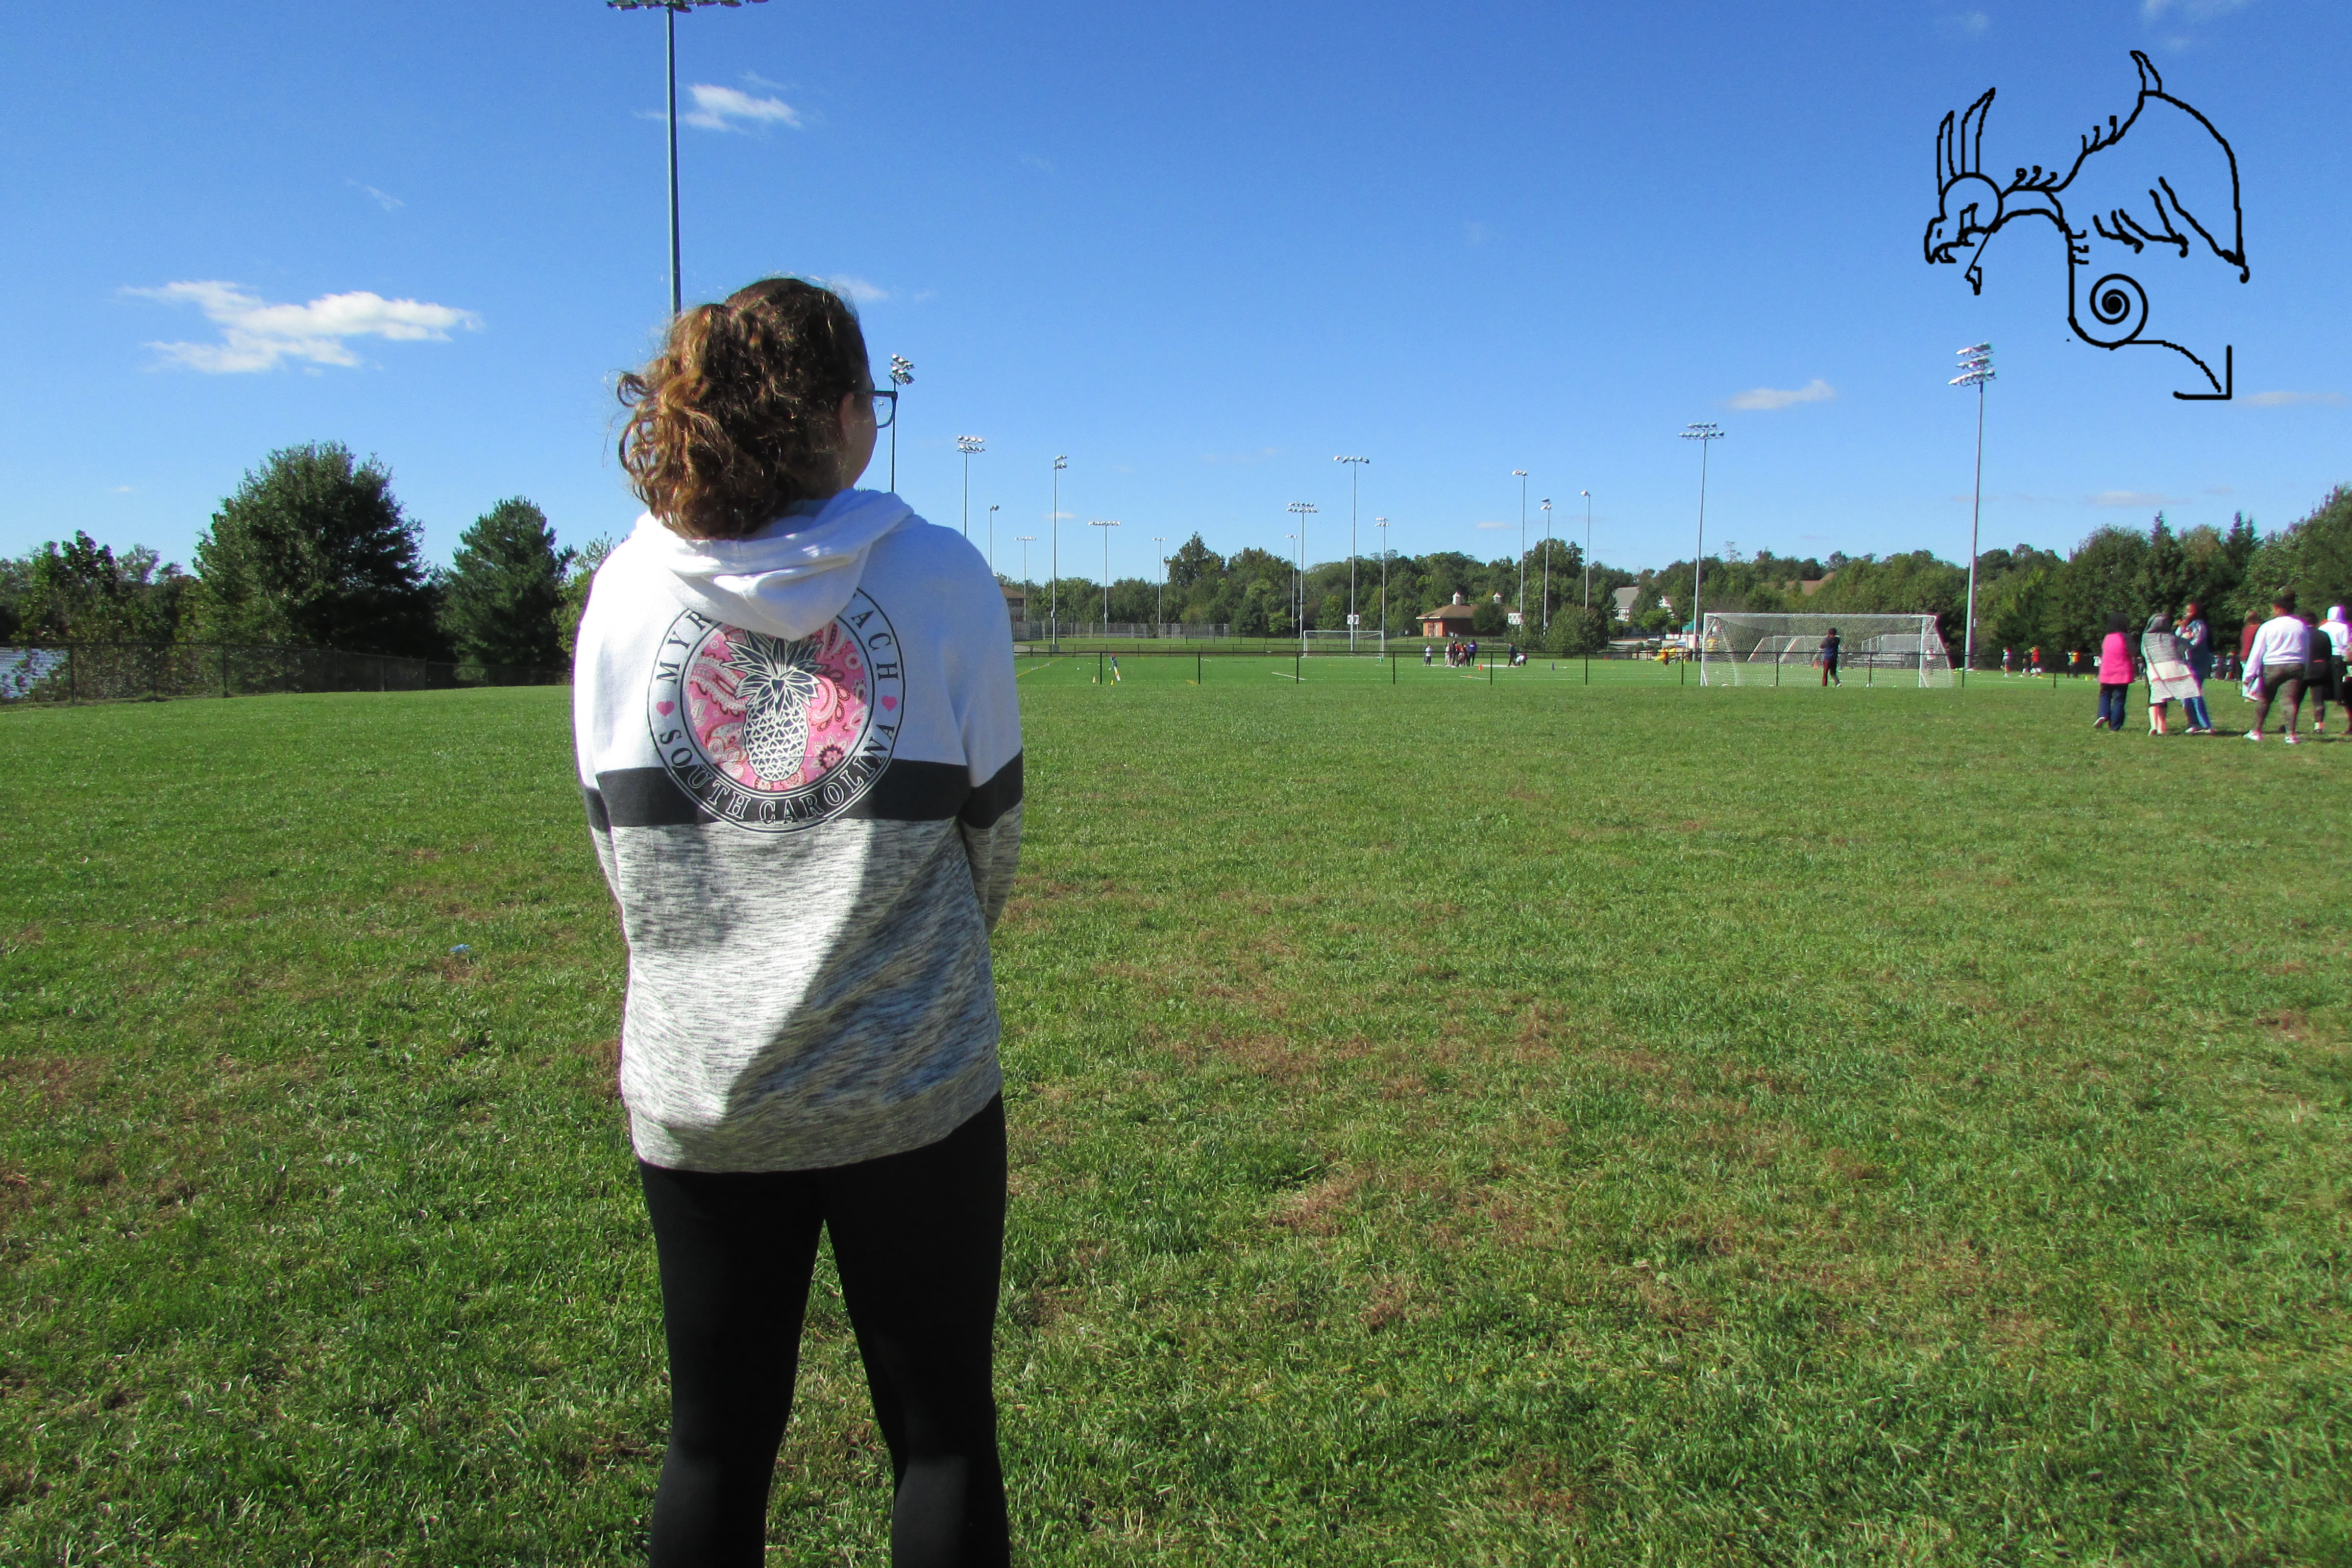
This project was very mesmerizing and simple at the same time. Our goal was to take 8 to 10 pictures of people and/or objects in motion. I had a lot of fun taking pictures of my friend moving around and of my sister in the spooky, foggy woods of Sugarloaf Mountain. To take pictures of them in the middle of their action, I set my camera to manual. I also set the ISO to 100 (400 in the mountains) to get the perfect lighting and the shutter speed to 1/640 to get the clearest image outcome. If you’re trying to do the same, I advise pressing the push-button right when the object/person is at its highest point (when jumping, in mid air, etc.) If the action is running/moving across (not in mid air), then try to take a picture by following the rule of thirds (see post for more information). In the future, I hope to take pictures of people in action during sports and other activities. -Marie Valouiski
It’s the season of thanks, and what better to celebrate than taking pictures of things I’m thankful for? I am very thankful for almost everything life gave to me, and since I’m not in my high school days yet, I have time to be as happy and carefree as I can be. If I didn’t have all these things, I’m not sure how I’ll be like and what will become of me! Here are 7 photos I took in 7 days that demonstrate what I am thankful for:
A roof over my head: This house has greeted me since birth, literally! My parents have told me stories about how I was born a couple days after they bought the home. I have many memories there, like the time my sister and I would goof around and break stuff, and the time I spent with friends and family relaxing and watching movies. You know what they say, “There’s no place like home”.
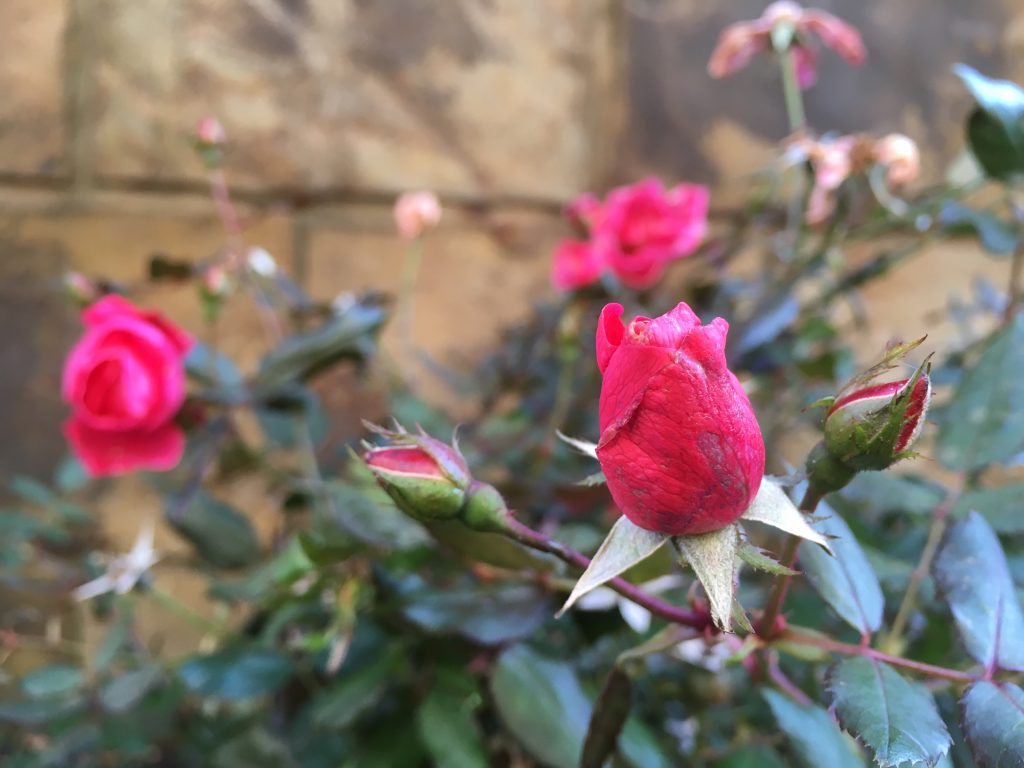
The beauty of mother nature: These beautiful flowers were taken in the Rio Washingtonian Center. To me, plants symbolize life and a new beginning. It’s amazing how mother nature could create not just bright flowers, but many MANY other things as well. I thank mother nature for bringing life to our Earth, despite everything humans do to hurt her.
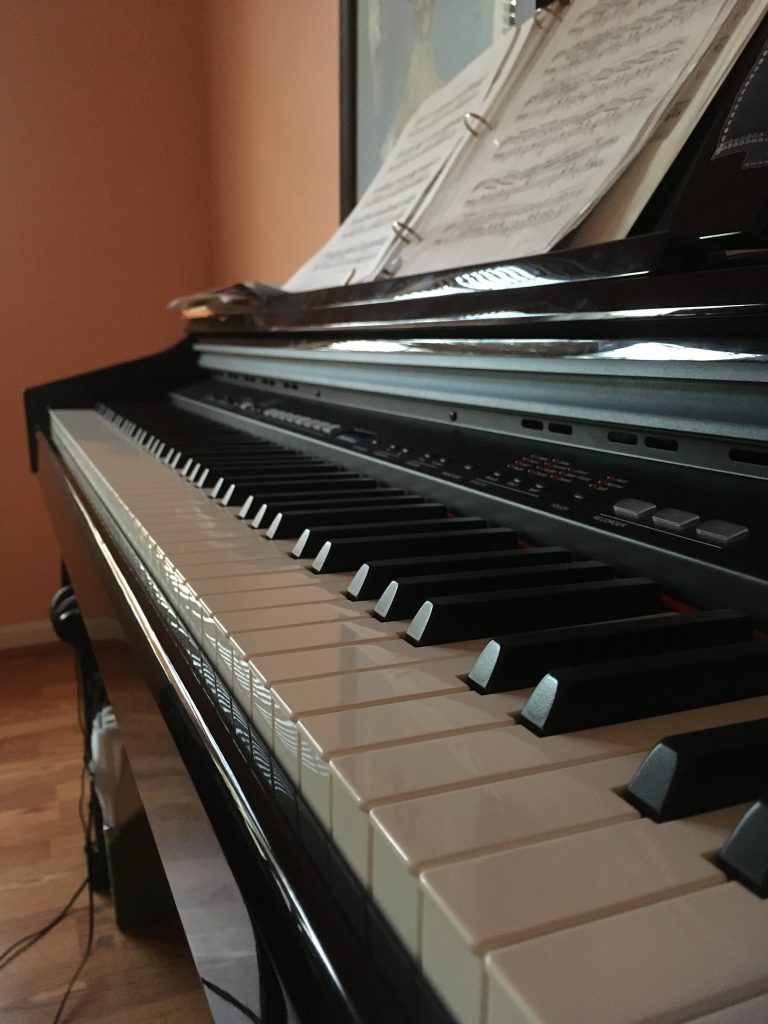
My instrument of musical ivories: My piano patiently waits in the living room for me to come back and play whatever my heart desires. I can play whatever kind of atmosphere or emotion I want to express! If I feel depressed, I could slowly move my fingers across the lower keys and play in minor (quiet). If I have adrenaline coursing through my veins, waiting to be let go on something, I could hop around key to key, quick paced and in major (loud). I’ve been playing since I was 7 years old, and admittedly I sometimes don’t play out of laziness, but I always come back to my beloved, loyal instrument.
Food on the table: Who doesn’t like food? No one! That’s why I made a spot to thank the thing that makes me happy, morning, noon, and evening: food. I also consider myself fortunate to have access to food 24/7 because of the lucky and wonderful status I’m in. Even though I may not be rich, I’m happy with what I have and couldn’t have anything better. I do consider people who aren’t as lucky and have little access to food and water. However, their strong and persistent spirits and (for some) seeing nothing is wrong, amazes me (I still donate to charity, don’t worry). Food is a major happiness booster and without it, I wouldn’t be alive, literally and figuratively.
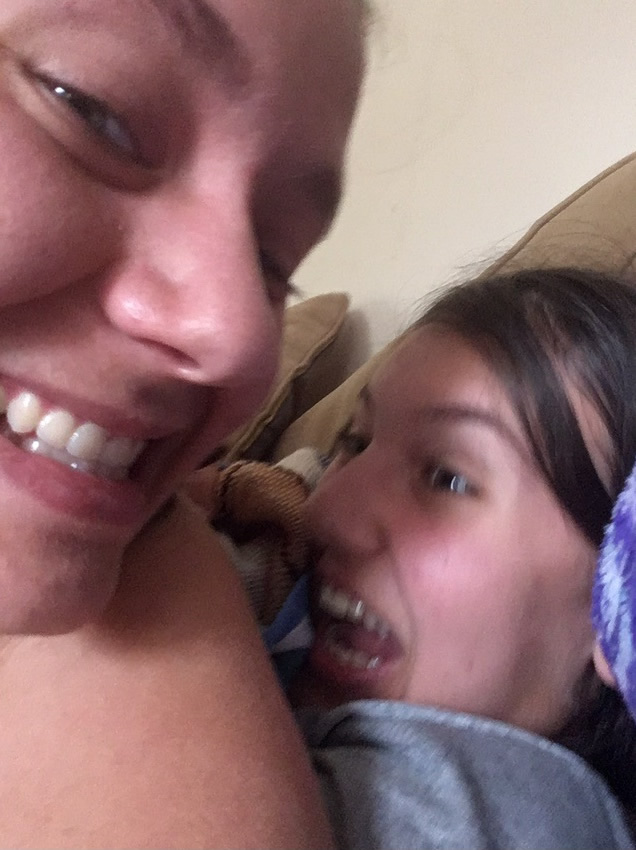
My gorgeous and beautiful sister: My beautiful, older sister (upper left corner in the photo) is one of the things I’m most thankful about. She’s always there for me whenever I need her and passes her experience in life to me, just like a mentor. She cares about my welfare and is willing to protect me from anything. In addition, she always finds a way to make me holler and laugh until my body aches and I happily return the favor by doing the same. We’re like two peas in a pod, not being able to separate form each other for too long. Although she does tease me sometimes and somehow finds a way to get on my nerves, that’s what siblings do. I wouldn’t ever ask for a better sibling in my life.
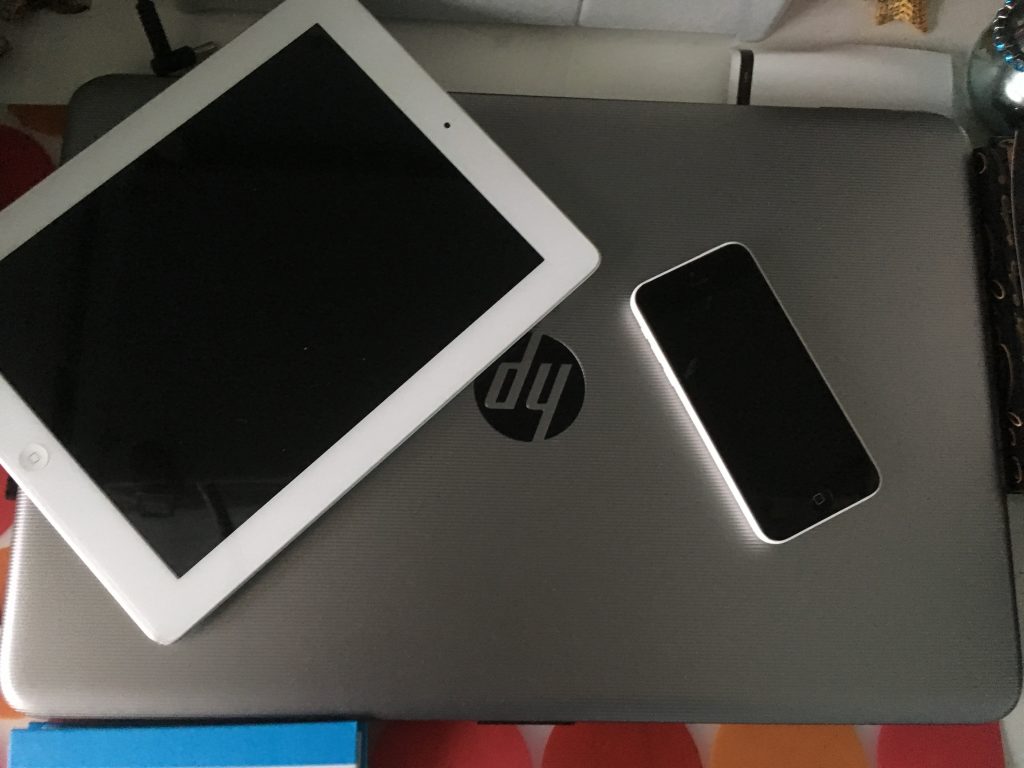
Modern technology: This may seem obvious in resemblance to me living in a time like this and ”depending my life on it” to some people, it goes way deeper than that. We all live in a time where technological advancement is at its highest point. We’re using technology to aid us in our daily lives, from getting work done to studying space and the universe beyond. We also use technology to , in a few ways, to protect the environment. Most paper and other things actually don’t end up getting recycled, thus working on assignments on computers produces no paper or waste. Technology also helps us study and receive new information about everything, and therefore advancing us even further into the distant future.
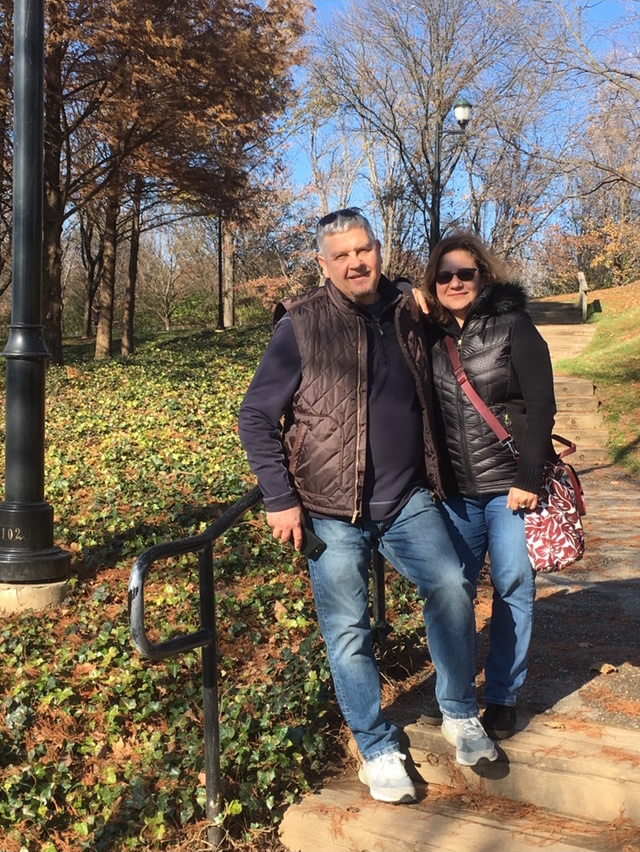
My amazing and superb parents: And last, but certainly not least, my golden-hearted mother and my jolly, goofy father. Where do I even start? They brought me into this world and gave me everything they could offer: education, extracurricular activities, everything mentioned above (except for mother nature), ice cream (yum), and so SO much more. They taught me many things to help me survive in the world we live in and care about me so much. But the most important thing that they, my other family members, friends, and others gave me isn’t my piano, or my computer. It wasn’t delicious junk food, the chance to travel, or even a home. It was something that made me never ask for more. It was love.
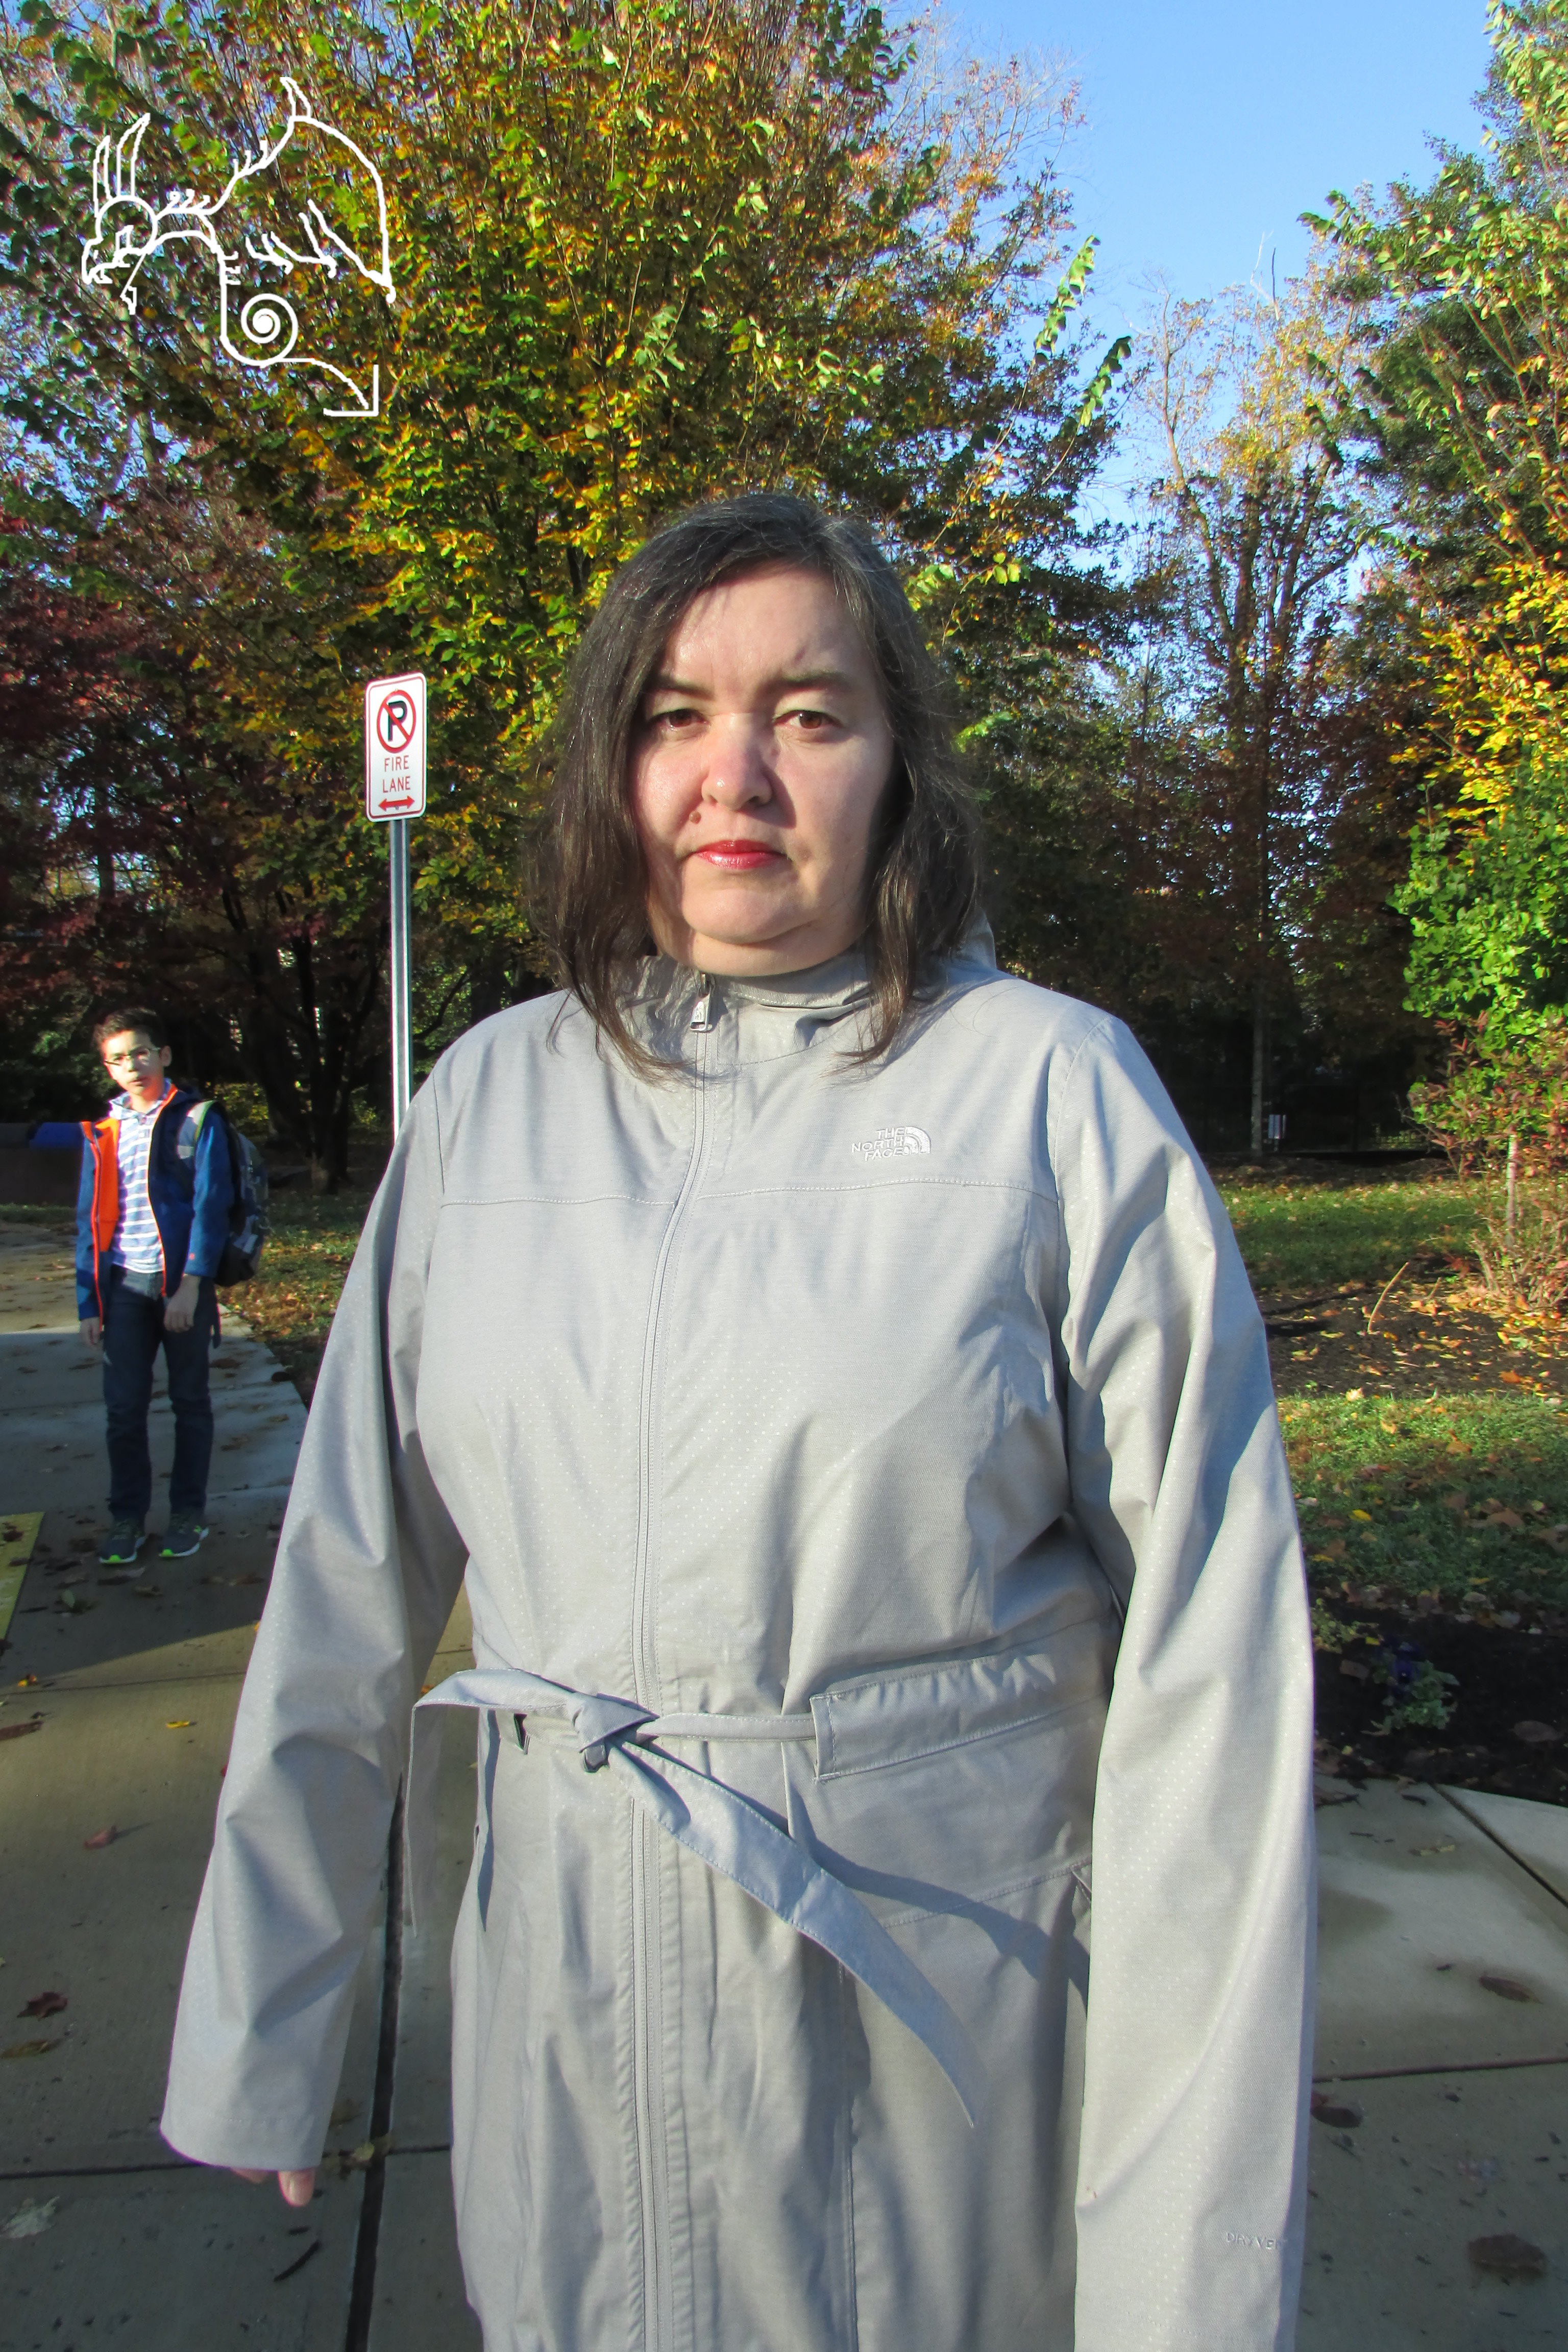
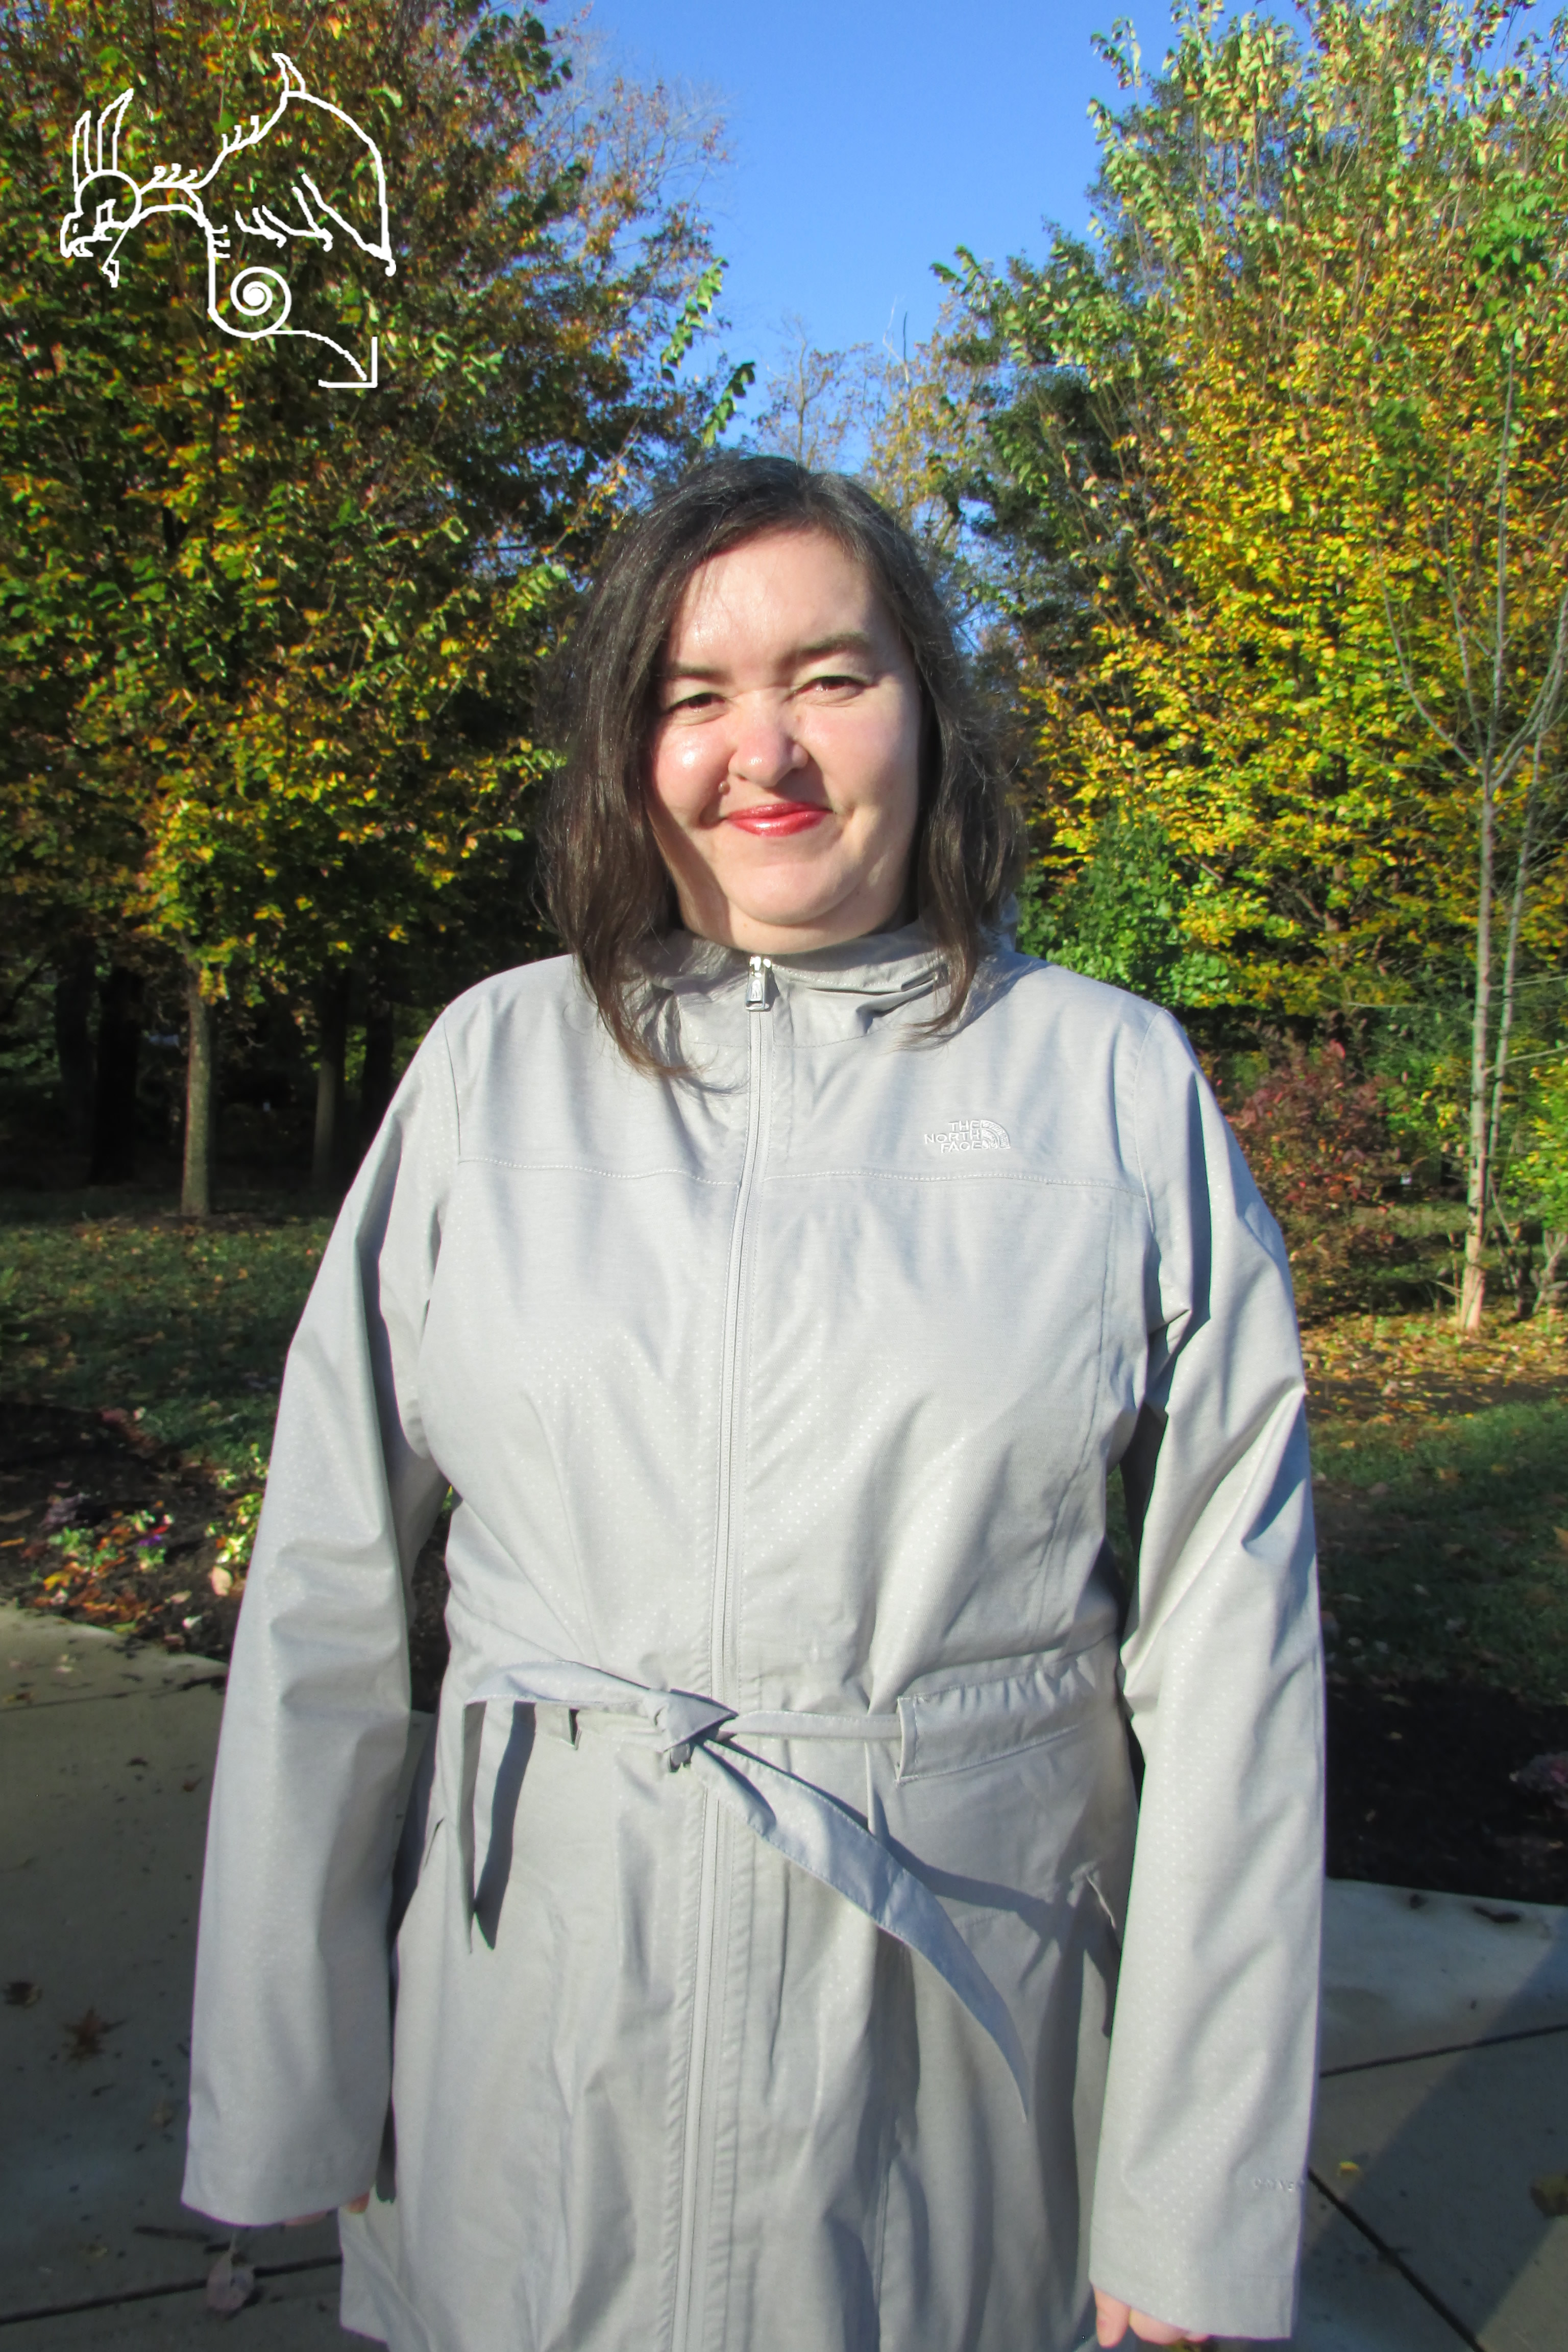
This project gave me a new experience that I never felt before in my life. I had to take two pictures of fifteen complete strangers, one photo with their normal facial expression and one with them smiling. As much as this assignment was uncomfortable, it was also very special. It was amazing seeing how visions and thoughts on a certain person could change drastically if they simply smile. The task also taught me about implicit bias, which are stereotypes and thoughts people naturally have to view on things. During my experience, I was sometimes hesitant to ask certain people if they wanted a picture, but I gathered all my courage and went onward to them. Some people said that they didn’t want one, and that was okay. Some instances were also pretty hilarious, where one person advised to take a picture of their friend, and that friend recommended another until the last one agreed for a photo. Everything was A LOT easier then what I had imagined in the very beginning. If I was hired as a photographer and wanted to avoid implicit bias, I would ask my client to simply smile. Smile and do a pose that your heart desires most, because that’s the fun of photography. For the first time, this project not only told me about how to make good pictures, but also more about the world we live in and what actually lives deep within us. -Marie Valouiski
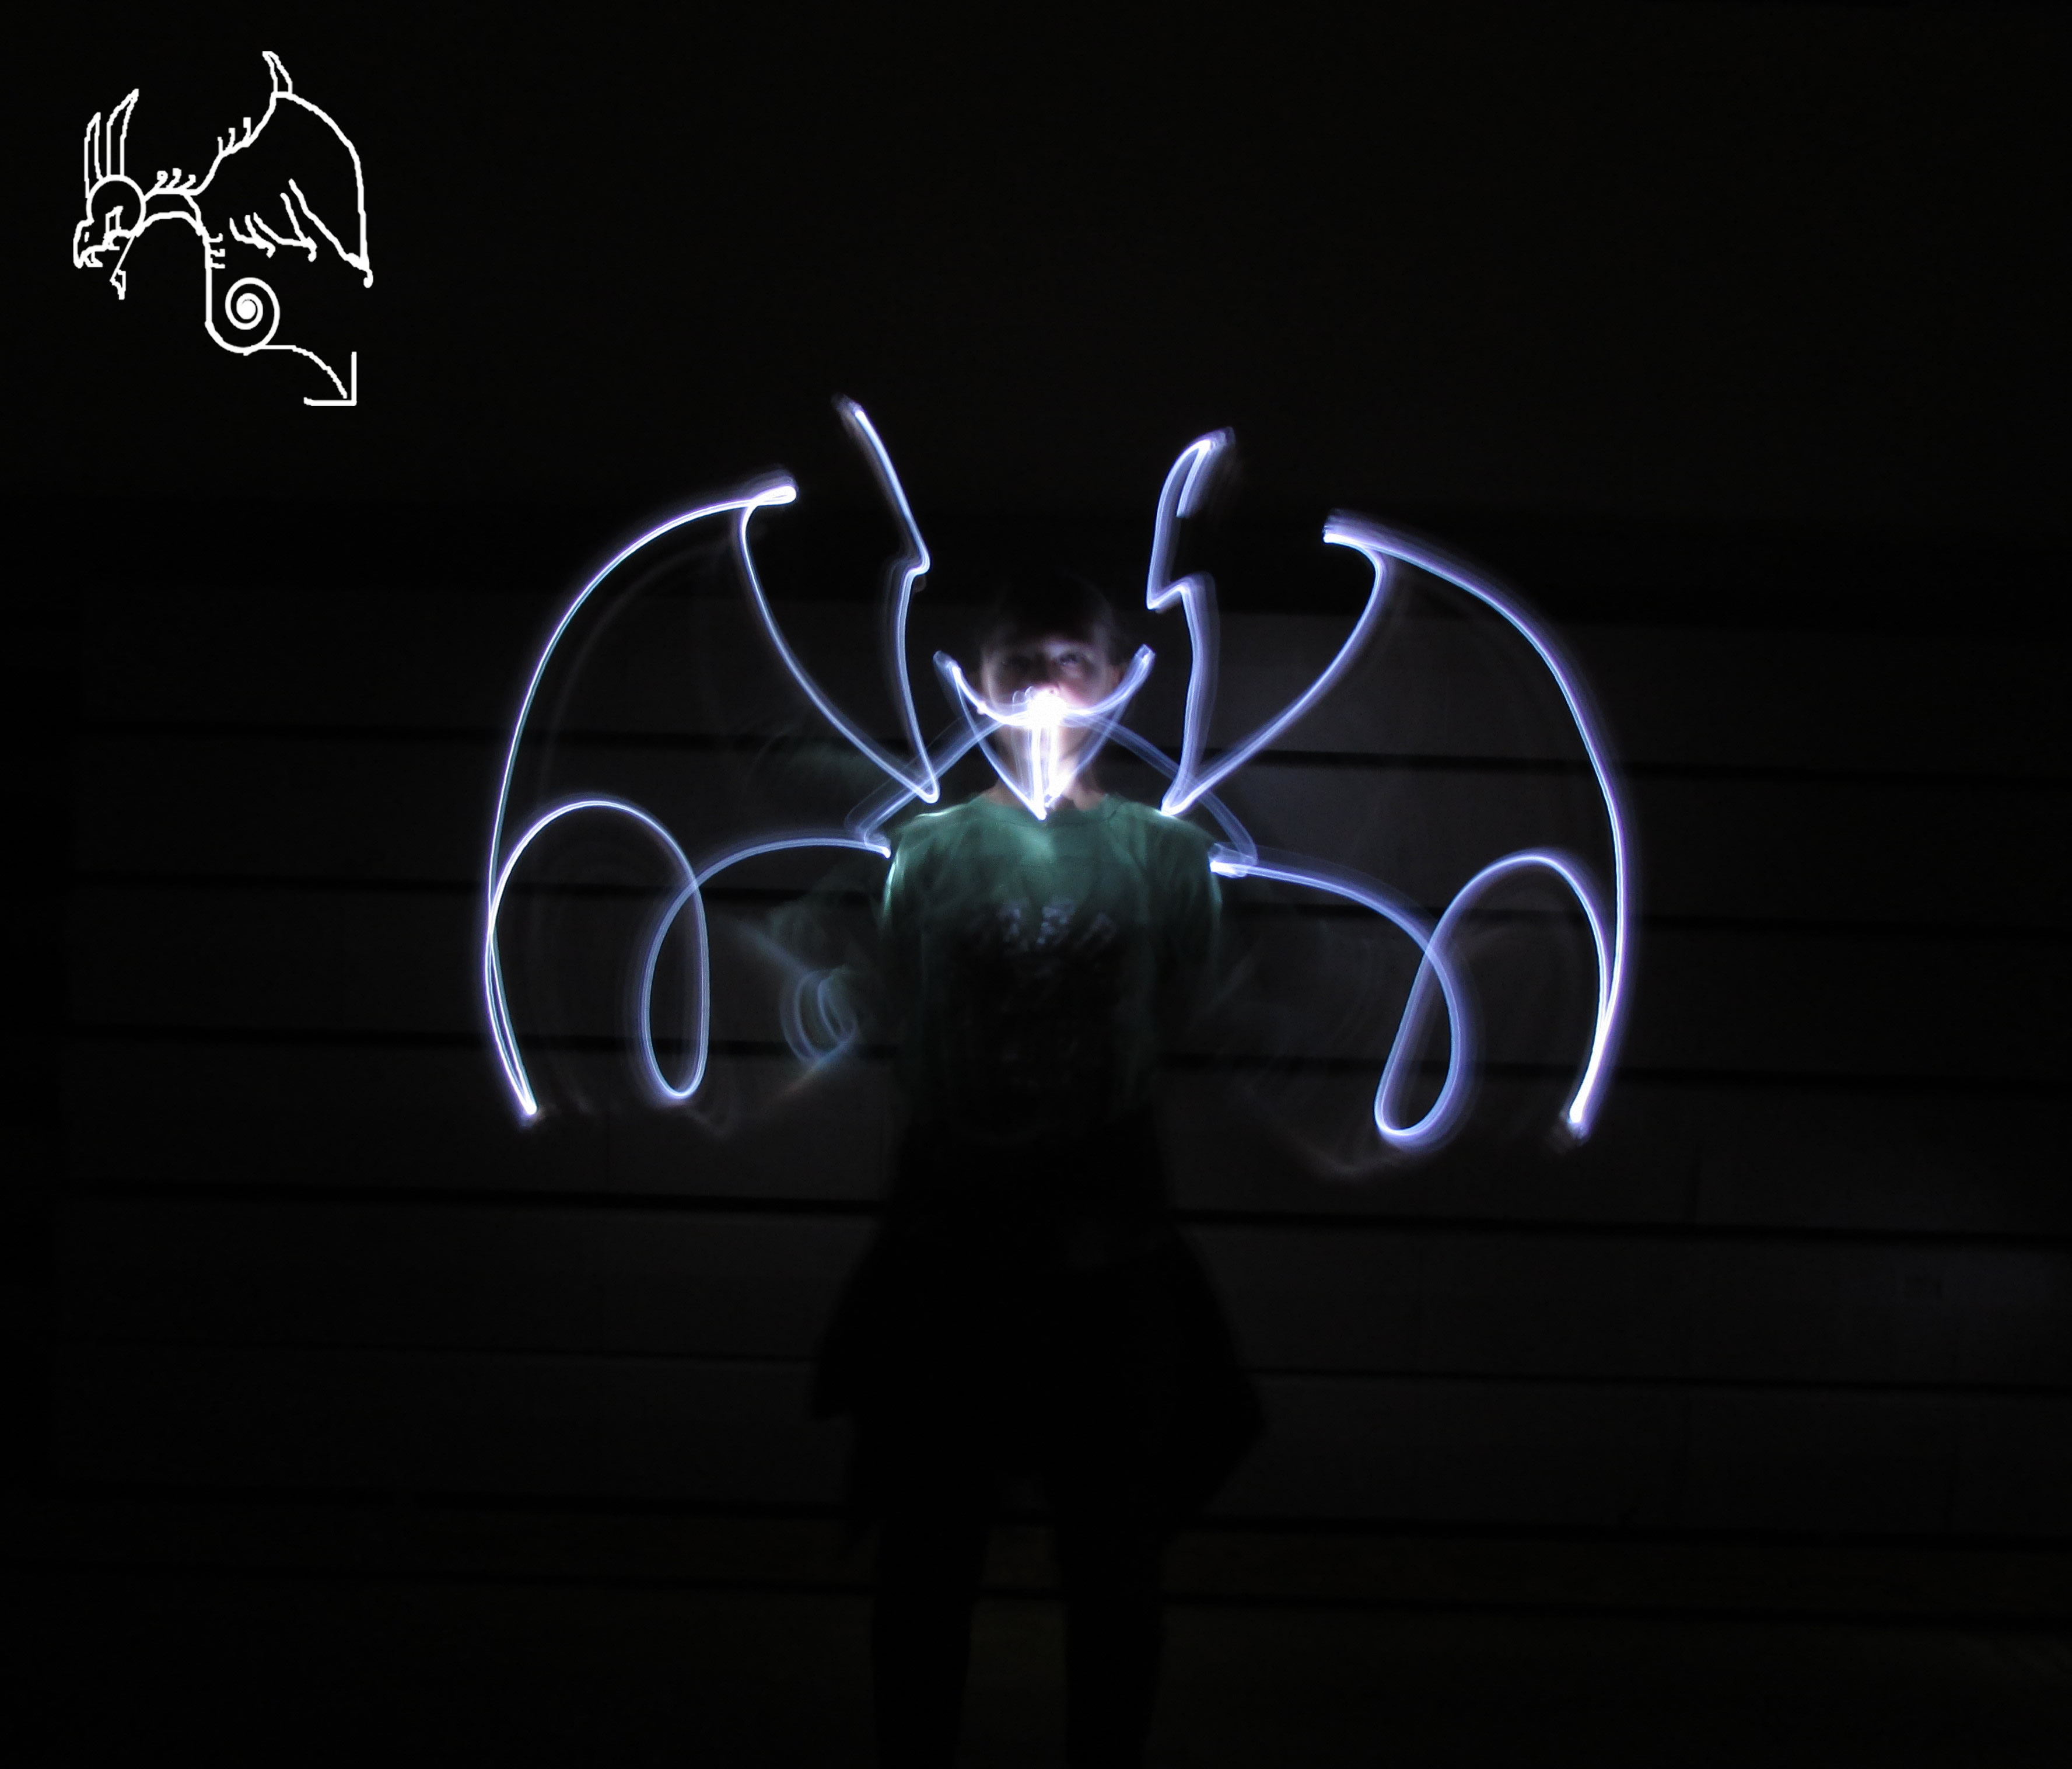
This assignment was one of the funnest and coolest things I’ve ever done in my life. I was amazed the moment I realized drawing with light was possible with my trusty camera. To take pictures of light graffiti, you’ll need to setup some settings on your camera first. To start off, you’ll need to put the settings of your camera on manual. Then, set your ISO to its lowest value, which in my case is 100. This will make it very sensitive to any light, so make sure your atmosphere is as dark as possible. Next, set up how long you want your camera to be exposed for before taking a picture by choosing the quantity of seconds. After that, draw your way with flashlights, your phone, glow sticks, and more! I got control of the settings very quickly, but there were things that were not so easy. It was difficult to understand for me and my group to know when to start drawing (at the end we concluded that we needed to wait for 2 seconds after we press the camera button to start drawing). Also, since we didn’t know how the light would show itself at the end, most of our photos turned out to be sloppy and sometimes blurry. The next time I try something like this, I’ll probably go outside at night and set up the camera’s shudder speed for as long as possible to create an epic photo with more than one light! -Marie Valouiski
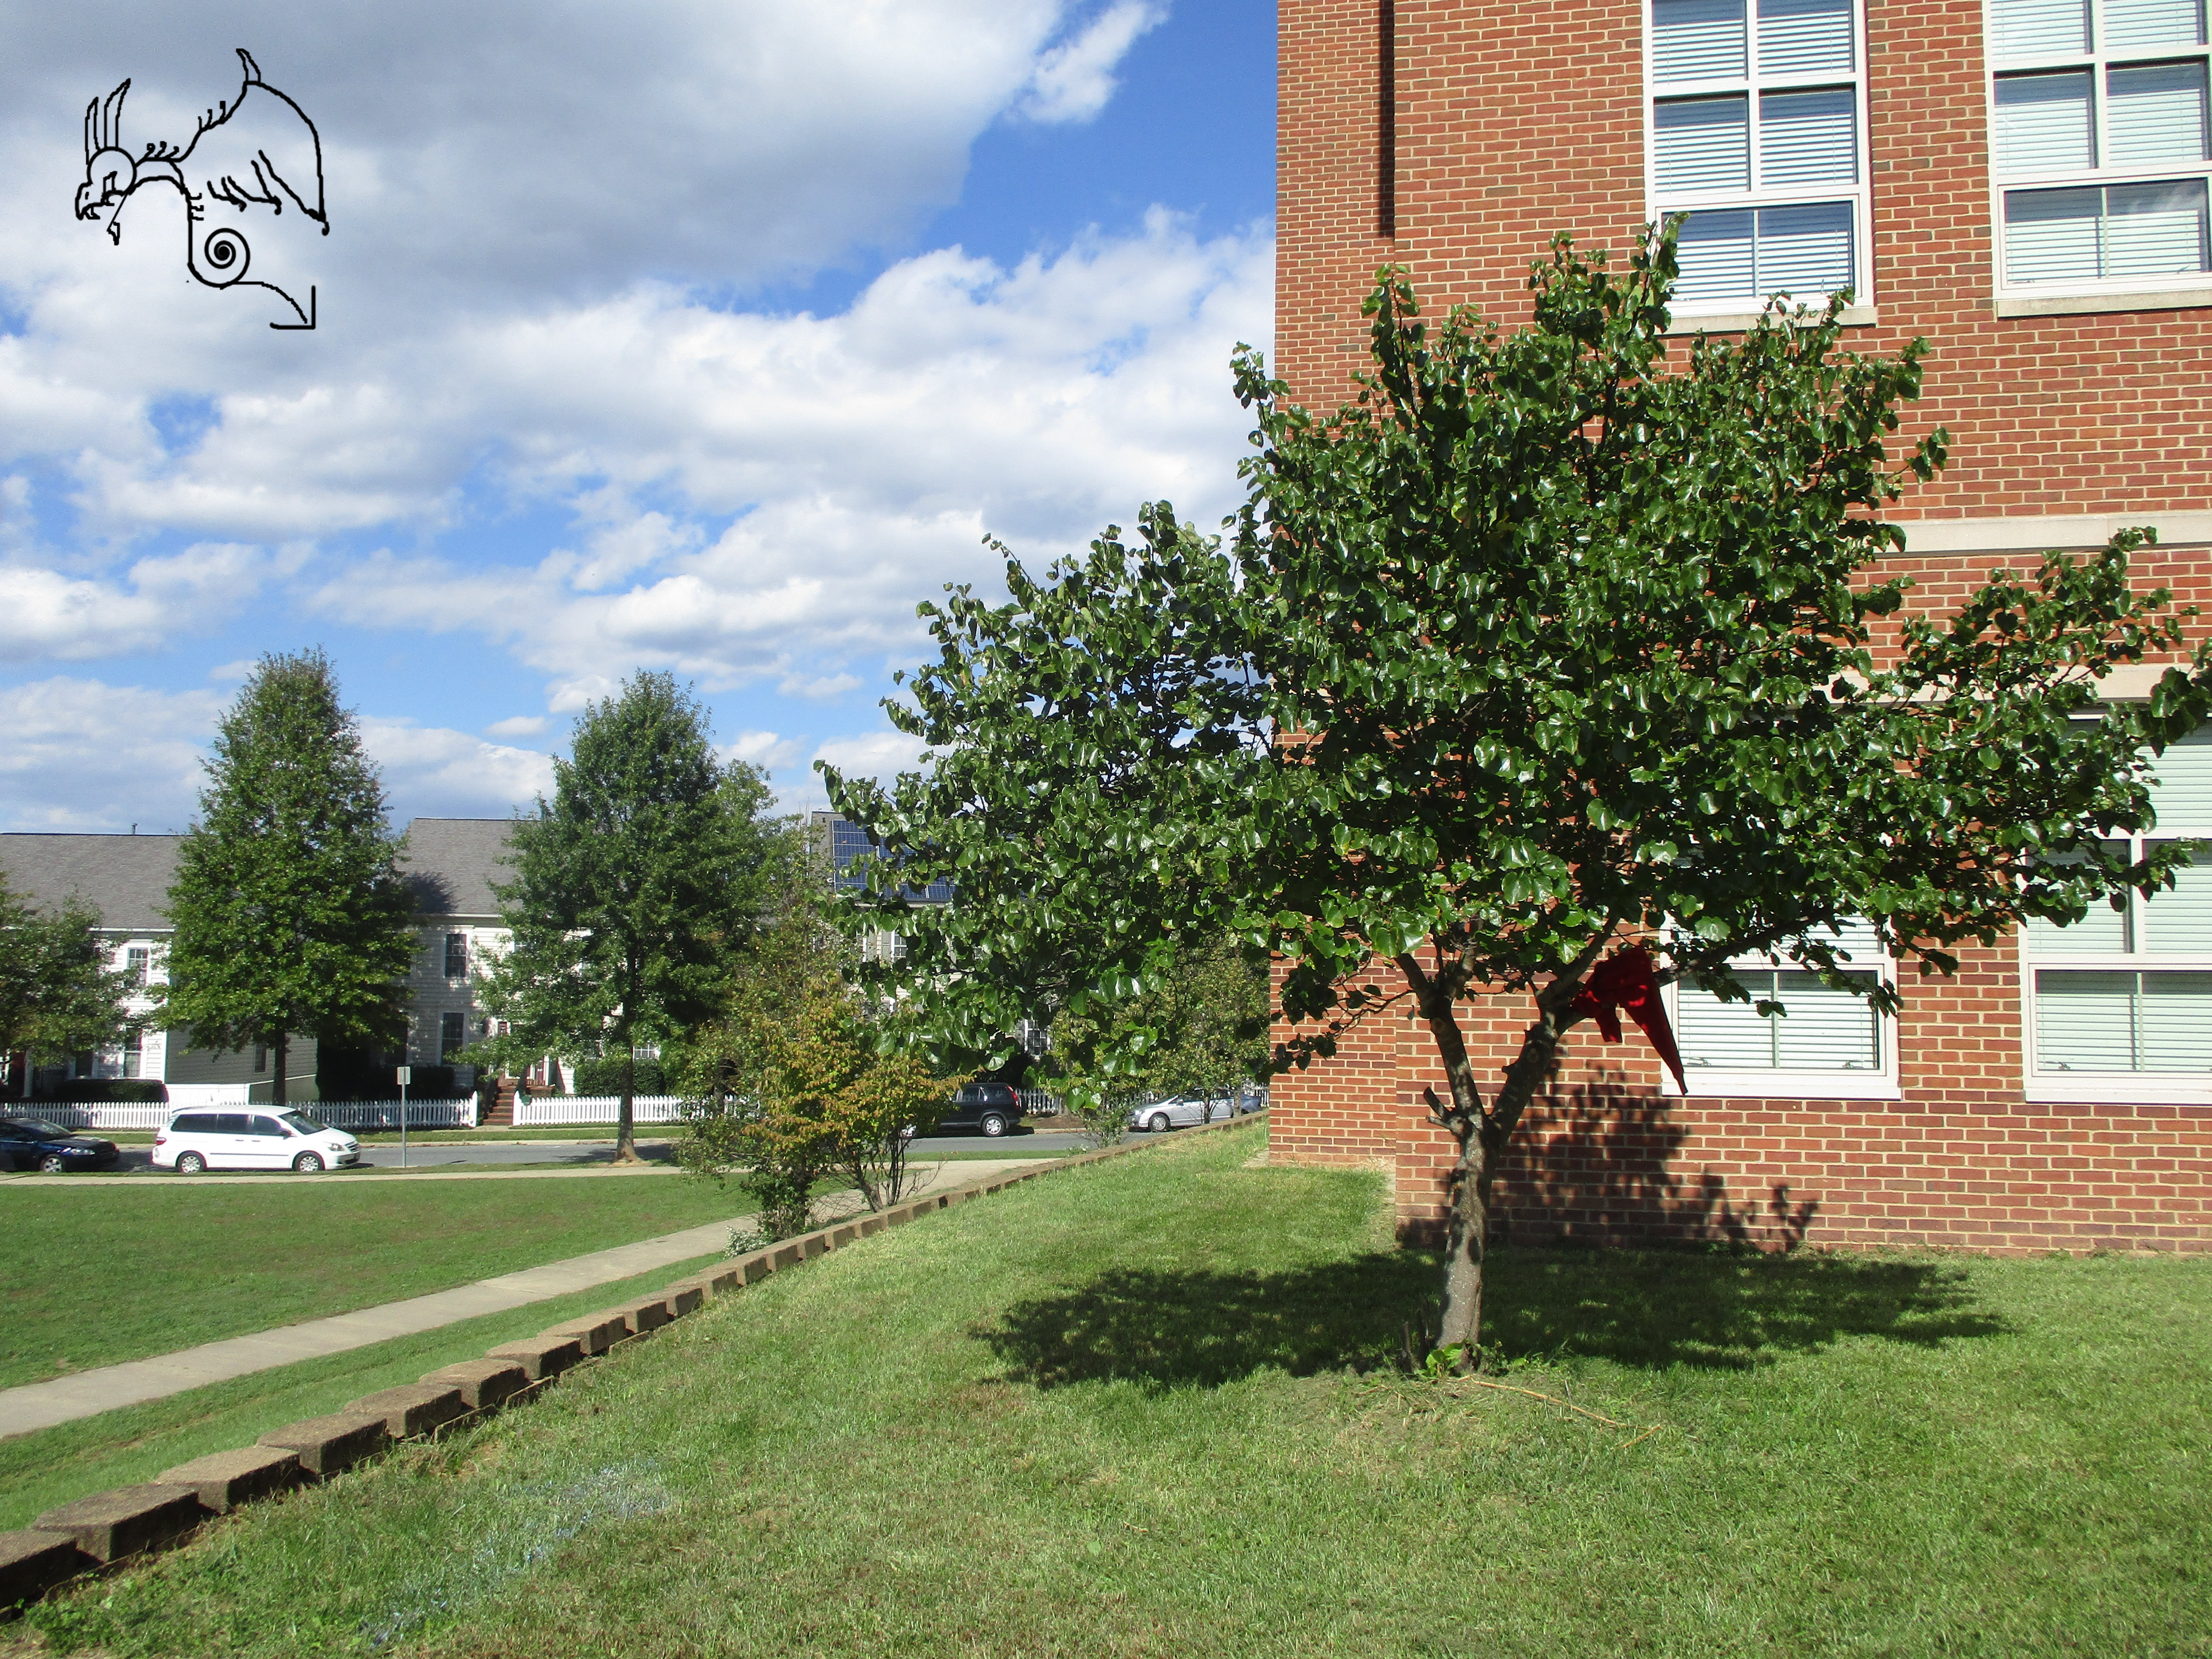
The Rule of Thirds is an important concept in the photography world. To help practice using the Rule of Thirds, you would need to use/visualize a grid on your camera screen that is divided by three lines going vertically and horizontally. The purpose of this is to put the subject of the photo along those lines so that the viewers’ eyes would involuntarily be drawn to that part. It’s also important to keep in mind that the subject CANNOT be in the very center of the photo. Lastly, during the use of the Rule of Thirds, photographers should be mindful of the background to give the final photo a nice, finishing touch. To put these rules into examples, we can use them to describe how a photo of a person close up would be takes. The photographer may want to put the person’s face on the left side of the center line going vertically. He/she might then put the person’s eyes along the center of the line going horizontally. For the background, there might be a brick wall, but it isn’t completely against the wall and the photo is taken from a little bit of distance from it. This would add depth to the photo and make it more interesting. I quickly picked up the pattern and use of the effect, but it got much easier towards the end. In my experience, it was easy to imply the Rule of Thirds to my photos, sense my camera provides a Rule of Thirds grid. The challenging part was finding objects with an interesting background to take a picture of. I am excited to use this technique for my photos in the future. -Marie Valouiski
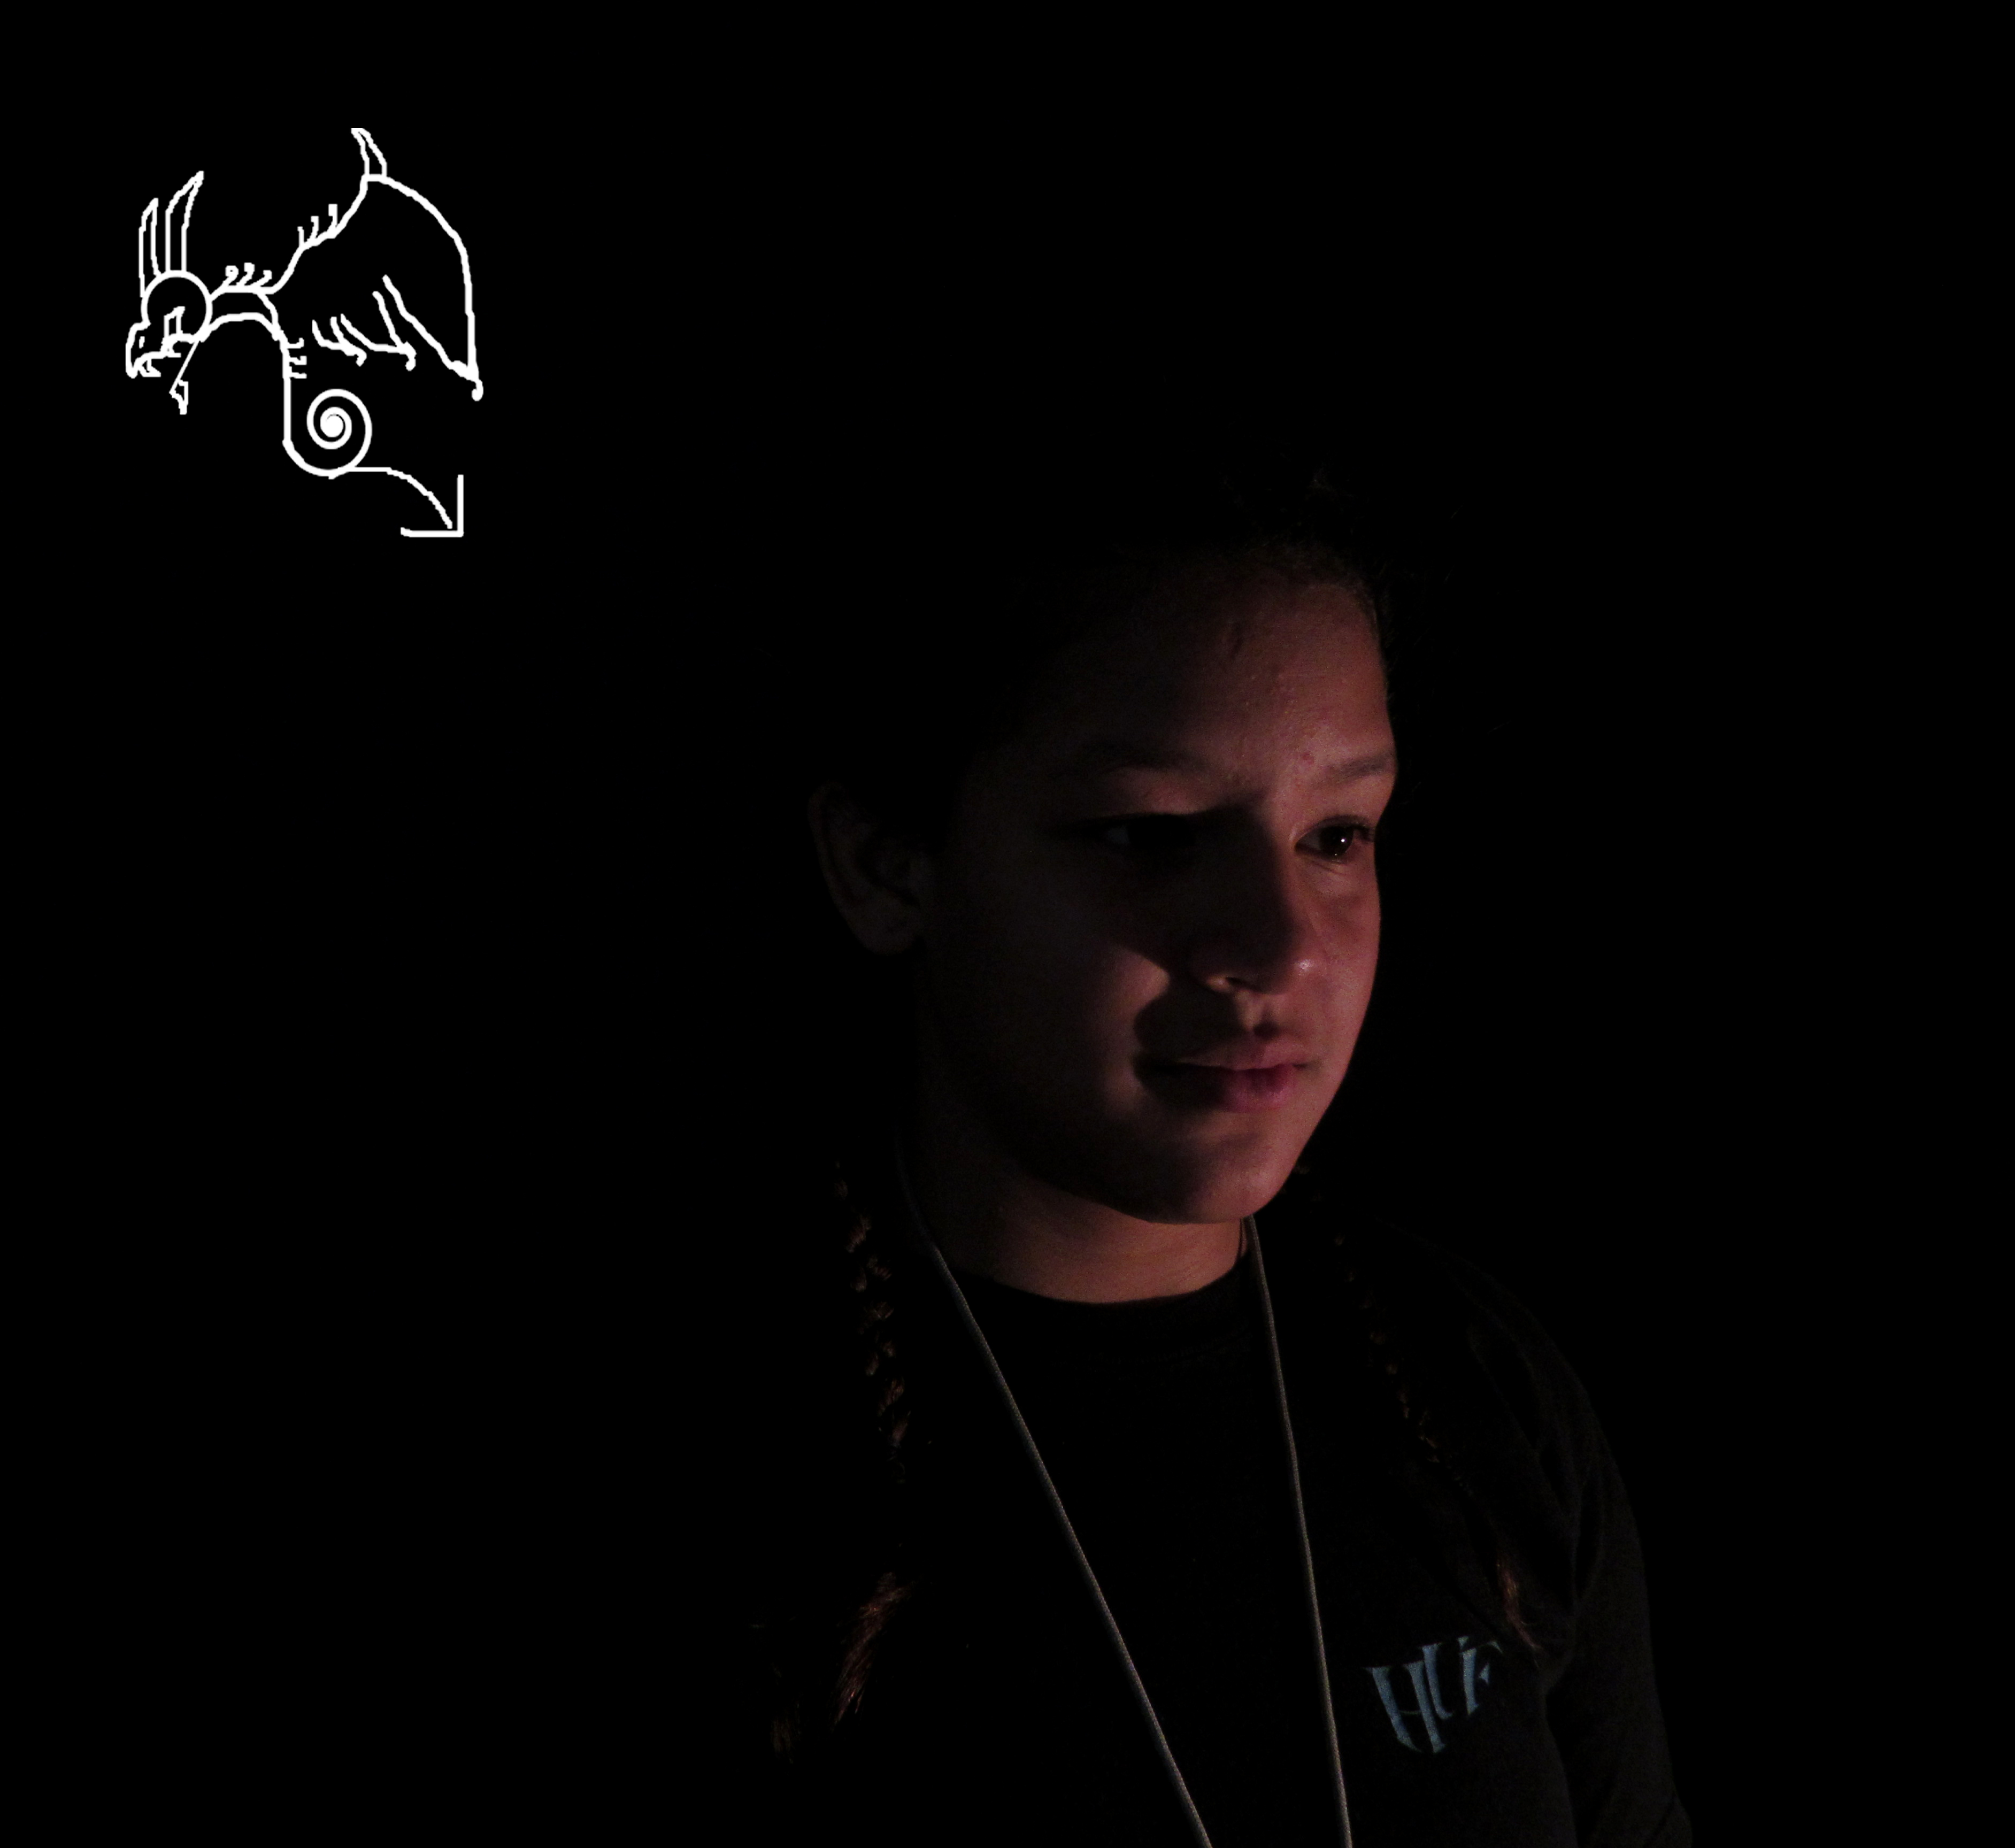
This is my second part of making portraits with an infinite background. It is just like making the portraits with the white background, except you’re using a black background. To capture the dark essence, we had to take a picture with as little light as possible and edit the photos using Photoshop. We also repeated the steps to take a good picture, using the manual setting and bring in a small, perfect amount of lighting using ISO and shutter speed. To edit the photos in Photoshop, instead of editing like we did with the white backgrounds, we had to make the background darker and the figure lighter. We also cropped out some shadows and things outside of the black screen. Our faces are a little too orange and kind of creepy, but the pictures do capture that dark essence and make the photos look infinite. Can’t wait to see what we’ll do next. -Marie Valouiski
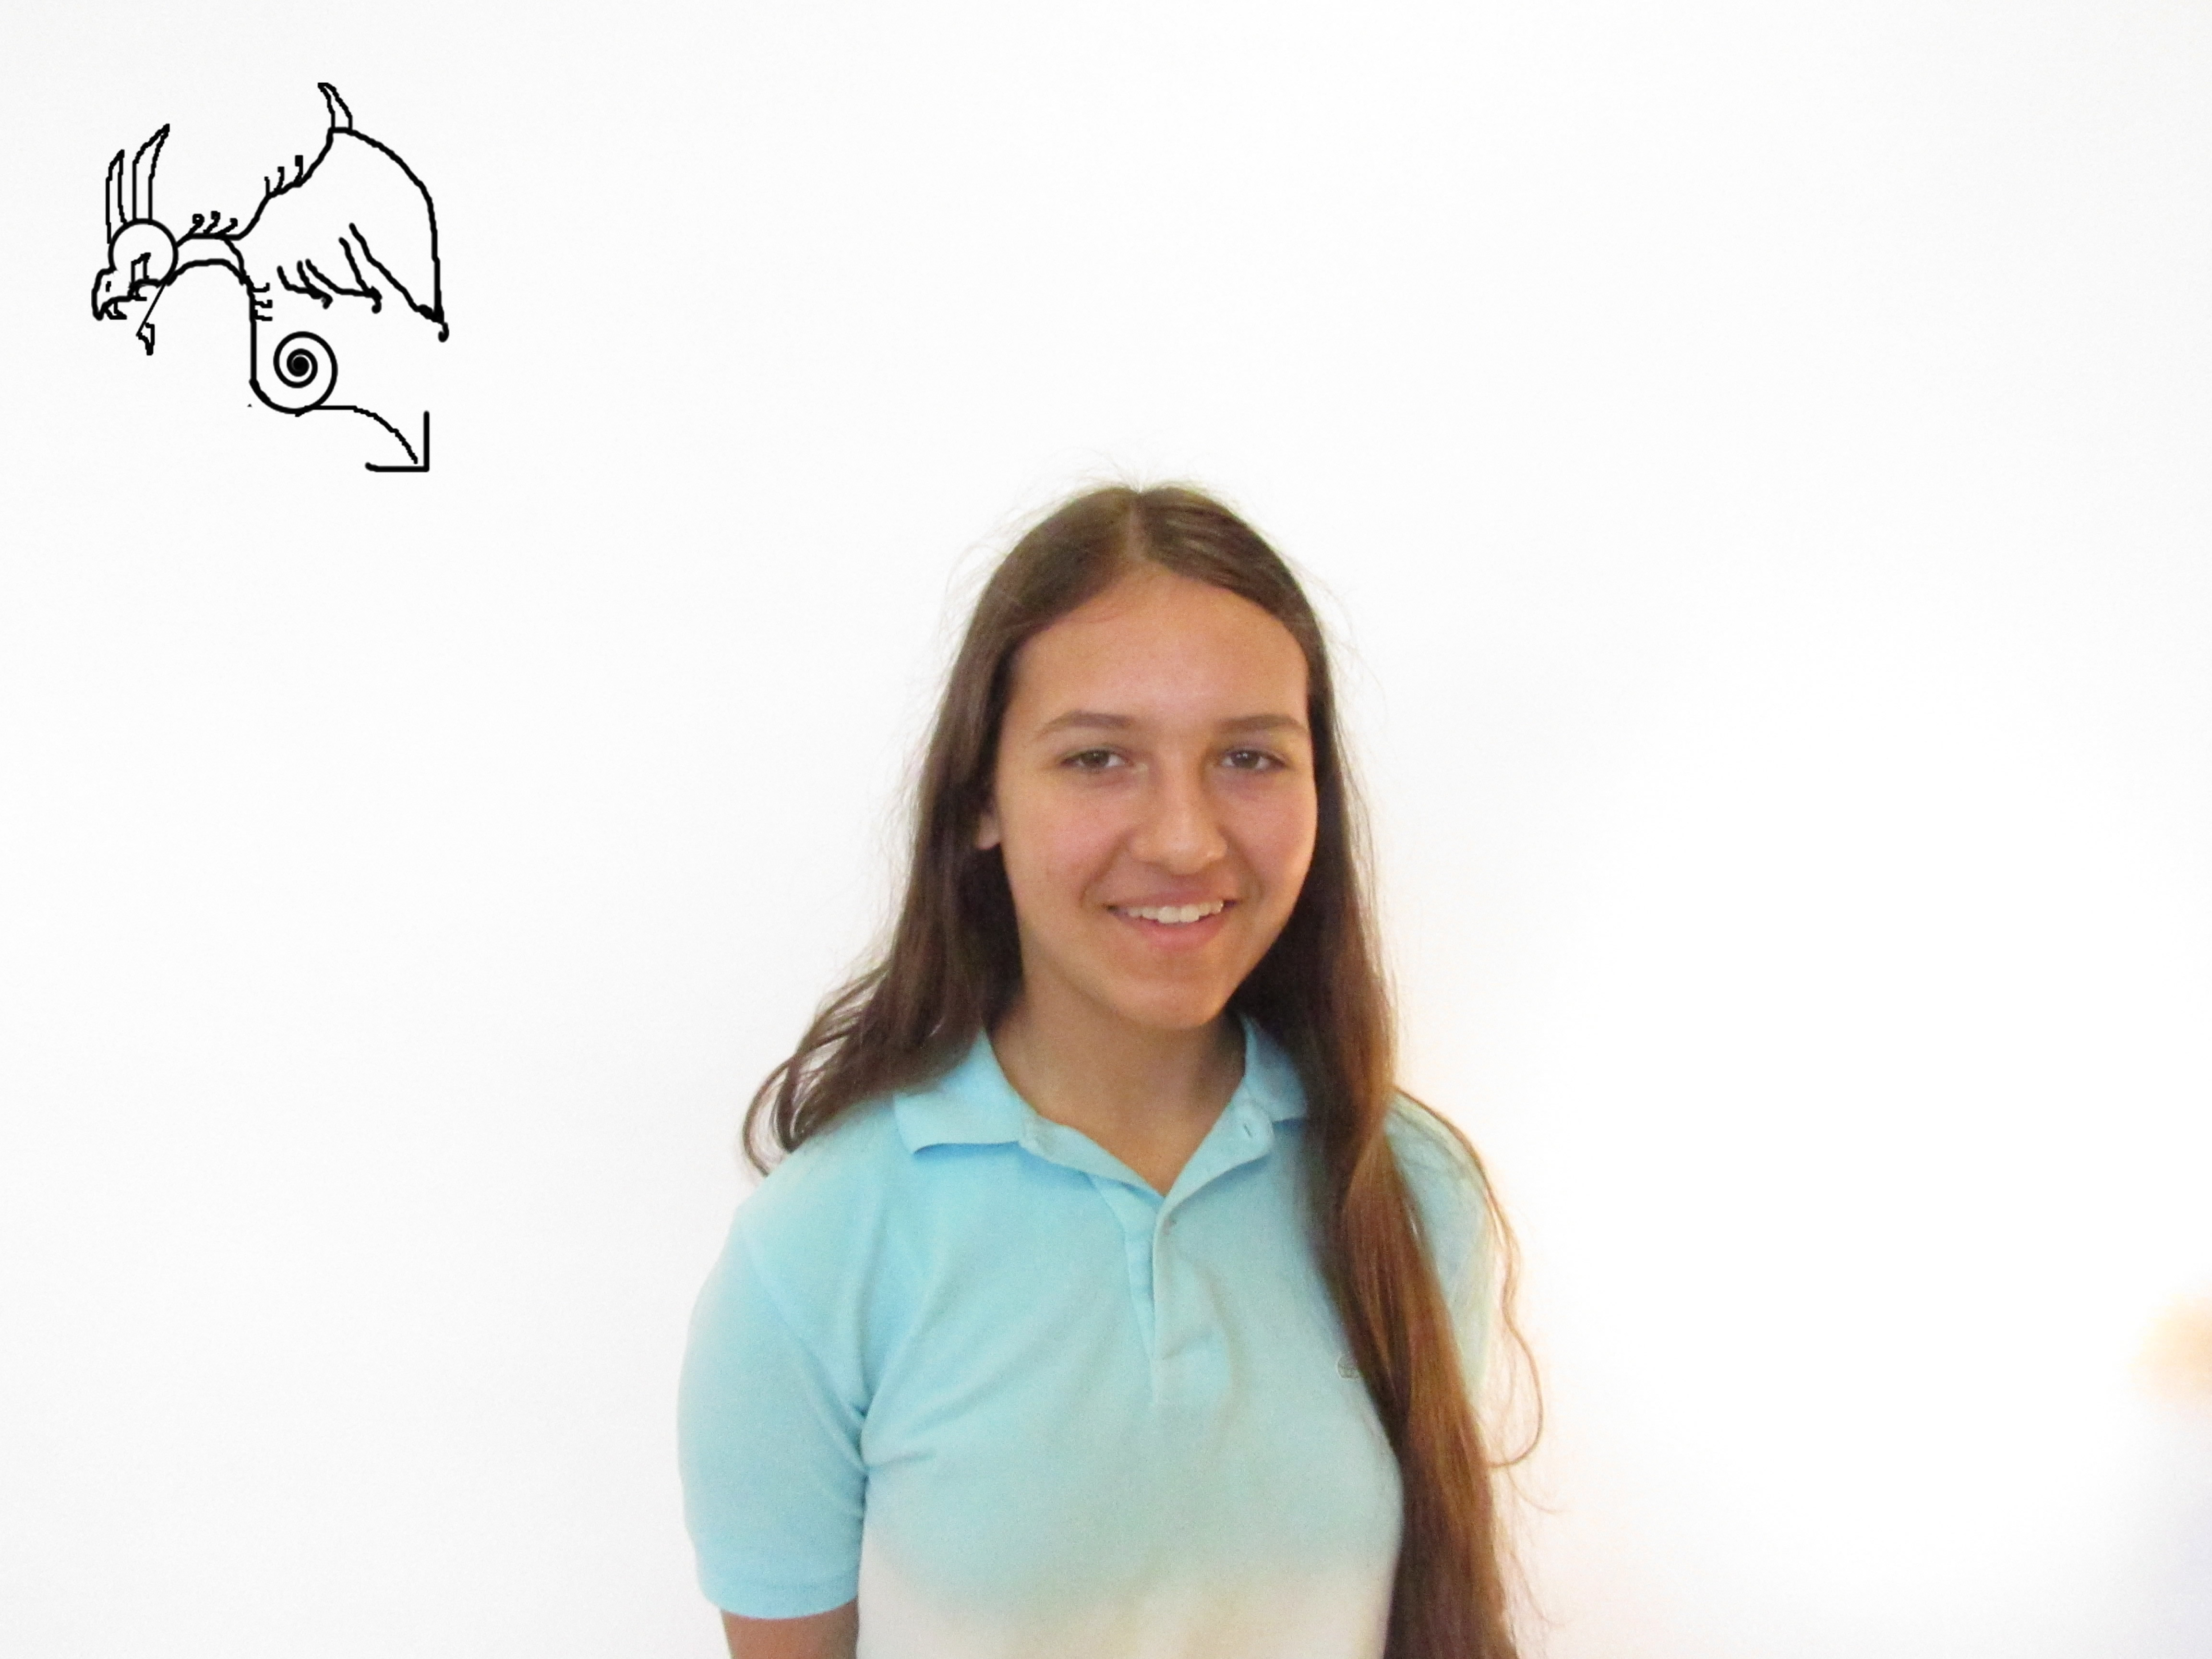
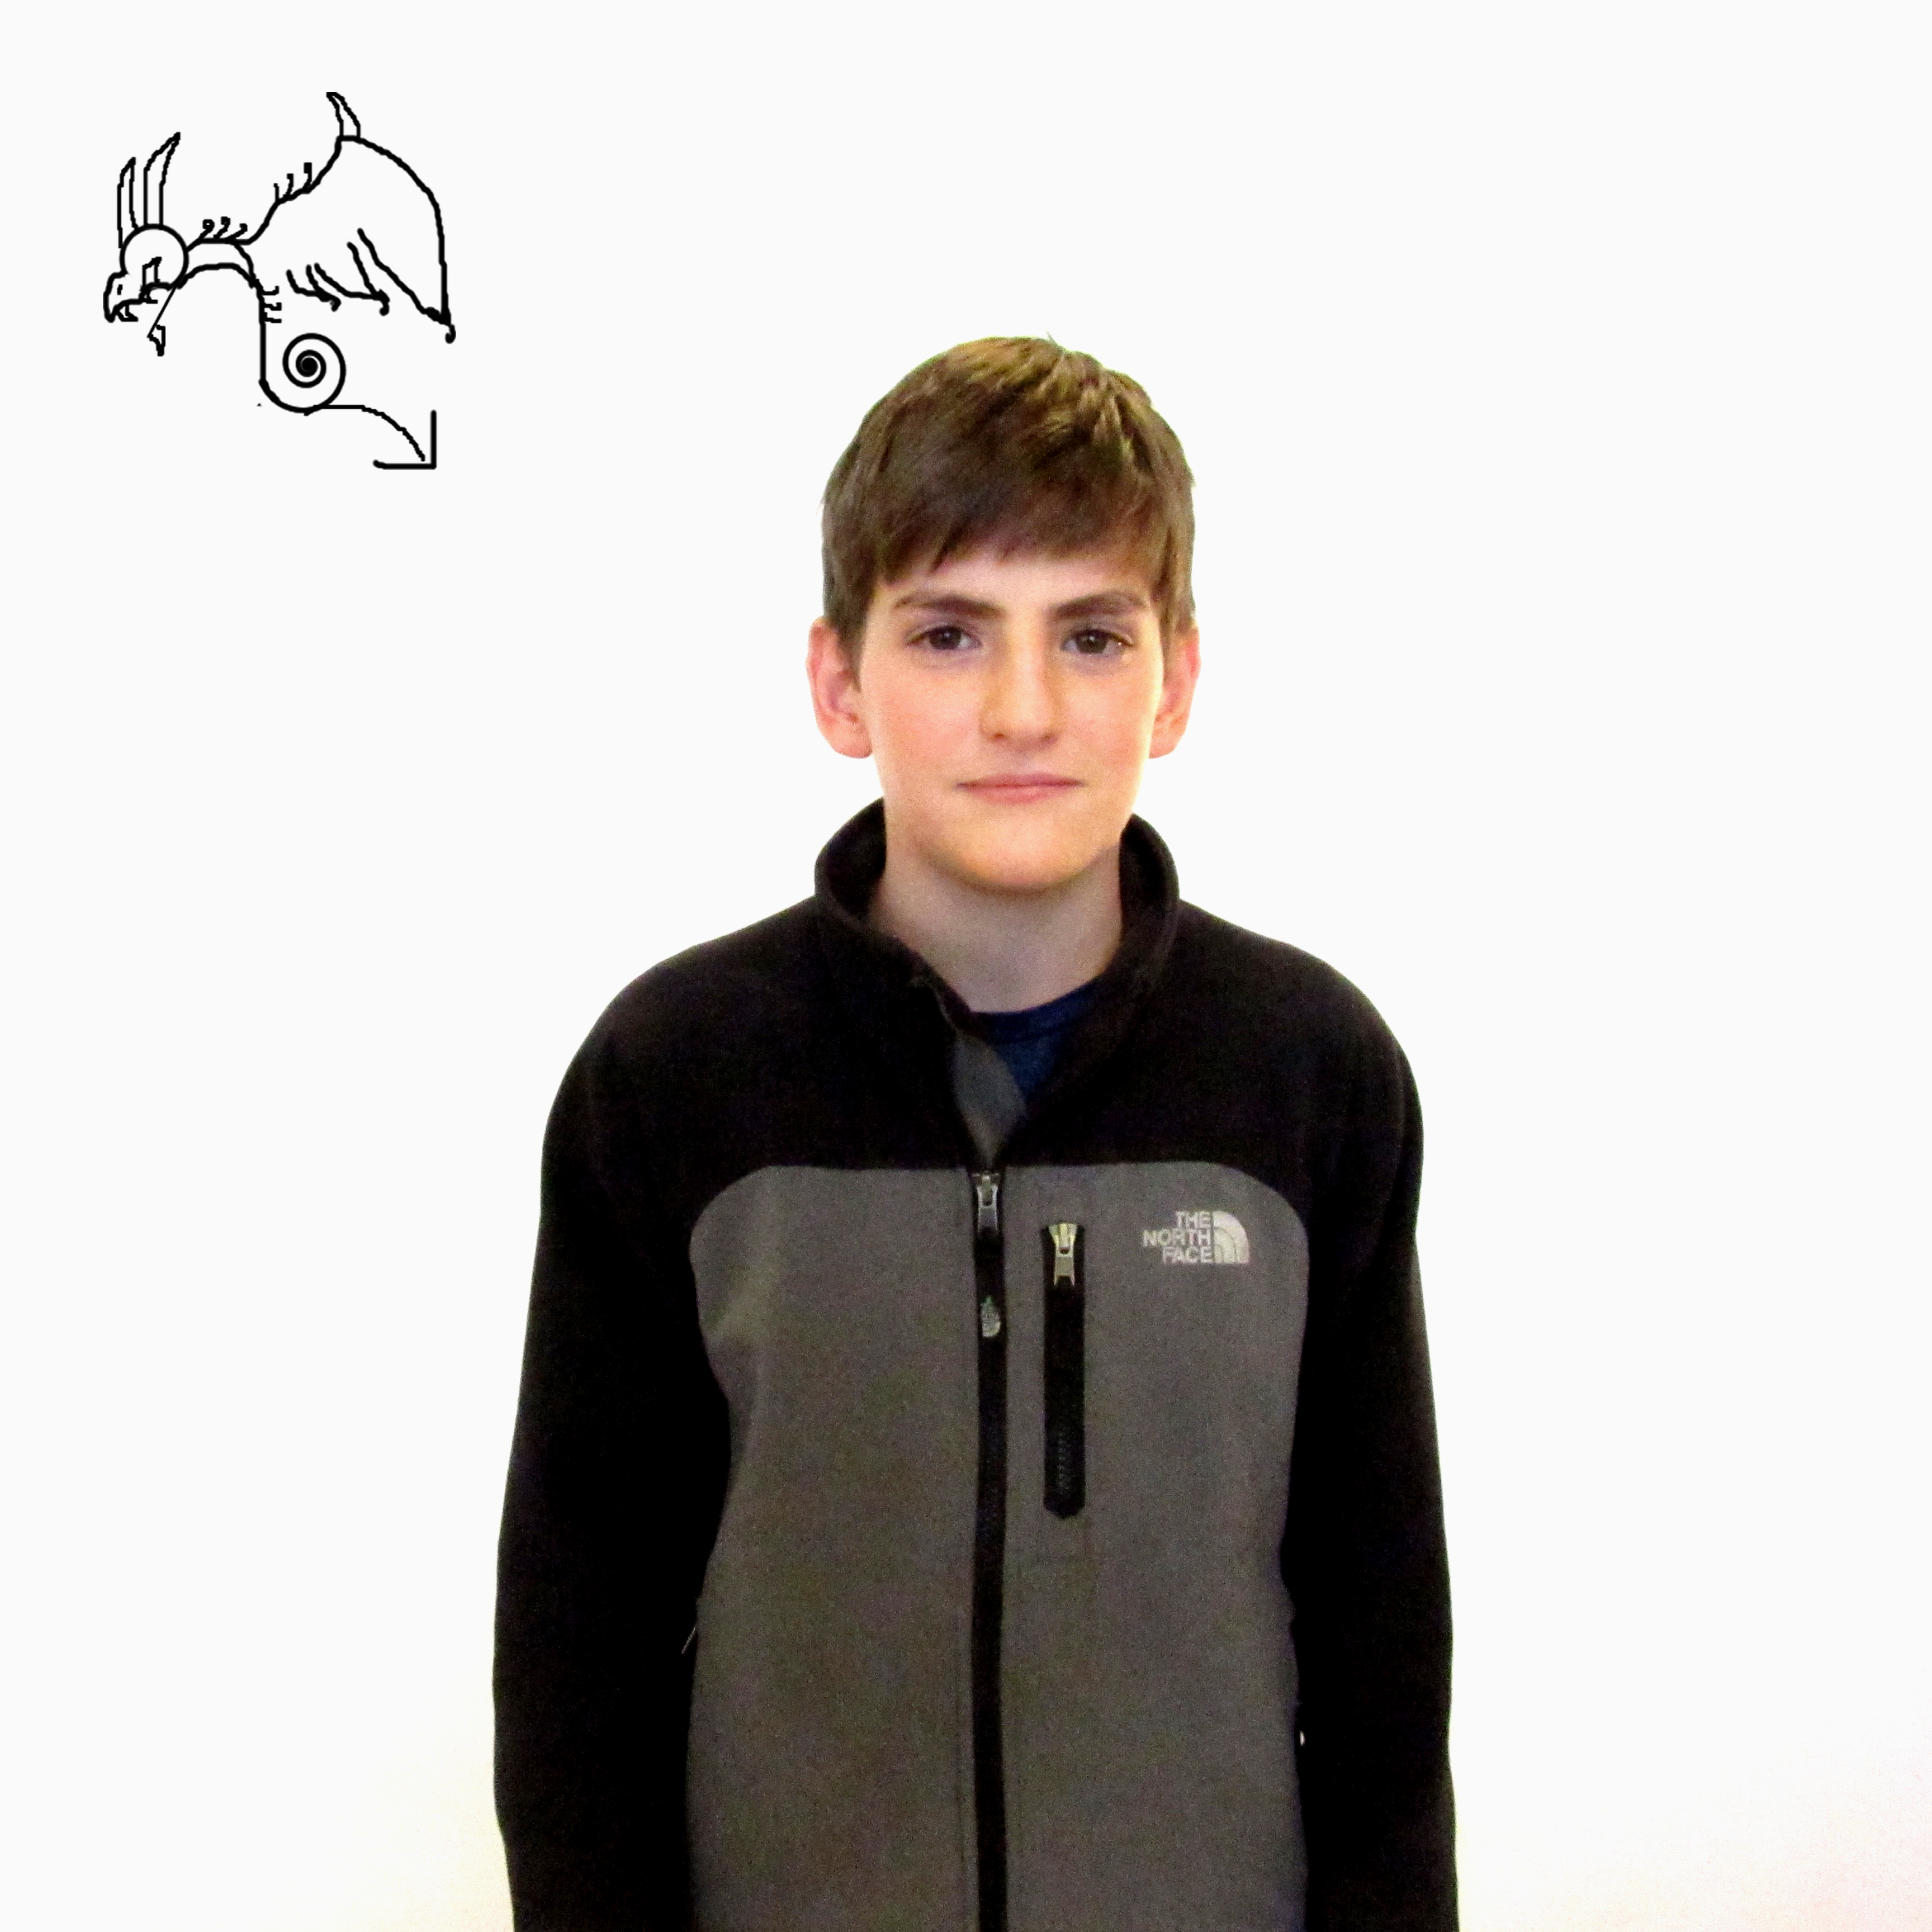
This assignment was pretty unique from the other projects. In this one, we had to take a picture of a person with a white background then edit the photo via photo shop. This makes the background look infinite or like there’s nothing there. To take a picture, we had to use the manual setting and take in the perfect amount of lighting and quality using ISO and shutter speed. Then we took the photo to photo shop, made the background lighter, the person a little darker, crop out the leftover shadows, and vola. The pictures turned out perfect and it worked really well. It took a while to edit all our photos however, and we needed to fix many mistakes along the way, but it’s all good now.