Light Graffiti

To view all my photos click here

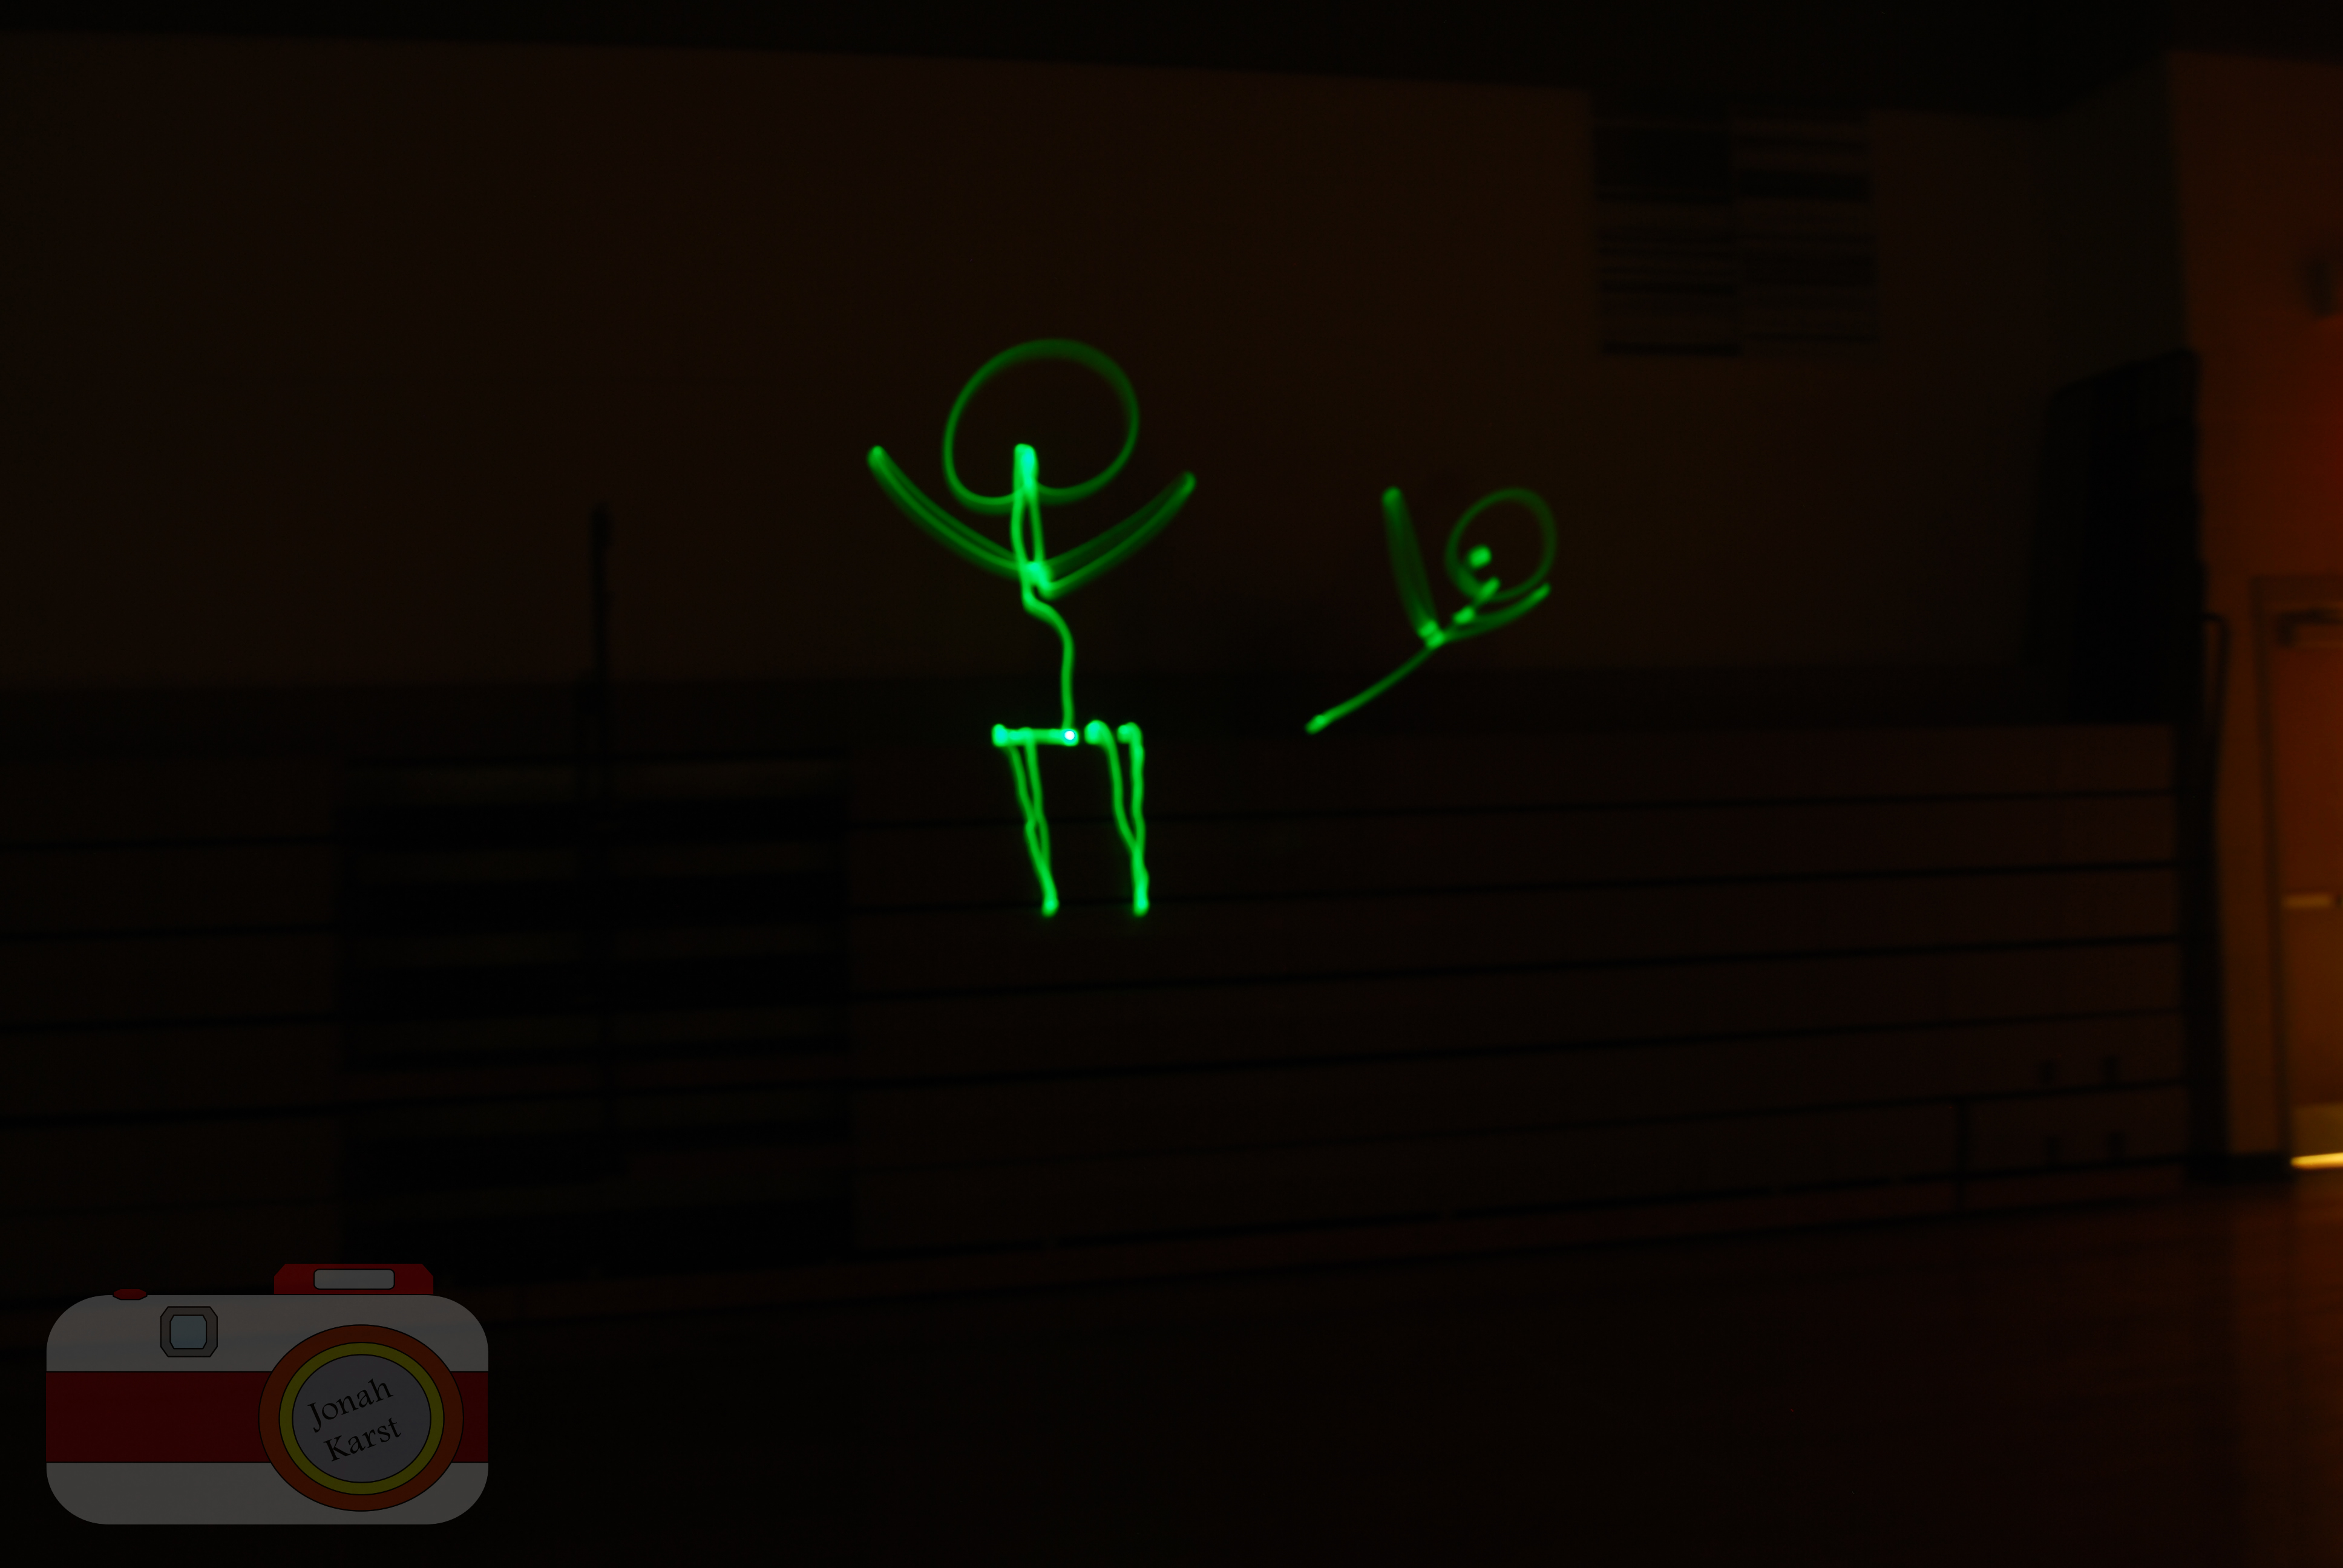
To take the pictures we would change the shutter speed to match what we needed, we used the mode “Bulb” to take our pictures. For the bulb mode you hold down the picture button as long as you want, while all the lights are out. Then you get any light(Doesn’t matter what color,) and draw a picture while the shutter is open. Once the person is done drawing the picture, you then release the picture button to finish the photo. The thing that worked the best was getting the light to show up on the ending results. But it was really hard to draw images, because you just had to assume where the rest of your drawing is. One idea I have to take this to the next level is to try stop motion animation with light graffiti. It could show you gradually coloring in something, or maybe you can draw a picture moving, there is many things you could do with stop motion animation and light graffiti.

Rule of Thirds

During this project it was pretty easy to find thing to include in our rule of thirds photos. It was pretty hard though to find the best possible place for the object to make it a rule of thirds photo. I thought that it was going to be super easy to make rule of thirds photos. After the project I realized that it was a little harder to make rule of thirds photos. To help follow the requirements for a rule of thirds photo, we used a grid to show us all the thirds of the picture. When setting up a shot you had to bring the main object or area, into a third of the photo either horizontally or vertically.

To view all my photos click here

Black Background Portraits

For this project we had to figure out the best lighting possible for out photos, then we had to find a good shutter speed. Then we used Photoshop to help crop and make our photos a little bit darker. It was pretty easy to find the shutter speed that was necessary for the best possible picture. It was a little hard however to get the background darker, and keep the person lighter/find a good contrast.

To see all my photos click here.

White Background Portraits

First in order to take the photos we had to organize all the lighting to make completely white background. Then we would change the shutter speed of the camera to let either less or more light into the picture, in till we got all the pictures with a good amount of lighting. Once we were done we edited our photos a little with Photoshop. We messed with the curves settings to make it so we could edit out the yellowish spots on our photos. Being able to determine the shutter speed probably worked the best for my group, but it was a little difficult to get the best lighting possible.


To view all my portrait photos click here